How to design your own icons set
26
Sep'10
Member since:
Sep 2010
Step
01
Member since:
Sep 2010
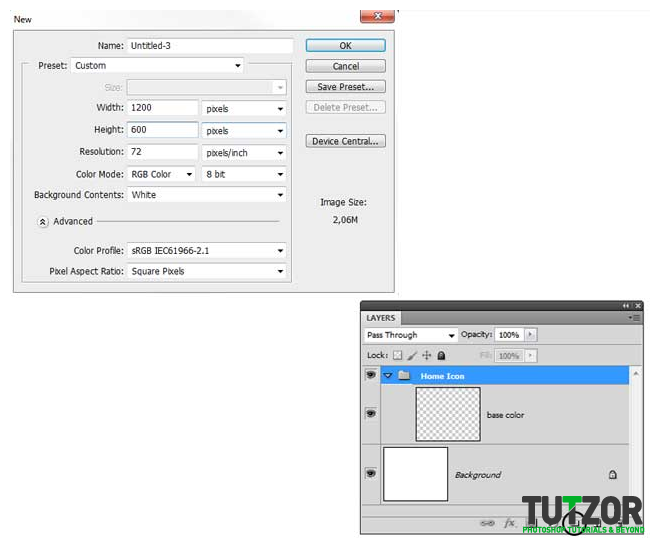
Start by creating a new document, 1200x 600 px and leave leave the background white. First we'll add a new group, call it “Home icon” then add a new layer “base color”.
Step
02
Member since:
Sep 2010
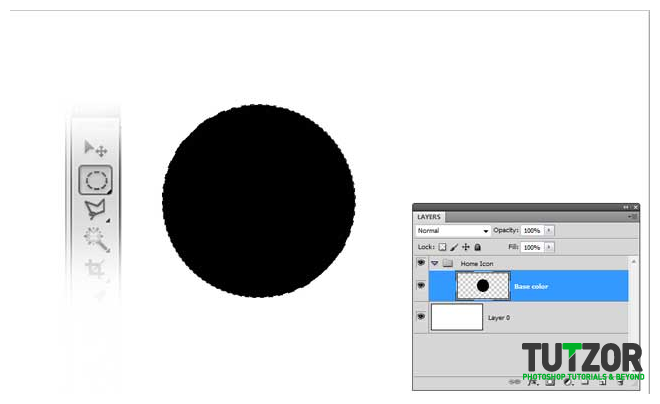
Make a selection using the “Elliptical Marque Tool”(M) and fill it with black (#000000). Hold down Shift when doing the selection for a perfect circle, and place it in the center of the canvas.
Step
03
Member since:
Sep 2010
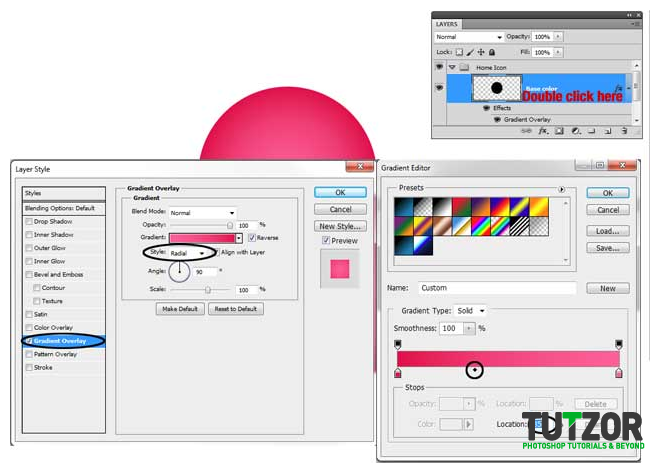
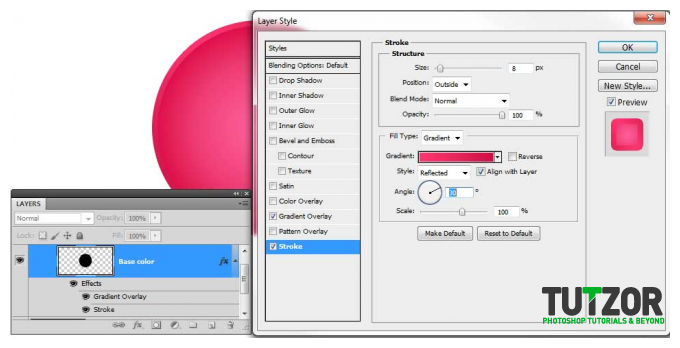
You can deselect now (Ctrl + D) and go to layer styles (double click the “base color” layer). Go to Gradient Overlay, set the style to radial and make the gradient from #e0003a to # ff5390. Move the middle point to 35.
Step
04
Member since:
Sep 2010
Go again to the layer styles and select “Stroke”. Set the size to 8 px, position outside, fill type gradient, style Reflected, angle 30 and use this colors in the gradient, from # cd0035 to # ff2160.
Step
05
Member since:
Sep 2010
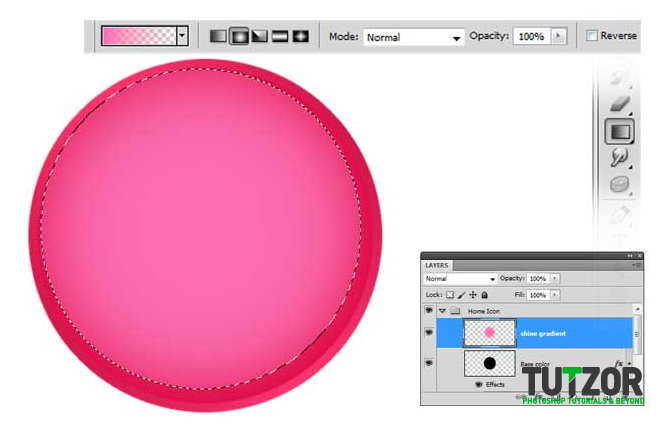
Add a new layer “shine gradient” and using the elliptical marquee tool, make another selection to the top left corner of the base color, where the stroke is, just like me, and fill the selection with radial gradient, color (#ff62a8) to transparent. Don’t deselect.
Step
06
Member since:
Sep 2010
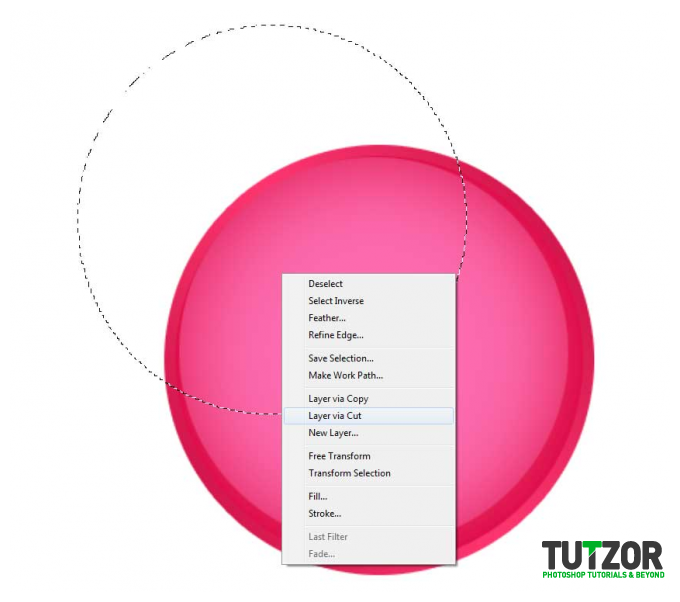
Move the selection like me, then right click on the selection and select “Layer via cut” from the dropdown menu. Name the new layer “shine gradient 2”
Step
07
Member since:
Sep 2010
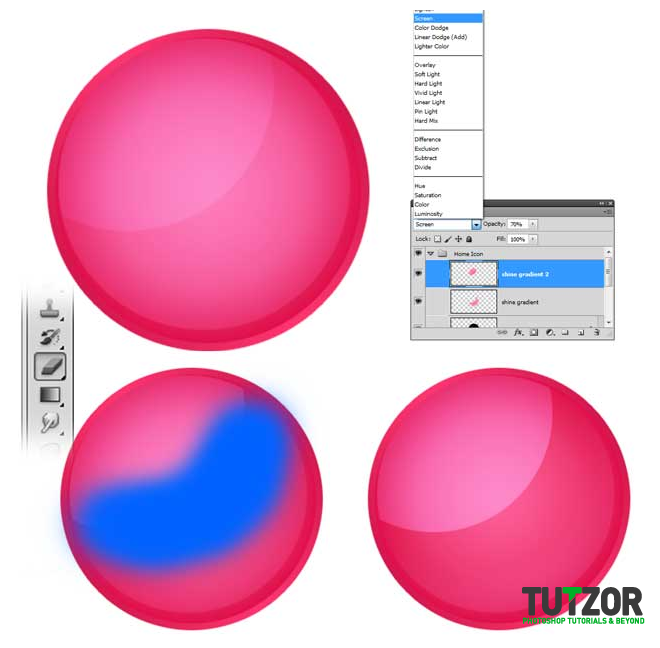
Set the both shiny gradient layers to screen blending mode. Set the opacity to 70% for “shine gradient 2” and 50% for the “Shine gradient”. Now pick the eraser tool and erase parts from the “shine gradient” like I marked for you (use a soft rounded brush).
Step
08
Member since:
Sep 2010
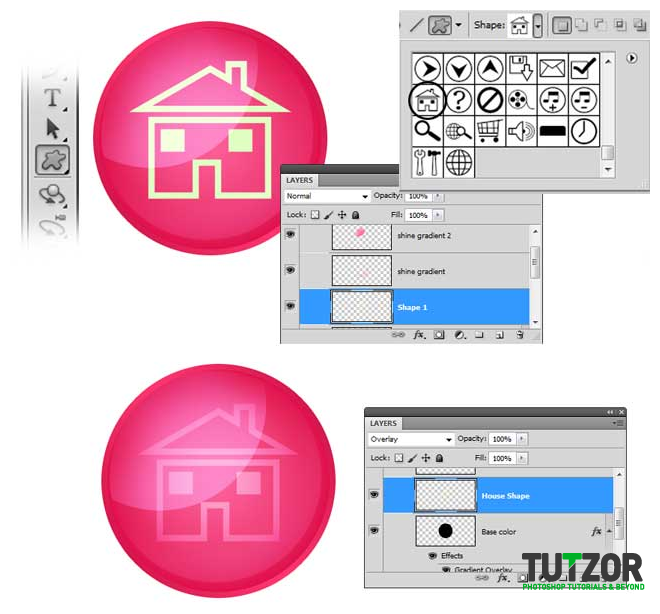
Now using “custom shape tool” look for a house shape. Set this color #deffbd and holding Shift (for proportions) draw a house. Rasterize the shape layer (right click on the layer > rasterize layer from the dropdown menu). Name the layer “House Shape”(make sure the layer is under the 2 shine gradients) and set the blending mode to overlay.
Step
09
Member since:
Sep 2010
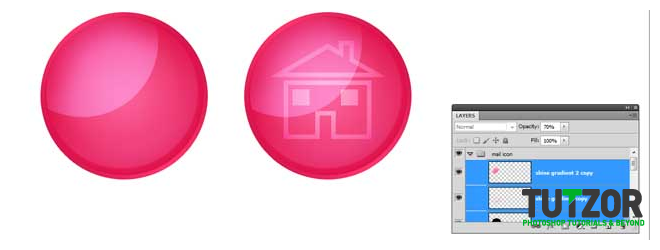
Add a new group “Mail icon” and duplicate all the layers from the home icon group (without the “shape layer”). Select the layers > right click >duplicate layers and move them to the “mail icon” group. Align the new shape to the right, like me.
Step
10
Member since:
Sep 2010
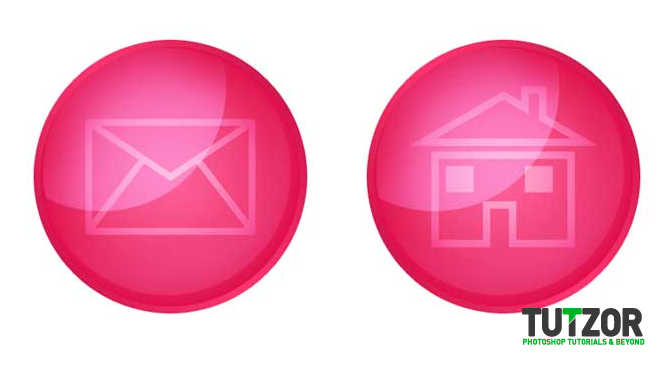
From the custom shape tool pick the mail shape and draw it like you did with the house, using the same color. Rasterize the layer, rename it “mail shape” and set it to overlay. Make sure the layer is under the shiny gradients.
Step
11
Member since:
Sep 2010
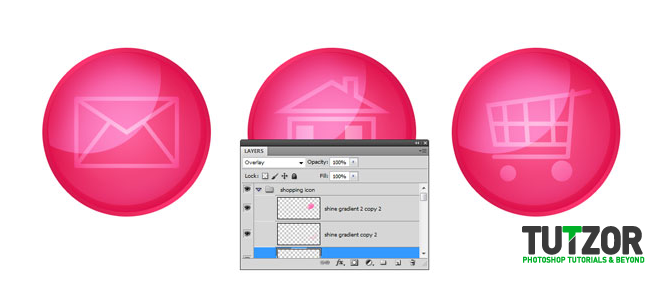
Add a new group “Shopping icon”, duplicate the layers like you did in the steps above, move them to the shopping group, align the layers to the right and from the custom shape tool pick the shopping cart and draw it with the same setting like before. Rasterize the layer, name the layer “shopping shape” and set it to overlay. Now we have a set of 3 icons with the same design.
Step
12
Member since:
Sep 2010
Go to the background layer and make a nice radial gradient from light gray to white, just to have a nice presentation for the incons.
That's all, enjoy.
