Creating Bright Web 2.0 style Heart icon using Photoshop
12
Mar'12
Member since:
Feb 2012
Heart icons or graphics are pretty popular, especially since its Valentine’s month. If this is your theme for your special season brochure prints and booklet prints, then you will probably will want to learn how to do them properly. In this tutorial, we will go through creating heart icons in the web 2.0 style.
Final Image

Step
01
Member since:
Feb 2012
Heart icons or graphics are pretty popular, especially since its Valentine’s month. If this is your theme for your special season brochure prints and booklet prints, then you will probably will want to learn how to do them properly. In this tutorial, we will go through creating heart icons in the web 2.0 style.
1. In Photoshop, select the custom shape tool in the tool window.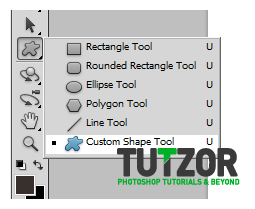
1. In Photoshop, select the custom shape tool in the tool window.

Step
02
Member since:
Feb 2012
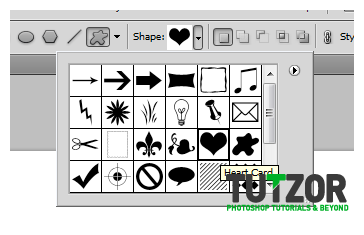
2. Next, on the shape properties above, choose the “heart card” custom shape.

Step
03
Member since:
Feb 2012
3. Next, just drag the tool unto the canvass to shape the heart.


Step
04
Member since:
Feb 2012
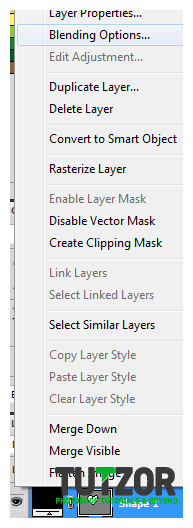
4. Now, we’ll add colour to the heart. We are not just going to make it red. We are going to make it a gradient red so that it looks more modern and dynamic. Do this easily by first right clicking on the heart layer and then choosing blending options in the context menu.

Step
05
Member since:
Feb 2012
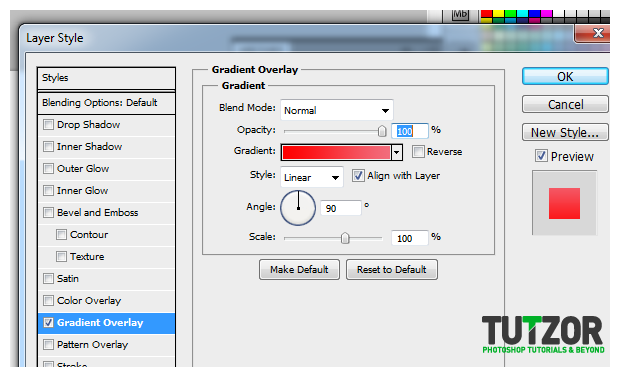
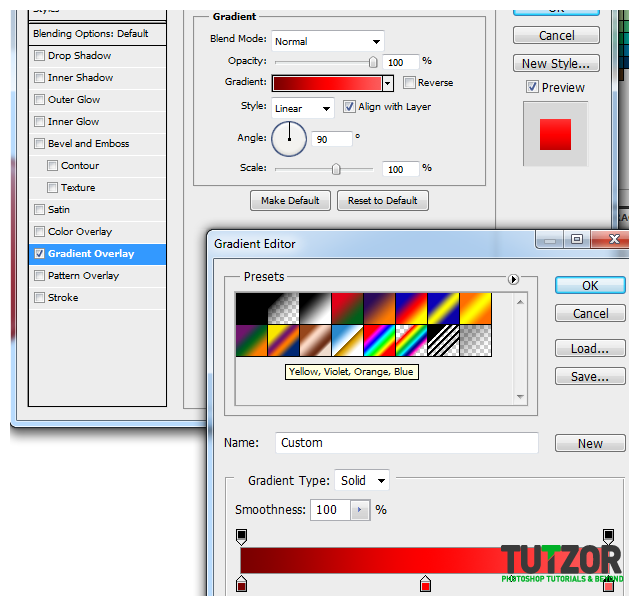
5. Once the layer options window is up, tick the “Gradient Overlay” box.

Step
06
Member since:
Feb 2012
6. Change the color by clicking on the gradient bar. Choose the 3 color option in the presets, and then change their colors to red values in increasing lightness. The hex codes for the color that you can use are:
a. Dark Red: #8d0404
b. Red: #fb1414
c. Light red/pinkish: #fd6363
a. Dark Red: #8d0404
b. Red: #fb1414
c. Light red/pinkish: #fd6363

Step
07
Member since:
Feb 2012
7. That should give us a nice gradient colour effect. For many people this is already a good style. However we will take things further.


Step
08
Member since:
Feb 2012
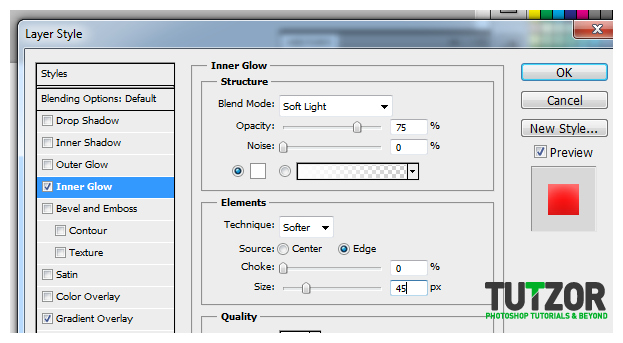
8. Now, we add an outer glow style to add some more soft light around the edges of the heart. Just bring up the blending options again and tick the Inner glow option.

Step
09
Member since:
Feb 2012
9. Set the blend mode to Soft light. The colour should be pure white #ffffff. Depending on the size of your heart, adjust the size. For us 42pixels is enough. This should result in a pretty bright looking heart.


Step
10
Member since:
Feb 2012
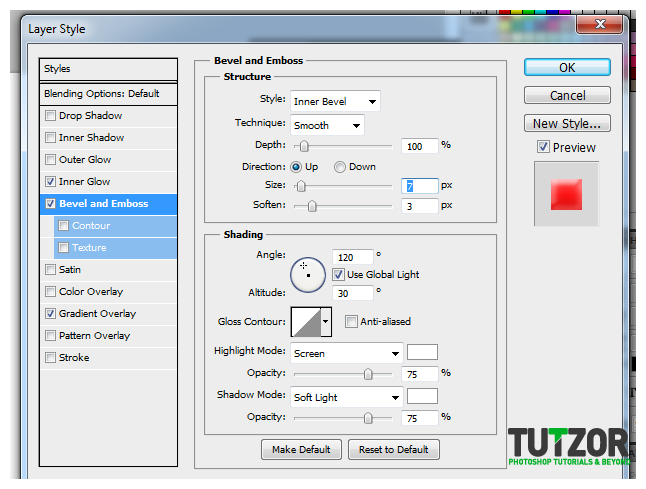
10. Now, let us add more subtle light options. Go back again to the blending options and tick of bevel and emboss.

Step
11
Member since:
Feb 2012
11. Input these settings
a. Technique: Smooth
b. Size: 7 (adjust if needed)
c. Soften: 3
d. Shadow mode: Soft light (Color is White)
12. Look at your shape closely and you will see a subtle white effect on top of our glow effect.
a. Technique: Smooth
b. Size: 7 (adjust if needed)
c. Soften: 3
d. Shadow mode: Soft light (Color is White)
12. Look at your shape closely and you will see a subtle white effect on top of our glow effect.

Step
12
Member since:
Feb 2012
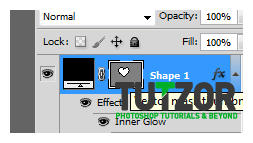
13. Now, select your heart again. We shall expand it to get a gradient coloured border. Press and hold the CTRL key and then click on the thumbnail of the heart layer to select the shape of the whole heart.

Step
13
Member since:
Feb 2012
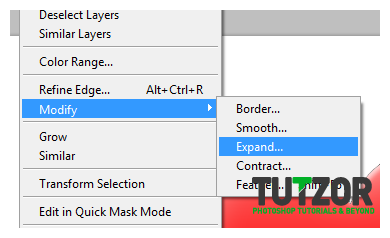
14. Then go to Select -> Modify -> Expand.

Step
14
Member since:
Feb 2012
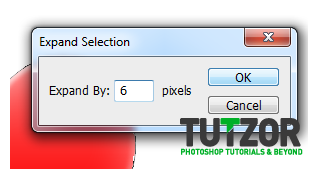
15. Expand the area to about 6 pixels.

Step
15
Member since:
Feb 2012
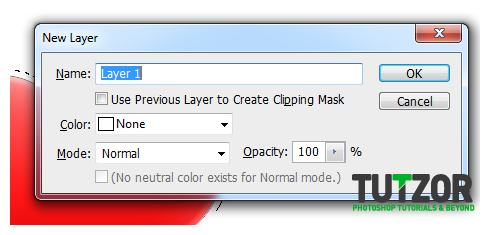
16. Now, press CTRL+SHIFT+N to create a new layer. Select the defaults for the new layer. Don’t worry the selection will still be there.

Step
16
Member since:
Feb 2012
17. Then fill that out with the paint bucket with a random colour.


Step
17
Member since:
Feb 2012
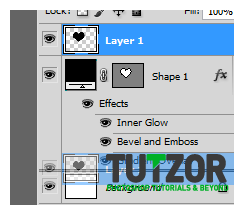
18. Then, send that expanded layer back.

Step
18
Member since:
Feb 2012
19. You should then see a nice black border on the heart.


Step
19
Member since:
Feb 2012
20. Change the colour of the border and use a gradient by editing its blending options. Tick off gradient overlay and decide on a good color.

Step
20
Member since:
Feb 2012
21. That should give us a gradient type border for the heart.


Step
21
Member since:
Feb 2012
22. So that is how you get a great looking heart icon for your designs. Now, you can leave it at that, but since this type of heart shape is common because it is used in Photoshop, you might want to alter its shape a bit.
23. DO this by selecting both layers and rasterizing them. Just right click on both selections and select rasterize layers.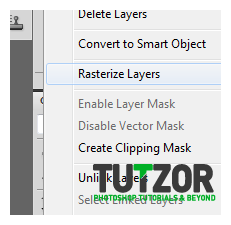
23. DO this by selecting both layers and rasterizing them. Just right click on both selections and select rasterize layers.

Step
22
Member since:
Feb 2012
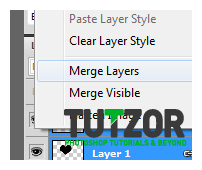
24. Then Merge both layers by right clicking and selecting merge layers.

Step
23
Member since:
Feb 2012
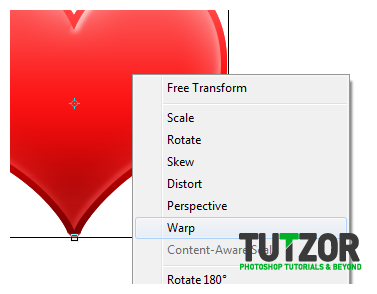
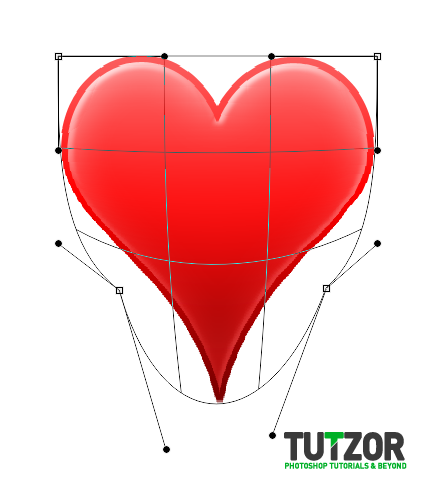
25. Now, you can press CTRL+T to transform the heart. It would be good to experiment with the Warp effect of the free transform. Just be creative about it.

Step
24
Member since:
Feb 2012
26. Just adjust the shape of the heart to your taste.

Step
25
Member since:
Feb 2012
27. Great! Now you know how to create heart designs that look bright, sleek and dynamic perfect for web 2.0
