Creating simple luminescent or glowing energy lines in Photoshop
07
Mar'12
Member since:
Feb 2012
In many abstract forms of digital cover art, you will see artists using glowing energy lines, light rays and luminescent type strings. This is particularly visible in posters, magazines, when printing booklets and even when printing brochures. There is a modern and exciting feel in a design when you use these glowing energy lines, and of course it helps lead the eyes of readers to the key features and elements in your design prints.
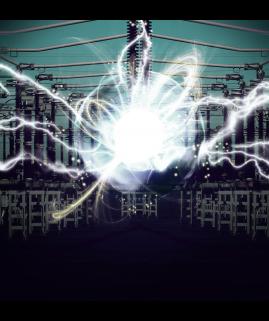
Final Image
Step
01
Member since:
Feb 2012
In many abstract forms of digital cover art, you will see artists using glowing energy lines, light rays and luminescent type strings. This is particularly visible in posters, magazines, when printing booklets and even when printing brochures. There is a modern and exciting feel in a design when you use these glowing energy lines, and of course it helps lead the eyes of readers to the key features and elements in your design prints.
This tutorial will show you the step by step procedures on how to do create those simple luminescent or glowing energy lines using Adobe Photoshop. It is pretty easy as long as you follow these instructions, so do not be worried. Just read through each step and you should see how it is done.
1. We will first create our document. Just open up a new document by clicking on File in your menu bar, and then clicking the option “New…”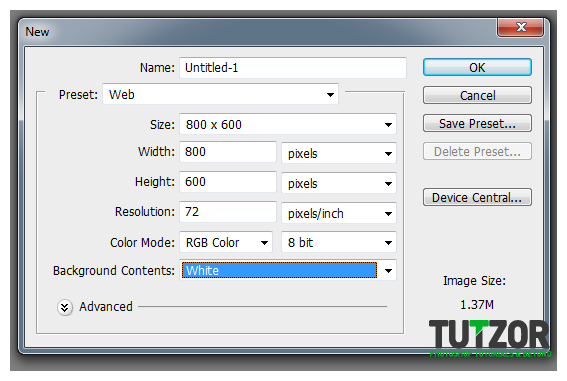

Step
02
Member since:
Feb 2012
2. It will be your decision in terms of size, but leave the background white for now. When it comes to the resolution, it would be good to use 72 for web images, while for printing 300 is better. Note that your computer will need more resources for 300ppi images. Click OK once you are satisfied with your settings.
3. Now, let us first add a black background as you will not see those energy lines too much with a white background. So simply select the paint bucket tool and then dump the colour black on your canvass.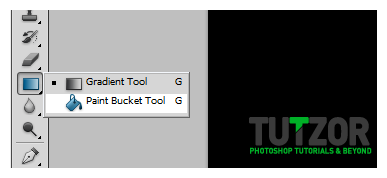
3. Now, let us first add a black background as you will not see those energy lines too much with a white background. So simply select the paint bucket tool and then dump the colour black on your canvass.

Step
03
Member since:
Feb 2012
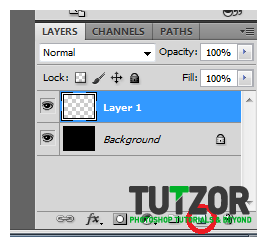
4. Now we have a good nice black background to work with. We will now need to add a new layer where our energy line will be placed. Simply press “Ctrl+Shift+N” or click on the “new layer button” in the layer view to create the new layer.

Step
04
Member since:
Feb 2012
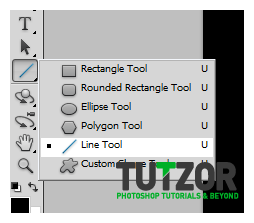
5. For our first energy line, we will make things simple by using a straight line tool first. Even beginners should be able to use this tool. Just hold your left mouse button on the shapes tool box and select the “line” shape option.

Step
05
Member since:
Feb 2012
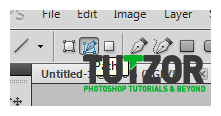
6. Use WHITE as the foreground colour to see your line later. Also, make sure to select the “paths” option above so that the paths of the line will be used for painting/rendering.

Step
06
Member since:
Feb 2012
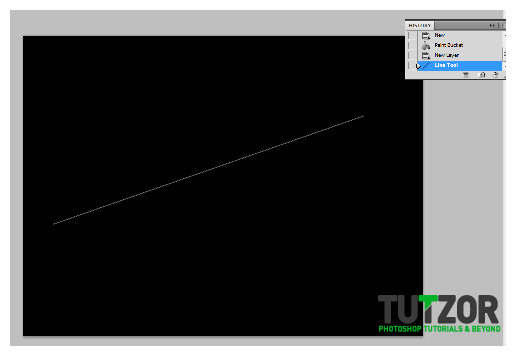
7. Now, just draw the line that you want.

Step
07
Member since:
Feb 2012
8. Next, we will use a brush to shape our energy line. Click on the “brush panel” icon to get your choices of brushes.


Step
08
Member since:
Feb 2012
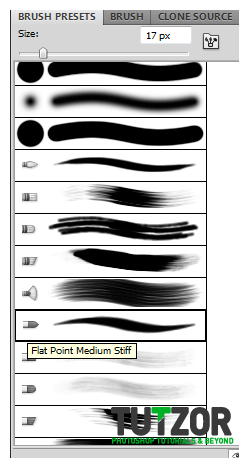
9. Choose from the different brush presents in your brush panel. For this tutorial we are going to use the flat point brush with medium stiffness.

Step
09
Member since:
Feb 2012
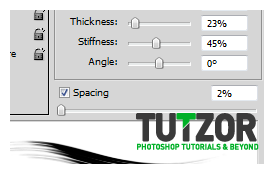
10. Next, click on the brush tab, and set the spacing to lower digits. 1-3% should do it.

Step
10
Member since:
Feb 2012
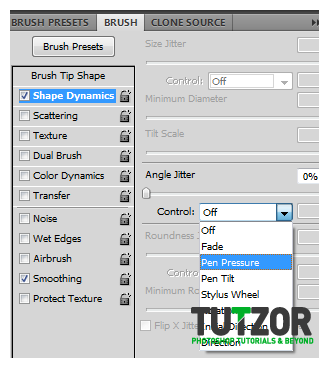
11. Also remember, to tick the checkbox for shape dynamics and click on “pen pressure” for the control option. Once done, press OK.

Step
11
Member since:
Feb 2012
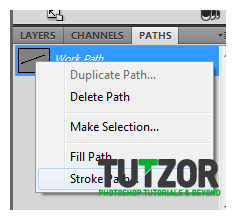
12. Now, click on the “paths” tab which should be beside your layer and channels view. Right click on the line path you just made and click on the option “stroke path…”

Step
12
Member since:
Feb 2012
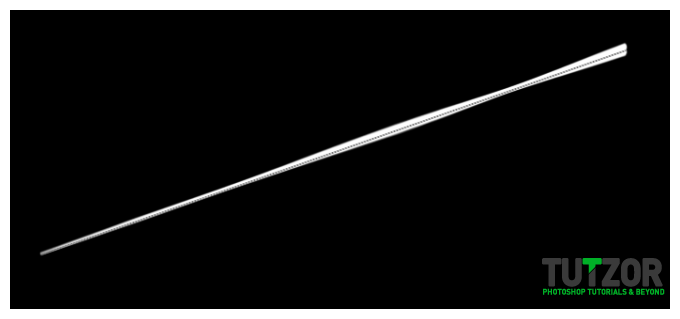
13. Now we should have a nice line with a brush stroke that is varying in width.

Step
13
Member since:
Feb 2012
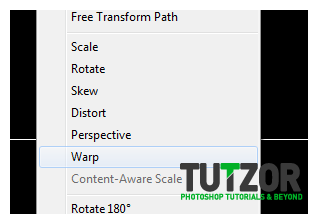
14. Next, select the layer again, and then press CTRL+T to transform your path. Right click on the line and then select “warp” on the context menu.

Step
14
Member since:
Feb 2012
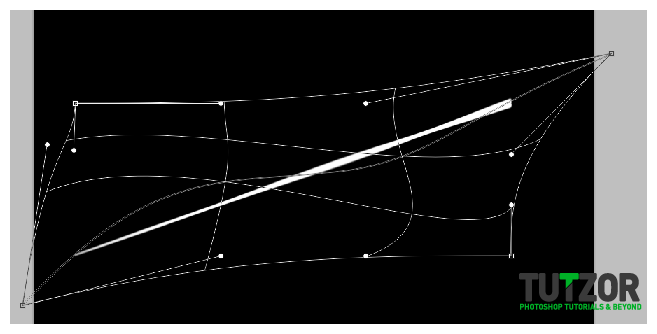
15. Move the lines a bit so that you twist your second energy line.

Step
15
Member since:
Feb 2012
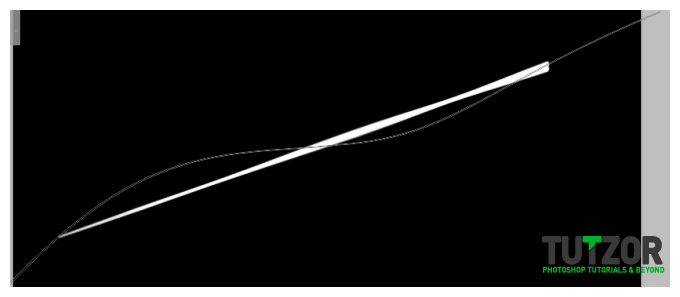
16. Once done, press enter. You will see a more twisted and smoothly curved version of your line.

Step
16
Member since:
Feb 2012
17. Stroke the path again with your brush.
18. Now, we have a nice twisted line.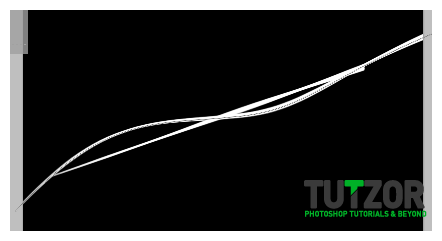
18. Now, we have a nice twisted line.

Step
17
Member since:
Feb 2012
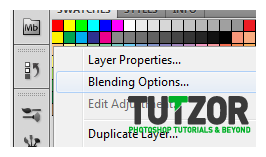
19. Next we add the glow effect to these lines. Right click on the layer of your lines and click on the “blending options” item.

Step
18
Member since:
Feb 2012
20. Next, tick the “outer glow” option, and then these values.
a. Blend Mode: Linear Light
b. Size: 12
c. Spread 5
d. Technique: softer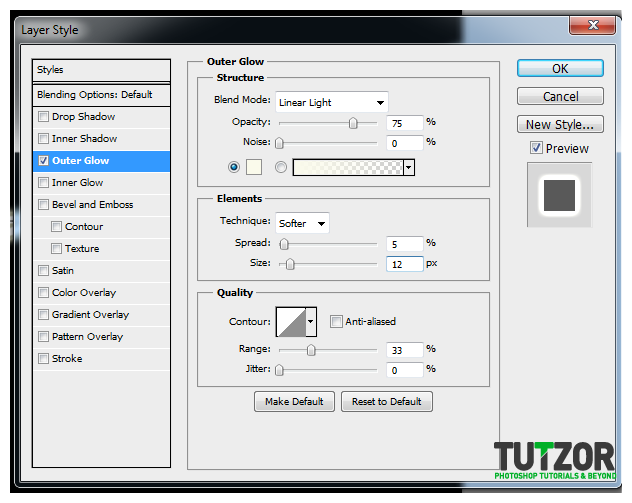
a. Blend Mode: Linear Light
b. Size: 12
c. Spread 5
d. Technique: softer

Step
19
Member since:
Feb 2012
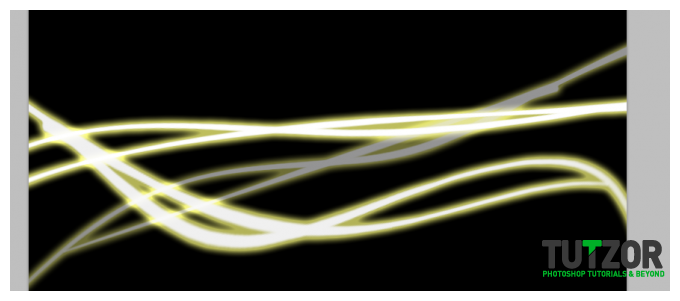
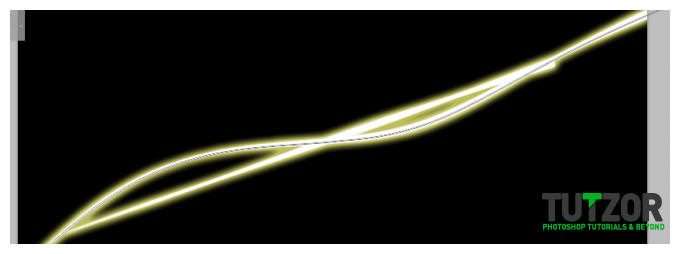
21. Once you press “ok” you now have great looking energy lines.

Step
20
Member since:
Feb 2012
22. Now just duplicate, warp and play around with the settings.


Step
21
Member since:
Feb 2012
So that is how you create great looking energy lines using photoshop. Just follow the instructions above first, and if possible vary the settings and experiment yourself!


