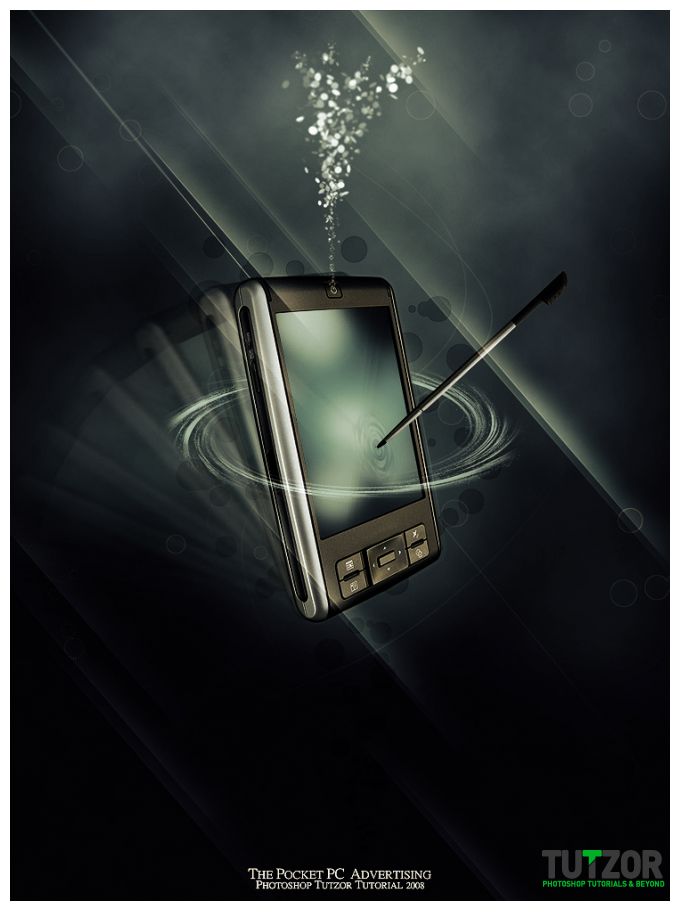
Sleek Phone Advertisement Flyer - PART 1
19
Aug'10
 Cpotorac
Member since:
Aug 2010
Step
01
 Cpotorac
Member since:
Aug 2010
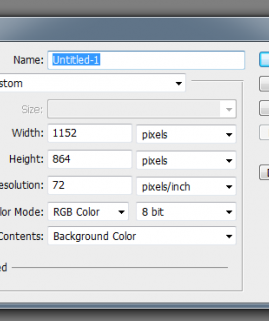
Start with a new document. My document is 741×1000 and I used this color: #000412.

Step
02
 Cpotorac
Member since:
Aug 2010
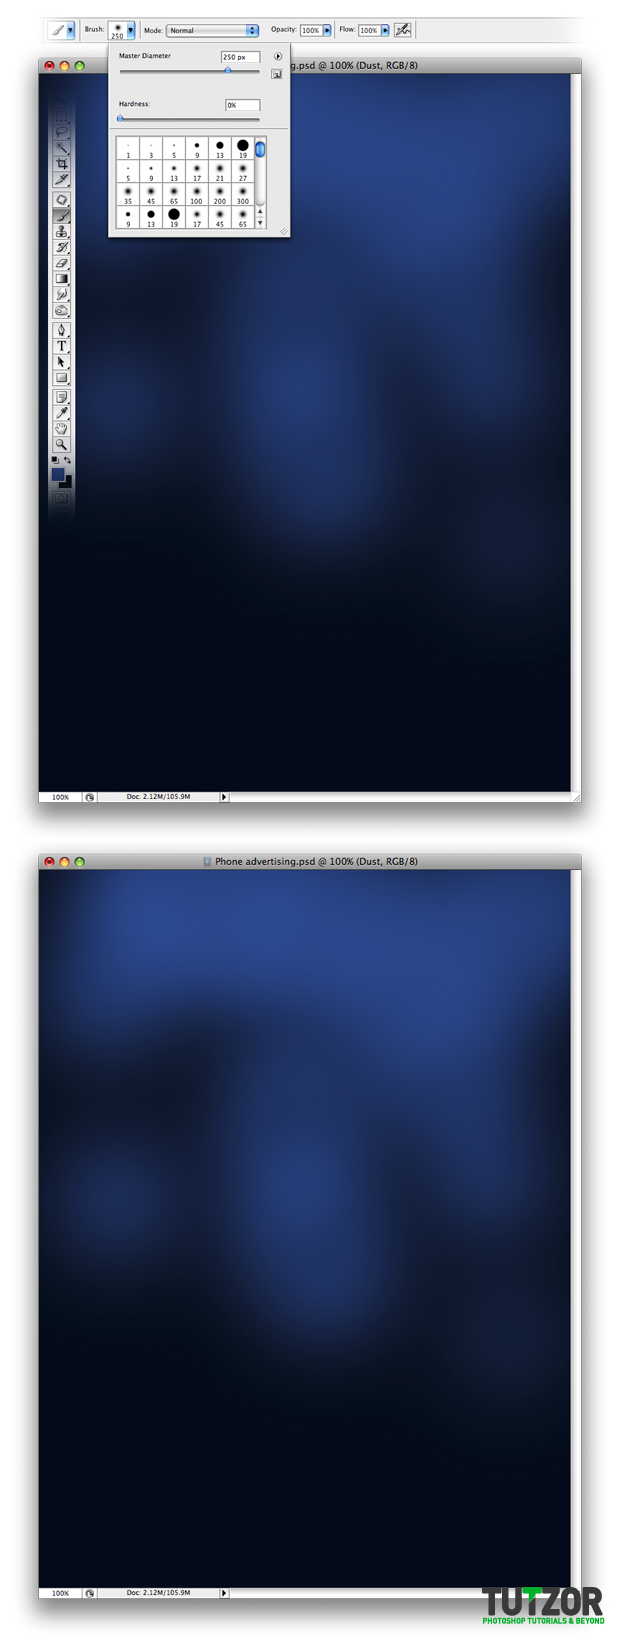
Create a new layer and name it Dust. Now select your brush and set it to 0% Hardness and 250 size. Also you need to use this color: #0b4690.
Now that you have everything set just paint with the brush as I did or maybe some other way you like. Than set the Dust layer to Screen.

Step
03
 Cpotorac
Member since:
Aug 2010
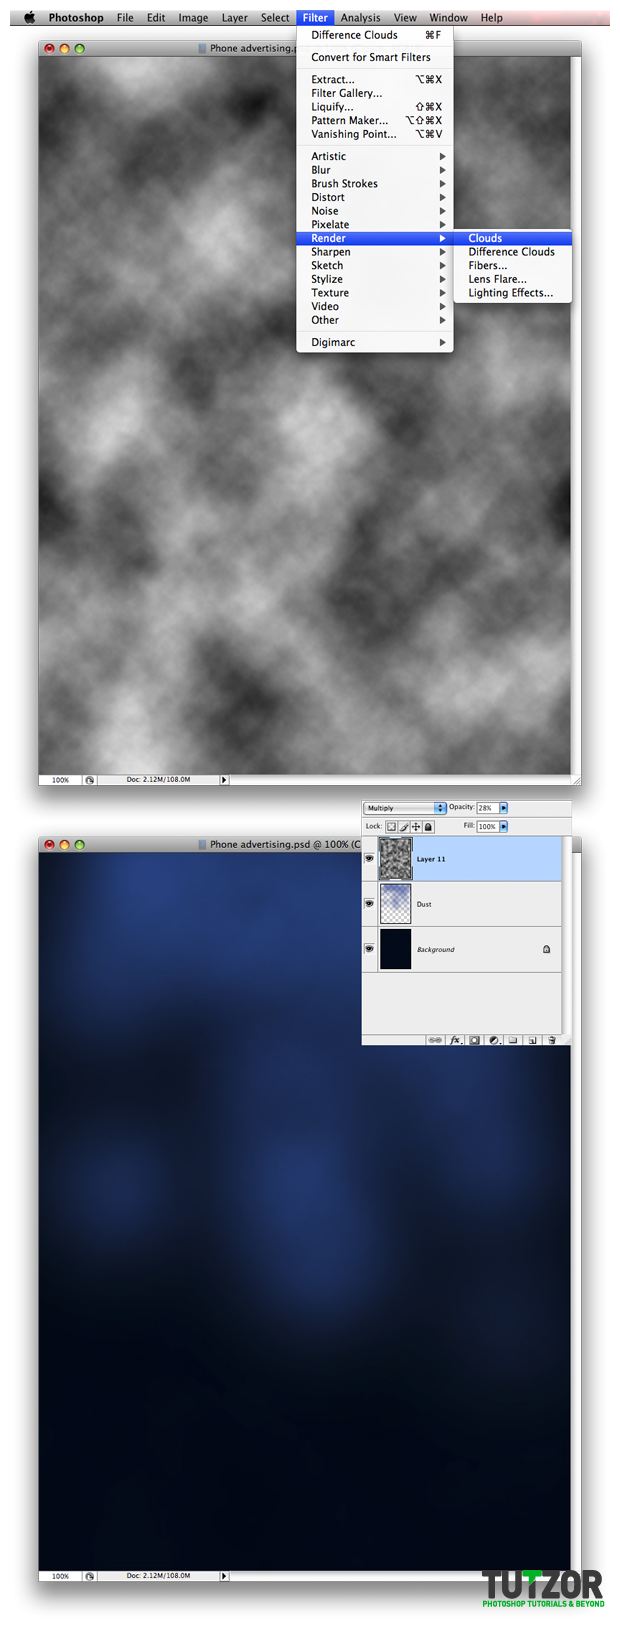
Set you foreground to White and background to Black. Make a new layer and call it Clouds and go to Filter – Render – Clouds. Then set the Opacity of the Clouds layer to 28% and set it to Multiply.

Step
04
 Cpotorac
Member since:
Aug 2010
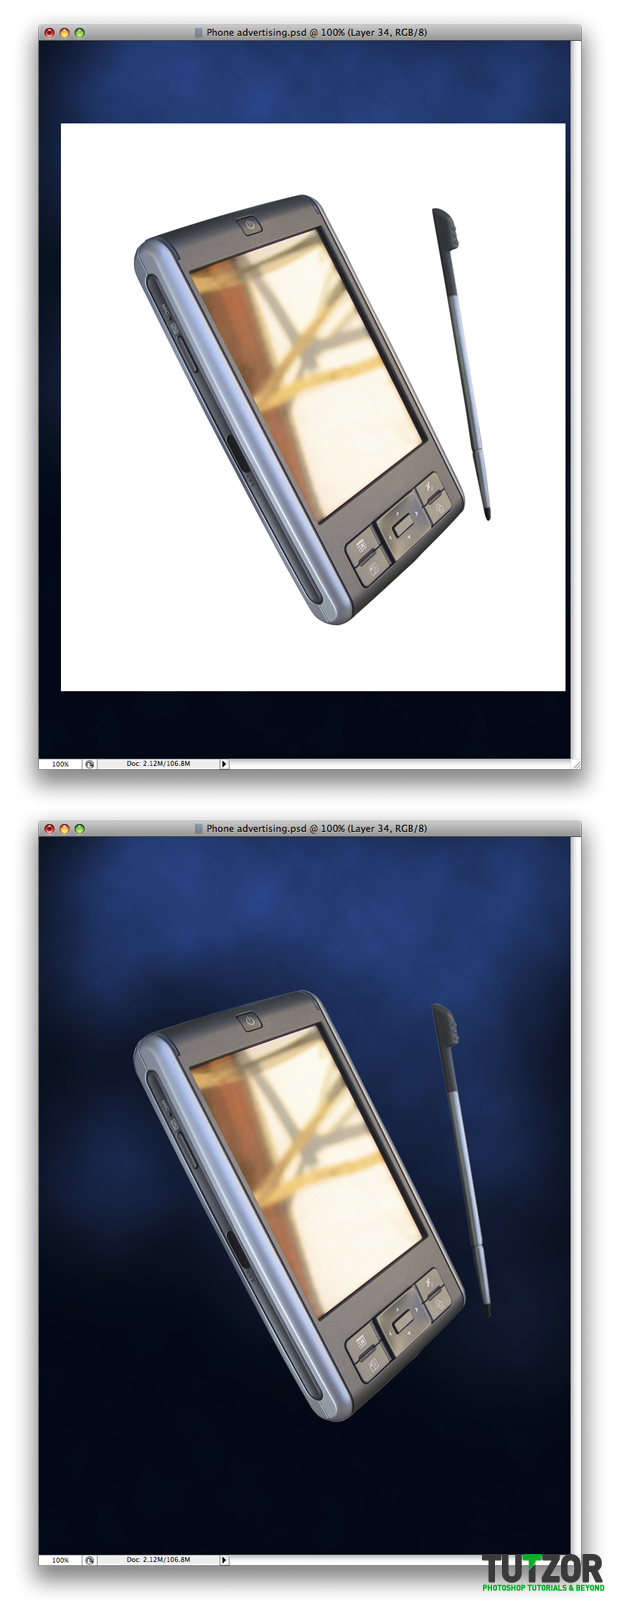
Now you need to bring your product in this document. The phone I will use I got it from http://www.sxc.hu/photo/855196. And then cut the phone out.

Step
05
 Cpotorac
Member since:
Aug 2010
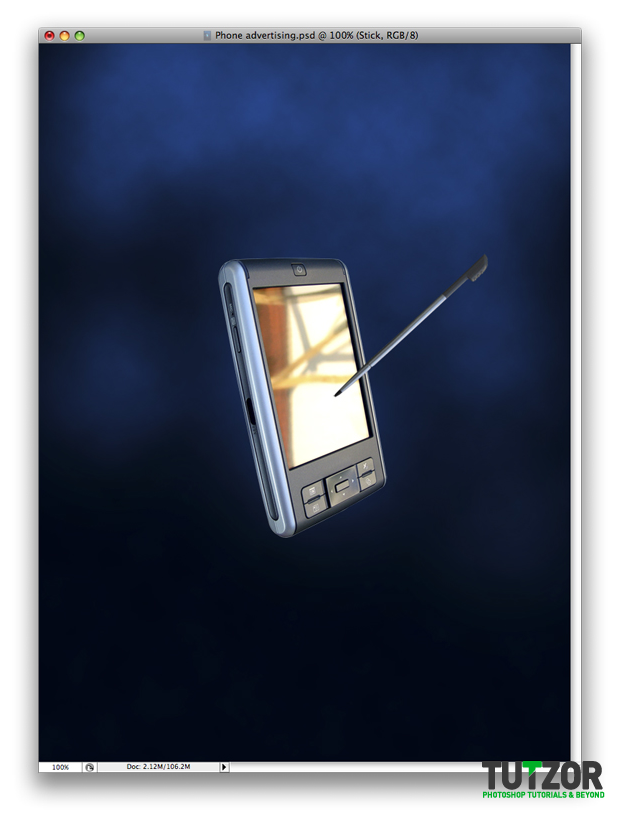
Next you need to resize your phone to the desired size and also rotate it a bit. Name the layer Pocket PC. Also I will need you to select the mobile pen and copy it into a separate layer and name it Pen.

Step
06
 Cpotorac
Member since:
Aug 2010
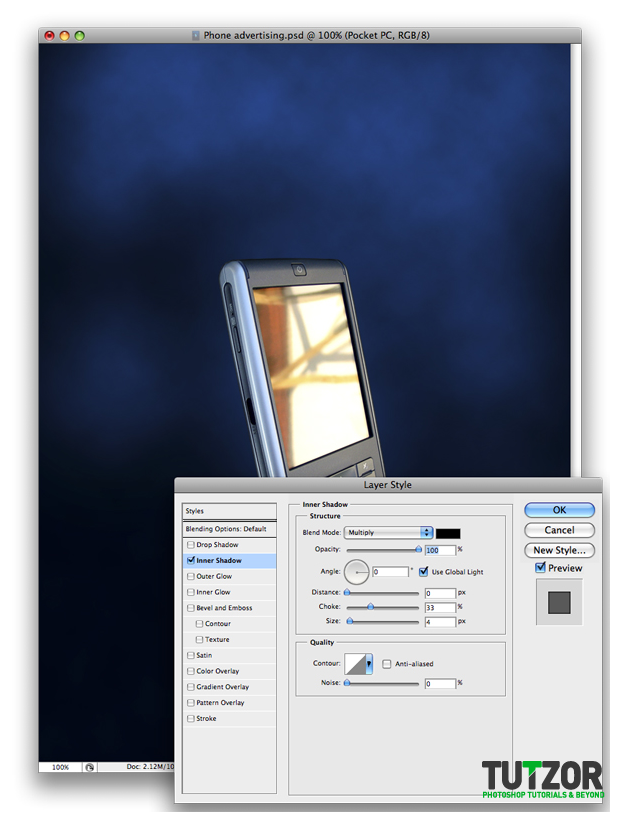
I will deactivate the Pen layer for now, as I will get back to it later. First use these settings for the Pocket PC layer Blending options:

Step
07
 Cpotorac
Member since:
Aug 2010
Ctrl + Click on the Pocket PC layer to make a selection. Create a new blank layer and fill the selection with black. Then set the layer to Soft Light.


Step
08
 Cpotorac
Member since:
Aug 2010
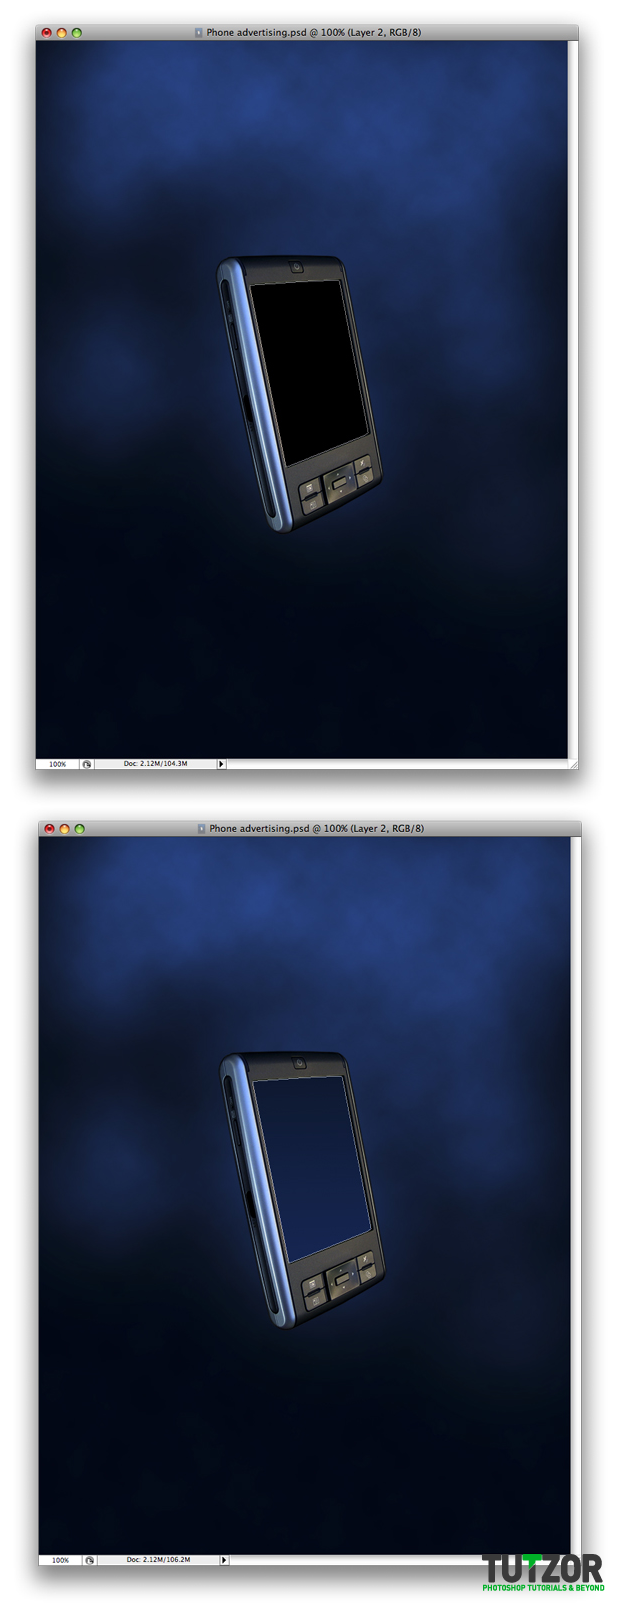
Create a new folder and name it Screen. Make a shape as I did, name it Screen and fill it with a gradient from up to down using the colors black and #001f4e.

Step
09
 Cpotorac
Member since:
Aug 2010
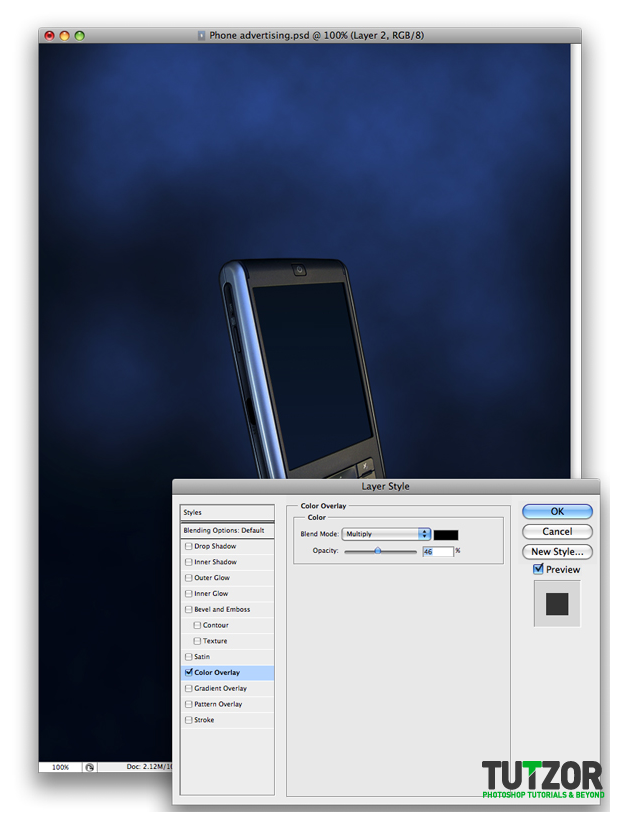
Double click on the layer to enter the Blending Options and use these settings:

Step
10
 Cpotorac
Member since:
Aug 2010
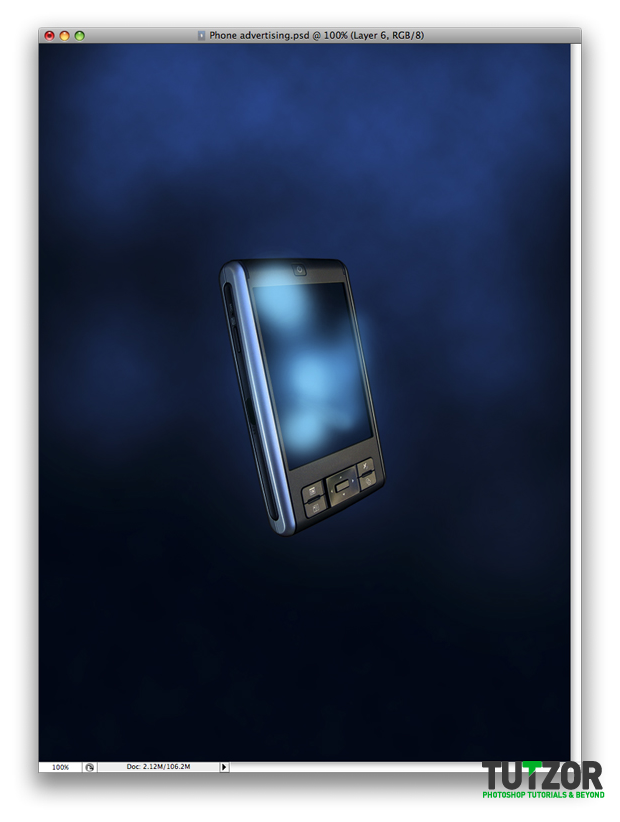
Make a new layer over the one is step 8. Use the brush set to 0$ Hardness and size 100. Also use this color: #47c0ef.
Using the brush draw as I did on the new layer you just created.

Step
11
 Cpotorac
Member since:
Aug 2010
Next Ctrl + Click on the Screen Layer in Step 8 to make a selection. Make sure to click on the mask not on the layer thumbnail. Than click on the Add vector mask button to mask away the part of this dust you don’t want. Then set the layer to screen.


Step
12
 Cpotorac
Member since:
Aug 2010
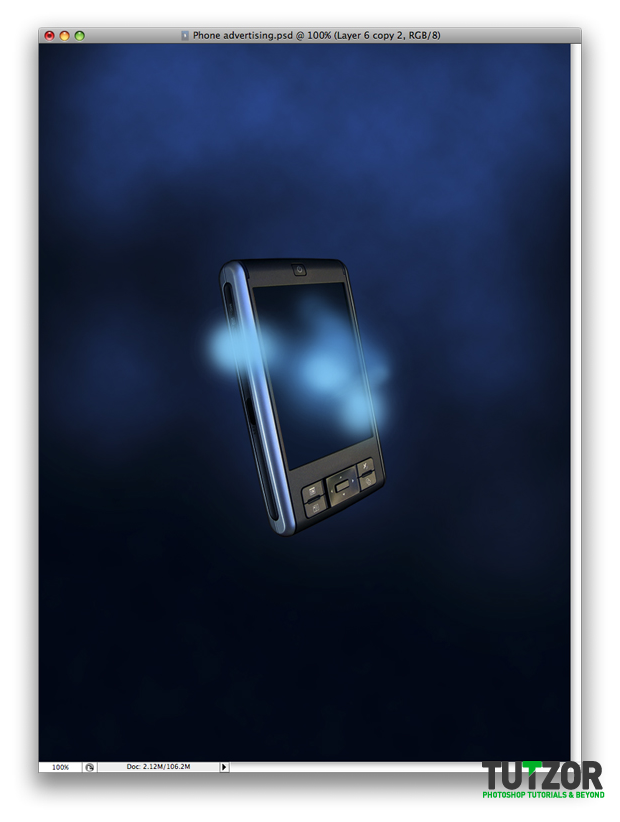
Make another layer and the same as with the one on step 10 and 11 using the same color draw as I did. (I have hidden the other one so you can see how I draw over this layer.)

Step
13
 Cpotorac
Member since:
Aug 2010
As you did with the layer in step 11 mask this one using the same steps.
Now set it to Opacity 40% and Screen.
Then I will activate the other layer back.


Step
14
 Cpotorac
Member since:
Aug 2010
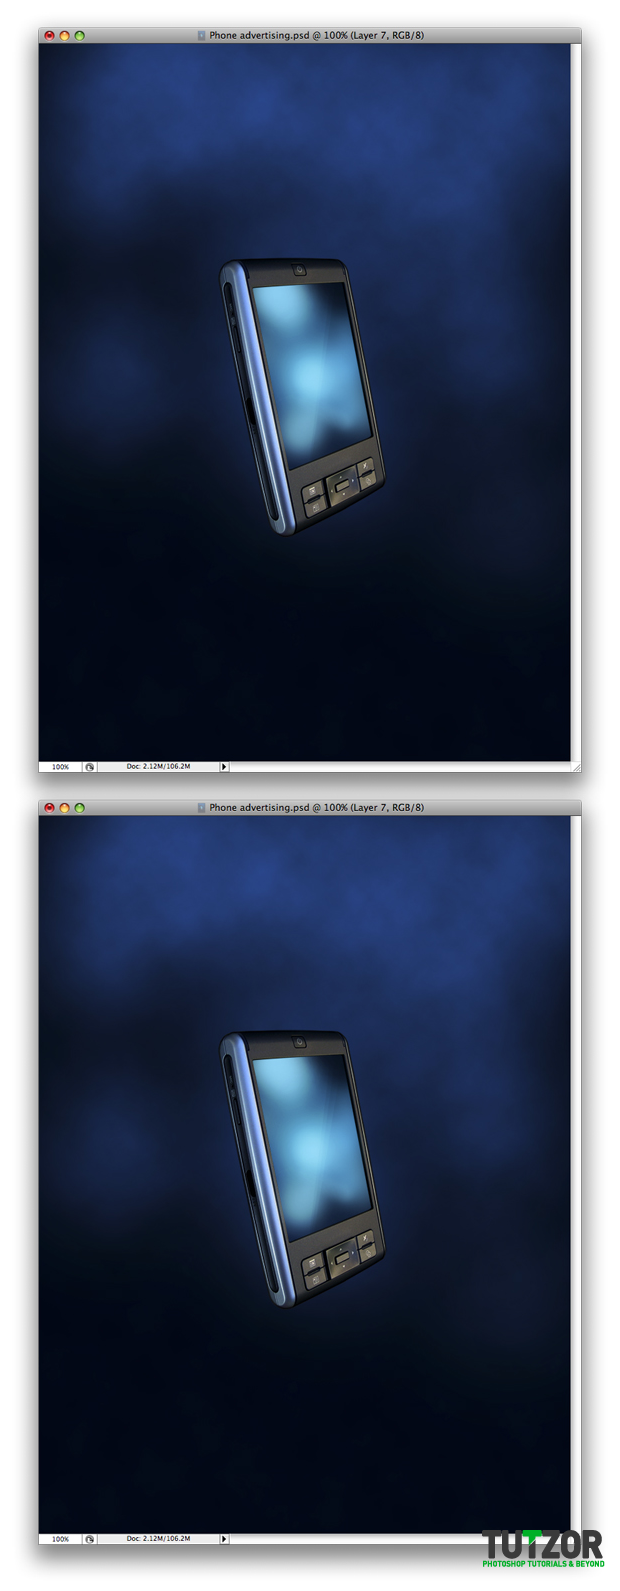
Make a shape as I did using the Pen tool set to Shape layers. Than set the shape to Opacity 7% and Overlay. And last simply mask it to show only on the screen. Use the same technique in step 11 to mask it.


Step
15
 Cpotorac
Member since:
Aug 2010
In this step you will duplicate 2 times the shape you just made and move them a little so that you get something similar to what I have done.

Step
16
 Cpotorac
Member since:
Aug 2010
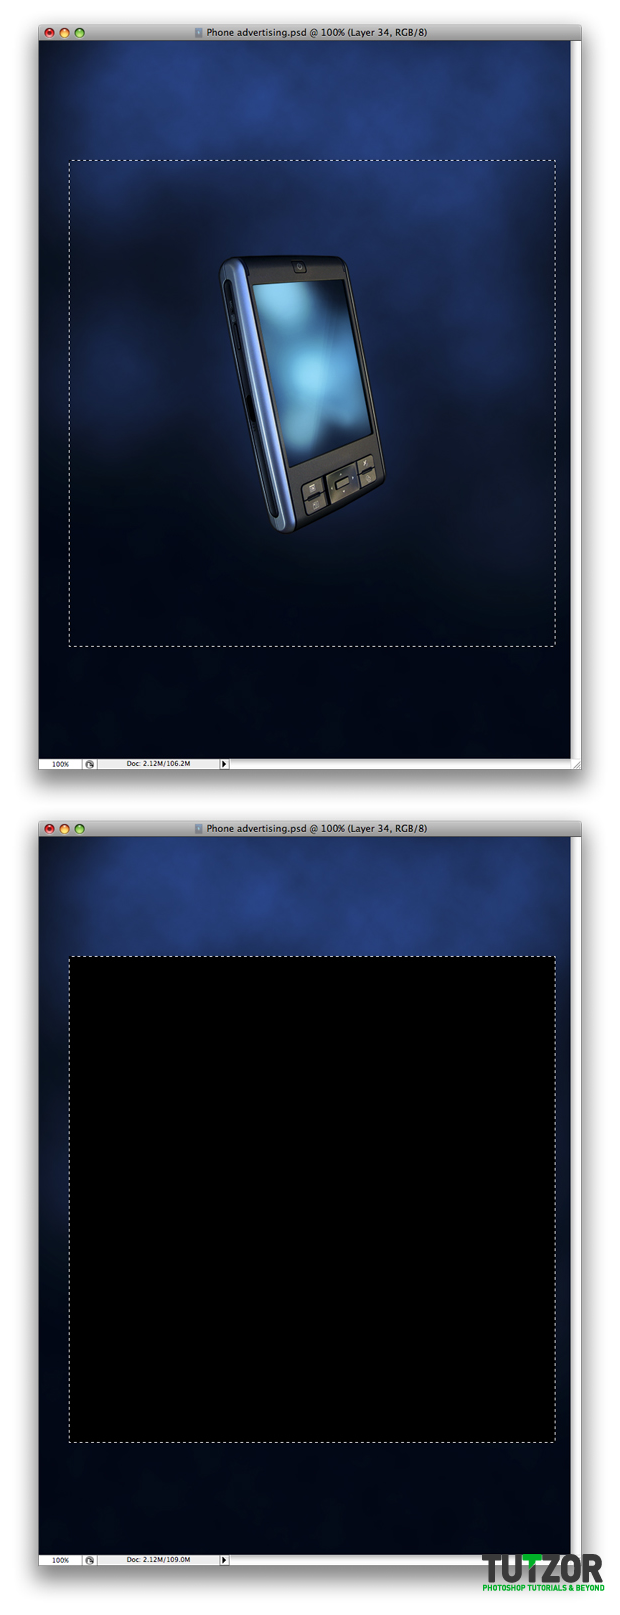
Make a new folder and name it Round Ring. In this folder make a selection as I did and fill it with black.

Step
17
 Cpotorac
Member since:
Aug 2010
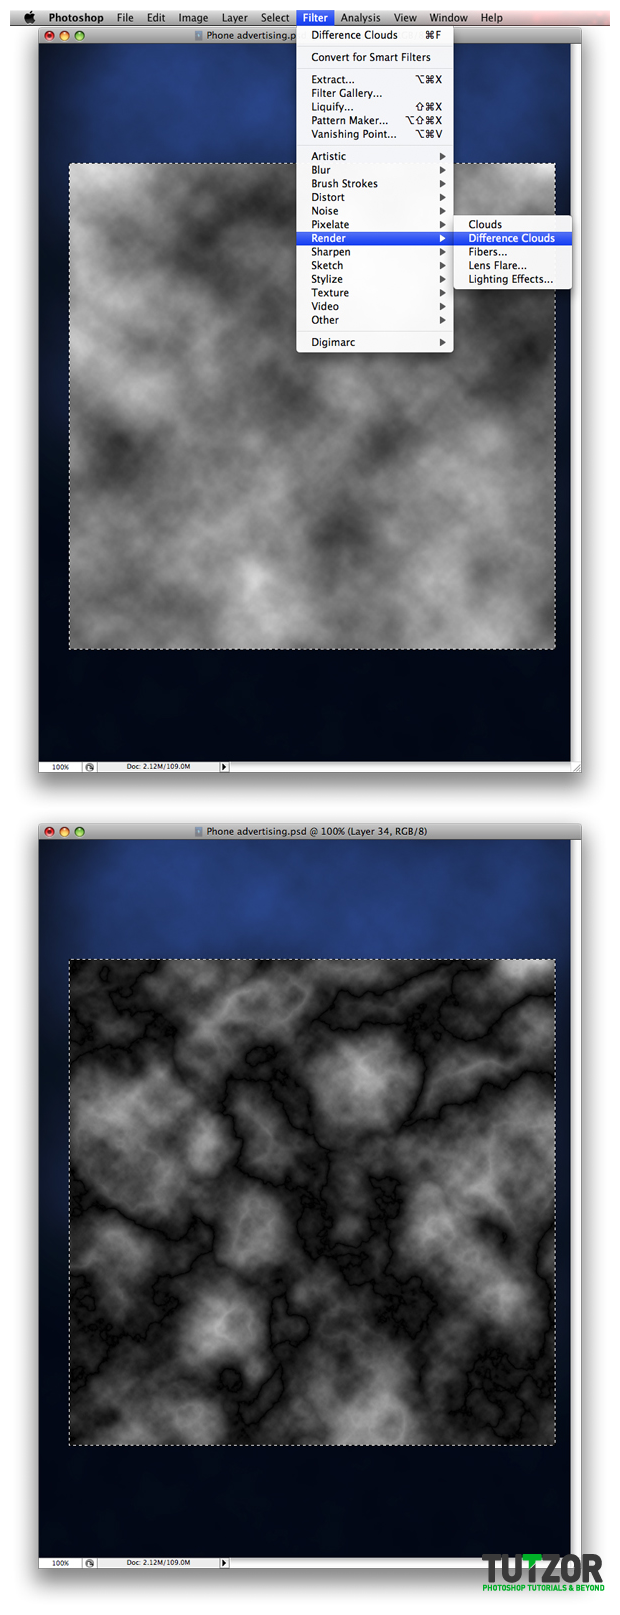
While you still have the selection go to Filter – Render – Difference Clouds. Than press Ctrl + F until you get the look you want.

Step
18
 Cpotorac
Member since:
Aug 2010
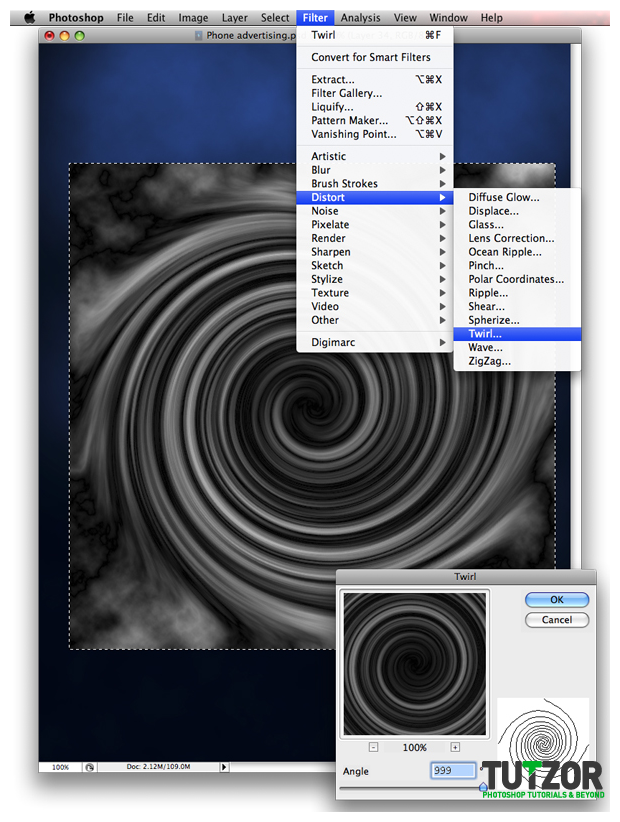
Now go to Distort – Twirl and use my settings. Also keep in mind that when you do this you have to have the clouds layer selected.

Step
19
 Cpotorac
Member since:
Aug 2010
Now you can finally deselect the layer and chose the Elliptical Marquee Tool and make a selection as I did. Than go to Select – Modify – Feather and use a 20% Radius. Next you need to inverse the selection by clicking Ctrl + Shift + I. And last step is to simply erase the part of the twirl that is not needed.


Step
20
 Cpotorac
Member since:
Aug 2010
Same as in step 19 make a selection in the center of the ring this time. Again go to Select – Modify – Feather and use the same 20% Radius. Than erase using the Eraser Tool.


Step
21
 Cpotorac
Member since:
Aug 2010
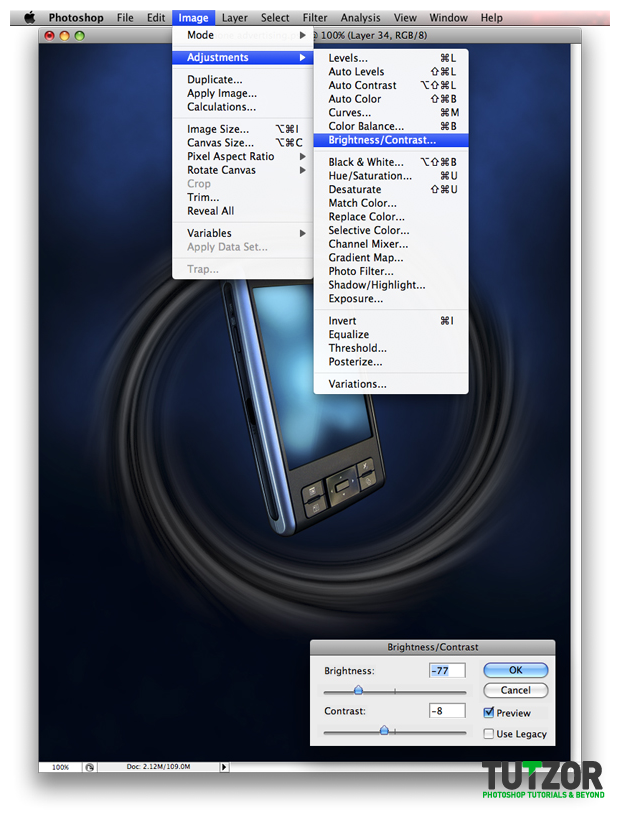
Now go to Image – Adjustments – Brightness and Contrast.

Step
22
 Cpotorac
Member since:
Aug 2010
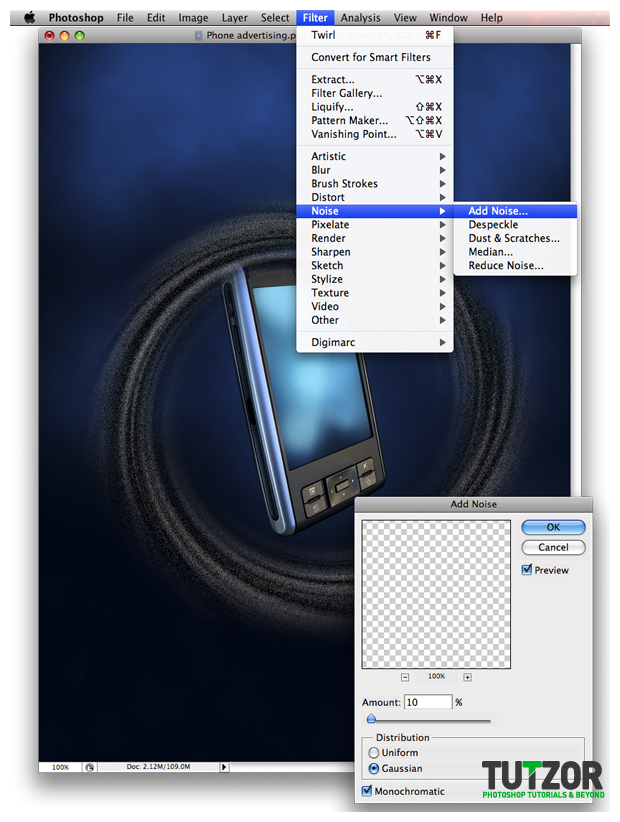
Next go to Filter – Noise – Add noise. Use a 10% Radius.

Step
23
 Cpotorac
Member since:
Aug 2010
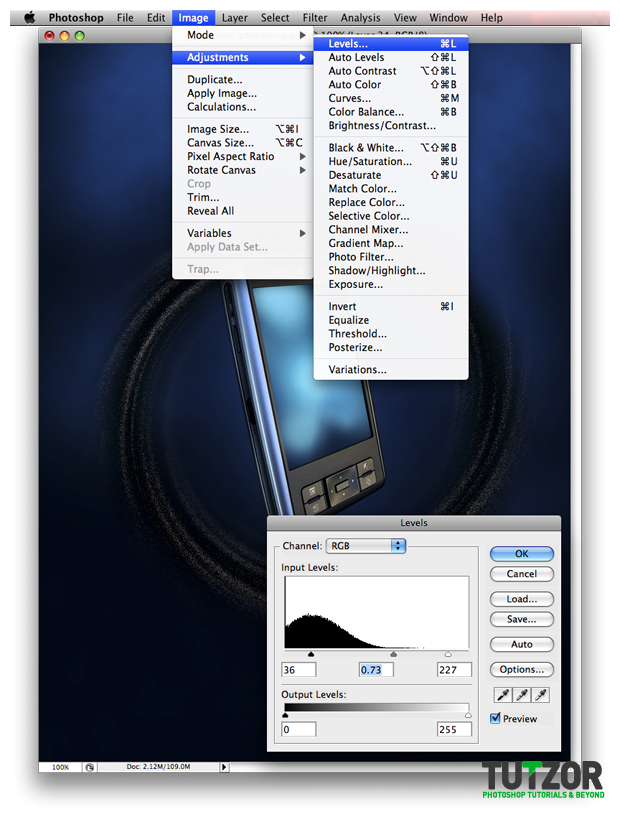
Now go to Image – Adjustments – Levels. Use my settings.

Step
24
 Cpotorac
Member since:
Aug 2010
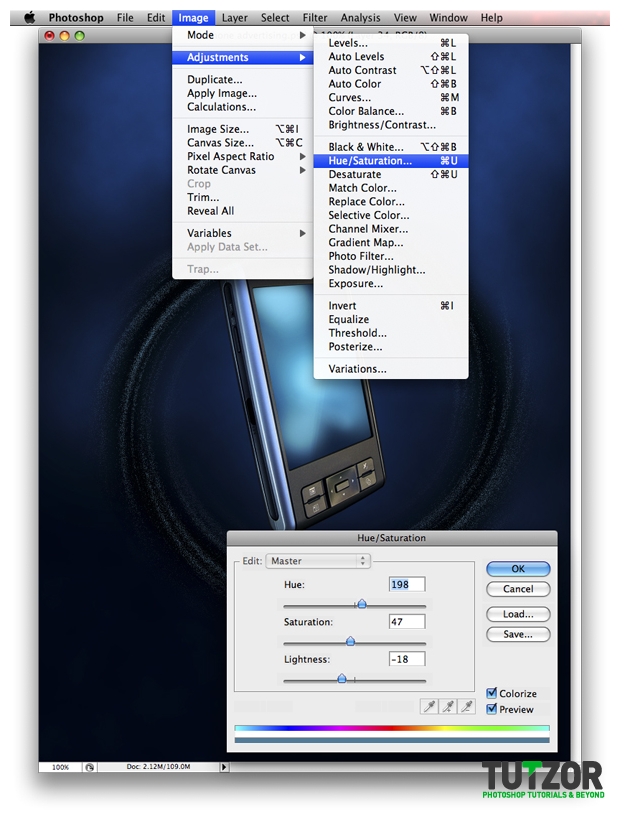
Next go to Image – Adjustments – Hue/Saturation and again use my settings:

Step
25
 Cpotorac
Member since:
Aug 2010
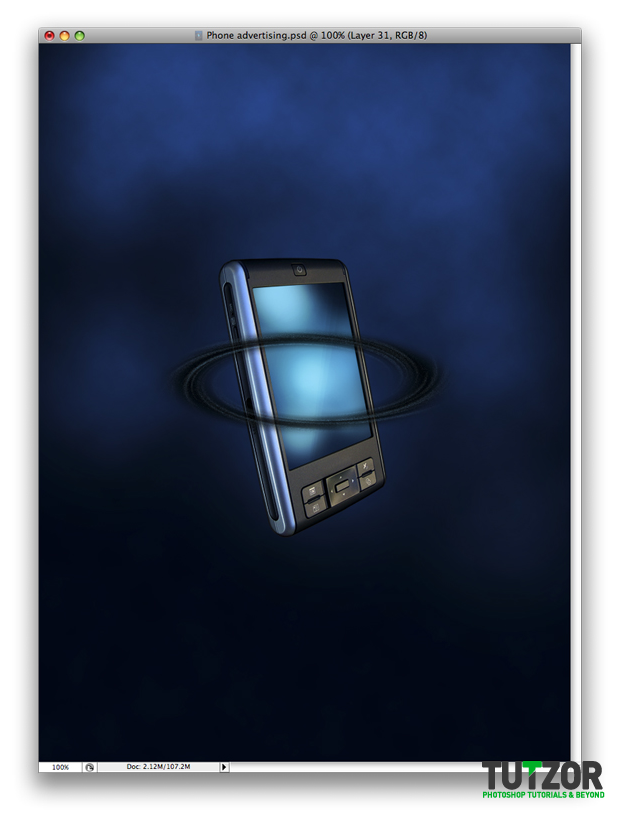
Now you need to transform the ring.



Comments
Re: Sleek Phone Advertisement Flyer - PART 1
nice work keep it up
see another site with great tutorials
http://www.tutorials99.com
Re: Sleek Phone Advertisement Flyer - PART 1
Excellent Tutorial. Detailed description of steps. For beginner is one of the best tutorial