HDR-look editing with Photoshop

01
Oct'10
hansen-fotografie.tumblr.com
Member since:
Sep 2010

HDR Vivid colors looking Tutorial.

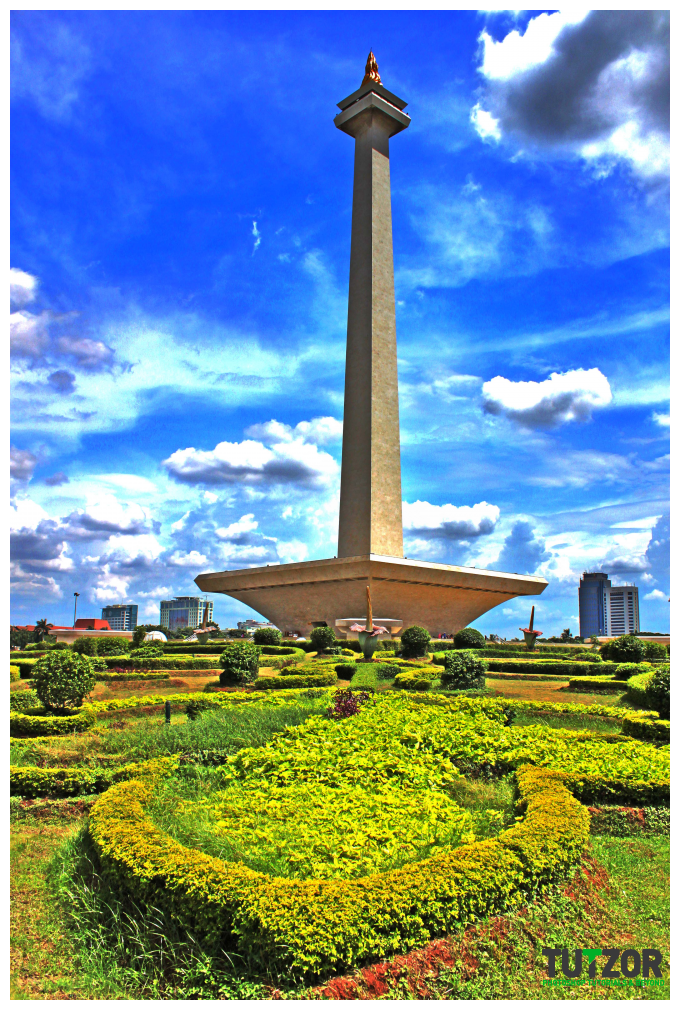
In this tutorial I will show you how to edit a photograph to be a HDR with vivid colors look.
High Dynamic Range as well as HDR is very useful for bracketing photograph, mostly with outdoors or a under exposure photo. In this tutorial I will not merge them (usually HDR need more than 1 photo) instead of just using single image.

What we need : Photoshop and an outdoor photograph.

Thanks for viewing, I hope this tutorial can help you to edit a photo with HDR feeling, but don’t hesitate to try the any other HDR program like photomatix pro.

About the picture,
it is a national monument, if you search up in google, you can type Monas. Located in Jakarta, Indonesia.

Rating

Your rating: None Average: 3.8 (31 votes)

Required Files

Final Image

Step
01
hansen-fotografie.tumblr.com
Member since:
Sep 2010
Open your file with Photoshop. In this tutorial, I use an outdoor photographs with texture of clouds.
Step
02
hansen-fotografie.tumblr.com
Member since:
Sep 2010
First of all, with the background layer selected, select Image then Adjustment then Shadow/Highlight. A pop-up screen will appear. Tick the ‘Show more options’. In this photo I use the settings of : Shadows amount : 50% Tonal width : 45% Radius : 41% High-light amount : 83% Tonal width : 76% Radius : 1120-1124 px you can change the settings as you like.
Step
03
hansen-fotografie.tumblr.com
Member since:
Sep 2010
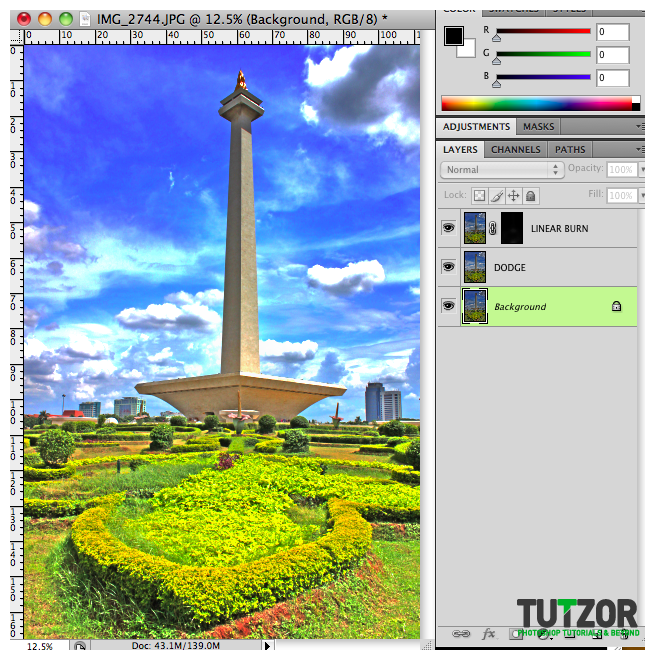
Duplicate background layer and select the blending option to Color Dodge. This setting w ill pop the colors out.
Step
04
hansen-fotografie.tumblr.com
Member since:
Sep 2010
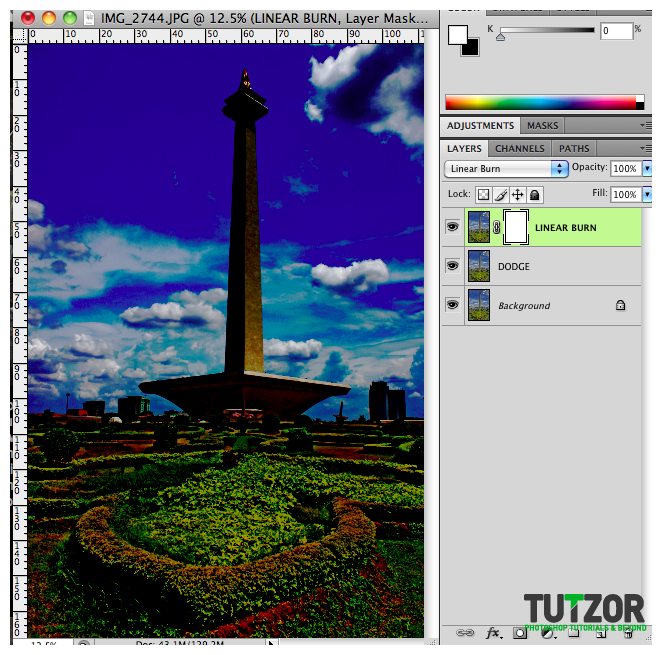
Do the same thing as in the third step, but blending option is set up to Linear Burn now.
Step
05
hansen-fotografie.tumblr.com
Member since:
Sep 2010
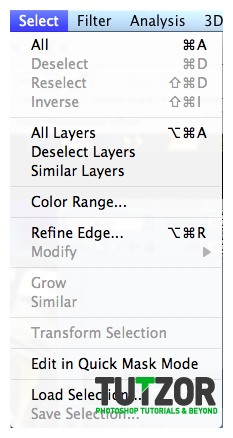
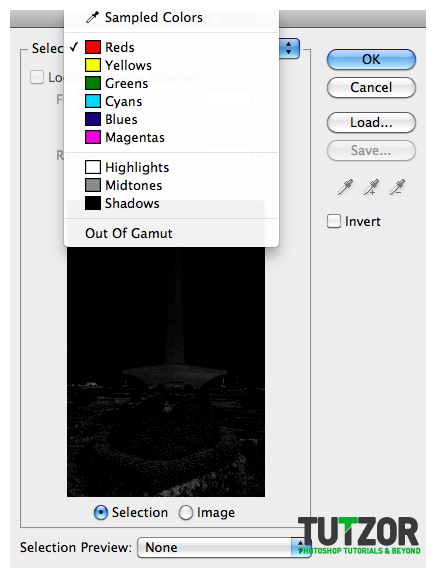
Now set the Foreground color to Black. And open Select then Color Range, tick off the invert option. Fuzziness should be set up around 100. Click the Reds Icon, then (optional) click the layer mask then apply Gaussian blur.
Step
06
hansen-fotografie.tumblr.com
Member since:
Sep 2010
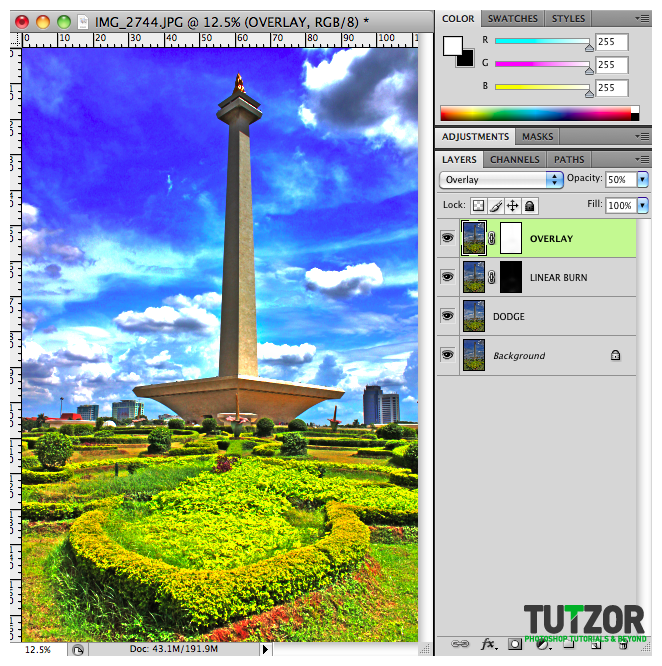
Duplicate the Linear Burn layer, then set the blending option to Overlay. Select the layer mask, then press Ctrl + I (or Command + i) to invert.
Step
07
hansen-fotografie.tumblr.com
Member since:
Sep 2010
Burn some parts of the image if you think its to bright and/or play with other adjustment if your pic looks too popped-out.
Step
08
hansen-fotografie.tumblr.com
Member since:
Sep 2010
In this last step, you can play with the Opacity of the layer. In this tutorial I reduced the Overlay and Linear Burn to around 50% (but the amount is up to you).
Step
09
hansen-fotografie.tumblr.com
Member since:
Sep 2010
You can save these steps as action, so the next time you want to apply the same effect, you can simply click the play button.

Comments

Comments

21
Sep'11
Anonymous

Re: HDR-look editing with Photoshop

Totally completely lost me at "set the foreground color to black", also your interface looks completely different than mine. Very very frustrating, I thought that this was supposed to be for beginners.

Thanks all the same. Moving on to easier tutorials

11
May'11
Leprakawn

Re: HDR-look editing with Photoshop

I hate to say this, but Photomatix—hands down—is the best HDR editing software out there. Take a few pictures in RAW format, and then you can go absolutely wild.

07
Dec'10
Anonymous

Re: HDR-look editing with Photoshop

I'm confuse, why does the layer of the picture where in i have to make it linear burn and overlay has a link?

02
Oct'10
marqito15

Re: HDR-look editing with Photoshop

Excellent!!

02
Oct'10
marqito15

Re: HDR-look editing with Photoshop

Excellent, I really want know how do this HDR image!!

02
Oct'10
ice

Re: HDR-look editing with Photoshop

Very nice!