Title Text Effects: Making Titles Look Like Gangsta Bling in Photoshop
07
Mar'12
 irenethompson80
Member since:
Feb 2012
Recreate the silver "bling-bling" effect for your titles in Photoshop with this tutorial. Apply this effect to the headings and headlines of your catalog prints or when flyer printing or even on your business cards.
Final Image
Step
01
 irenethompson80
Member since:
Feb 2012
Recreate the silver "bling-bling" effect for your titles in Photoshop with this tutorial. Apply this effect to the headings and headlines of your catalog prints or when flyer printing or even on your business cards. Without further ado, here's the first step.
1. With a new document open, use the horizontal text tool to type in the text title that you want. You will want to choose a creative font style that matches the “Bling” style. However, any kind of font style or even graphic can be put through this effect process.


Step
02
 irenethompson80
Member since:
Feb 2012
2. With your text ready, you may want to first change your background to a darker colour, and your text to a white colour. This allows us to see our effect better.


Step
03
 irenethompson80
Member since:
Feb 2012
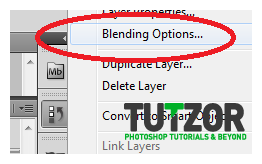
3. Now, first go to the blending options of your text layer. Simply right click on the text layer and select blending options.

Step
04
 irenethompson80
Member since:
Feb 2012
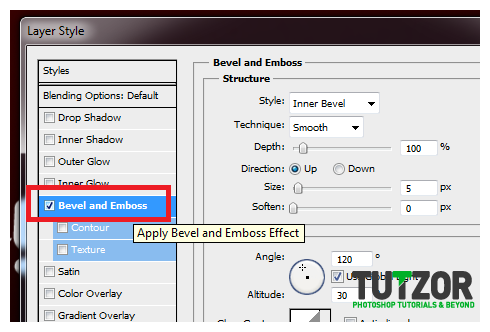
4. First, tick the bevel and emboss effect.

Step
05
 irenethompson80
Member since:
Feb 2012
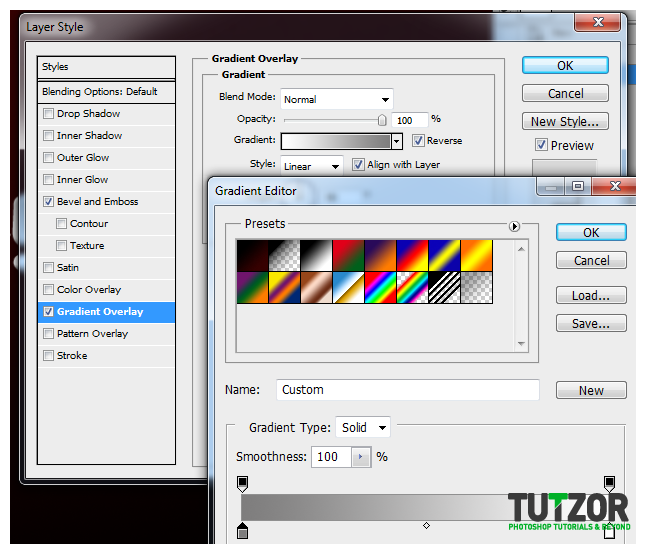
5. Next, tick of the gradient overlay option. Use a light grey to a white gradient setup. Make sure that the grey starts from above and white is at the bottom. To achieve this, just tick the reverse box in the gradient overlay options and the just set the gradient editor from grey to white, left to right.

Step
06
 irenethompson80
Member since:
Feb 2012
6. This gives us this result:


Step
07
 irenethompson80
Member since:
Feb 2012
7. Hold down the CTRL key and click on the Icon of the text layer. This should select the area of the text layer only.


Step
08
 irenethompson80
Member since:
Feb 2012
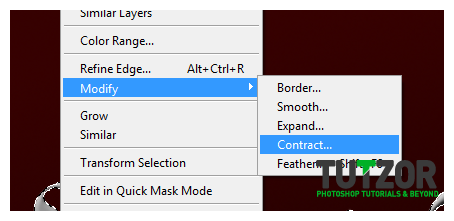
8. Now, click on Select -> Modify -> Contract. In the window that opens select 5px:

Step
09
 irenethompson80
Member since:
Feb 2012
9. This reduces our selection a bit.


Step
10
 irenethompson80
Member since:
Feb 2012
10. Create a new layer by pressing CTRL+SHIFT+N. Then, brush in white colour in our selected area.


Step
11
 irenethompson80
Member since:
Feb 2012
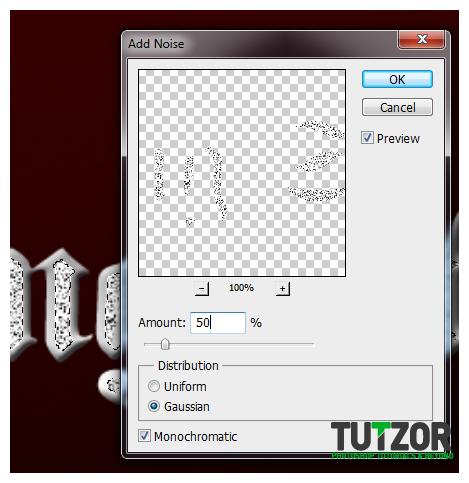
11. Then, apply the following Filters:
a. Filter -> Noise -> Add Noise – Set this to 50%

Step
12
 irenethompson80
Member since:
Feb 2012
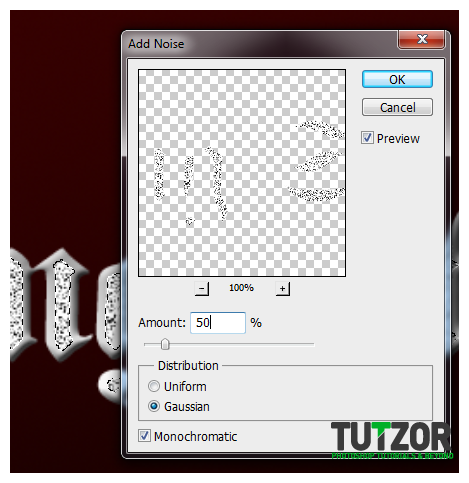
b. Filter – Stylize – Emboss: Use the defaults.

Step
13
 irenethompson80
Member since:
Feb 2012
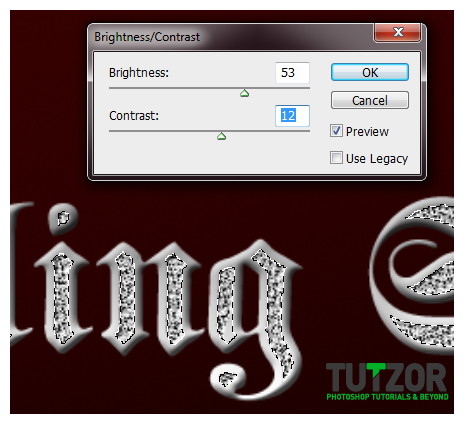
c. Image- Adjustments – Brightness Contrast: Just brighten it a bit.

Step
14
 irenethompson80
Member since:
Feb 2012
12. Great! Now we have a nice bling looking title text.


Step
15
 irenethompson80
Member since:
Feb 2012
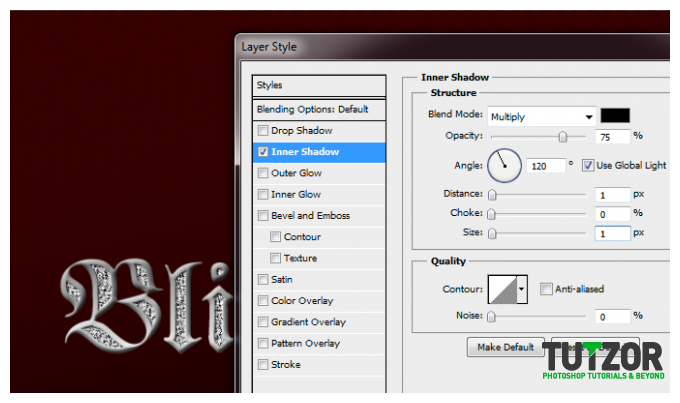
13. We will just add some refinements. First, add an inner shadow in our shiny inner layer for the text. Depending on the size of your text, you may want to use different distances and sizes. For our example we are using 1 pixel for both.

Step
16
 irenethompson80
Member since:
Feb 2012
14. Finally, all that is left to do is to add some twinkles and shines. Do this by drawing two intersecting lines (1 pixel thickness) and then splashing one small blurry brush point (3px) in the middle. Add it around your text for that shiny twinkly effect.


Step
17
 irenethompson80
Member since:
Feb 2012
Great! Now you have a nice bling style.


