Create an E-Mail Icon
16
May'11
Member since:
Mar 2011
Step
01
Member since:
Mar 2011
First, let us start with creating a blank canvas...good...let's say about 500x500 pixels.
Then fill the first layer with a base white #ffffff color and rename the layer to "Background".
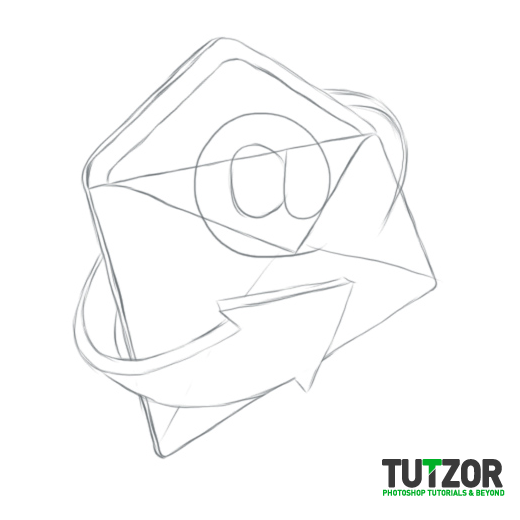
Then let's create a new layer over the "Background" one and start sketching our idea. Look in image 1 below for my sketch.
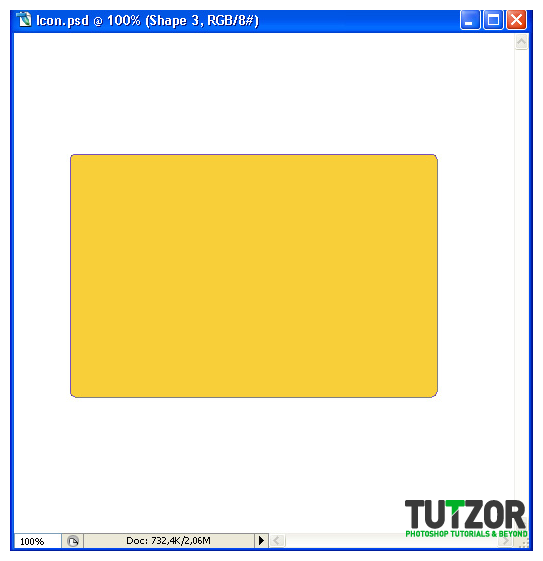
Then create a new layer and setting our Foreground color to #f8cf39, let's take the Rounded Rectangle Tool (U) and set its Radius to 4px.
Let's also set it to Shape Layers mode.
Then drag to create a ..well..rounded rectangle like in picture 1 below----->
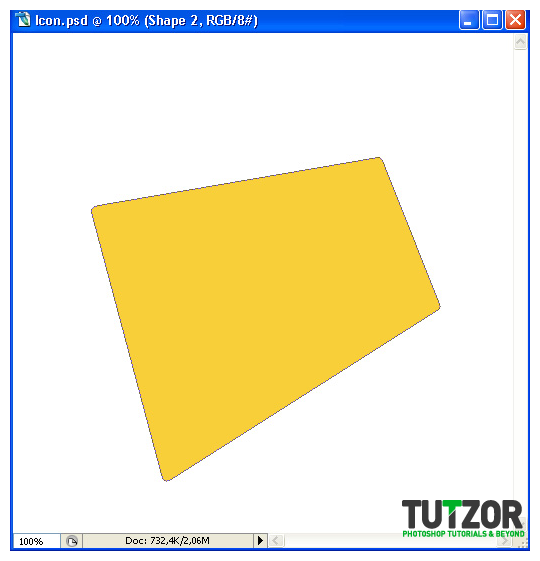
Then click Ctrl(Cmd on Mac)+T to transform the thingy as you see in picture 2 below:
Step
02
Member since:
Mar 2011
Right.
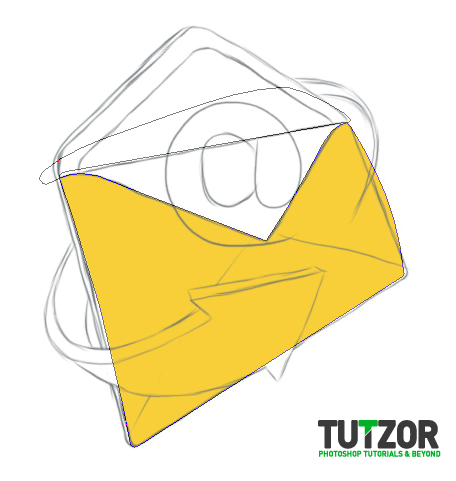
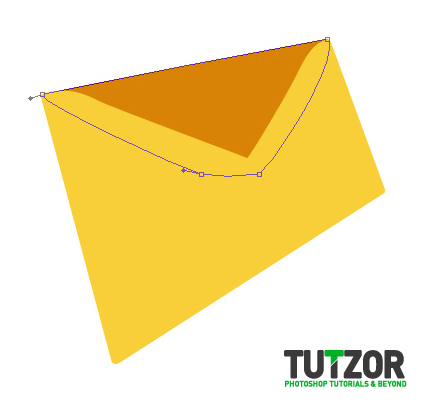
Next, let's set our Pen Tool to Substract from Shape Area and chip away at the yellow shape, so we get a triangle-like indent. Let's name this layer "Body Envelope". See image 1 below--->
Next, let's make a new layer yet again and move it under the "Body Envelope" one.
Setting our Foreground color to #eabd7b let's take the Pen Tool up again (with the Shape Layers setting on) and draw the "inside" of the envelope. Like in the image 2 below.
Let's also name this layer "Envelope Inside".
Step
03
Member since:
Mar 2011
Good.
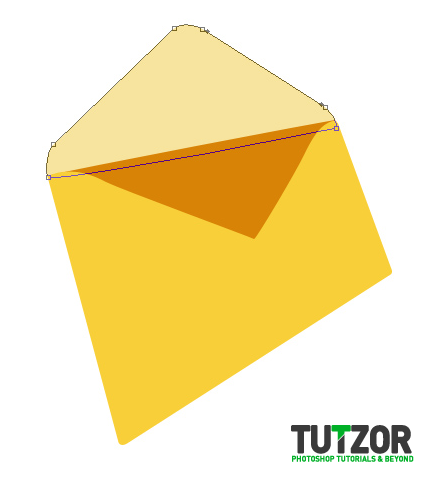
Now we'll make a new layer..of course..and move it under the "Envelope Inside" one.
Set your Foreground color to #fbf1cc and with the Pen Tool trace out the shape of the envelope's cover. Name it "Envelope Flip"...like in the image below--->
Step
04
Member since:
Mar 2011
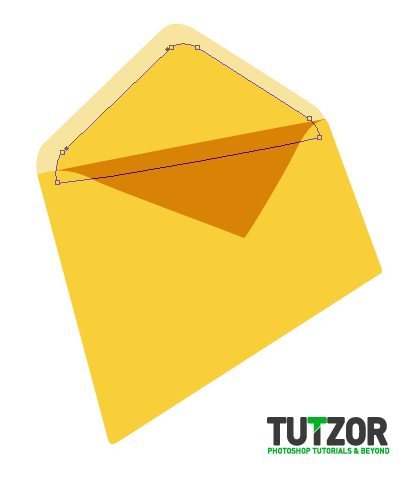
Okay, now duplicate the "Envelope Flip" shape layer and set its color to #fbe696
Make sure the copy is above the original "Envelope Flip" layer in the Layers Palette and then re-name the copy to "Envelope Flip Center".
Resize it do it fits within the center of the flip.
Like in the pic below--->
Step
05
Member since:
Mar 2011
Just a little more, then we can start adding shiney-shiney gradients :)
Bear with me ^^
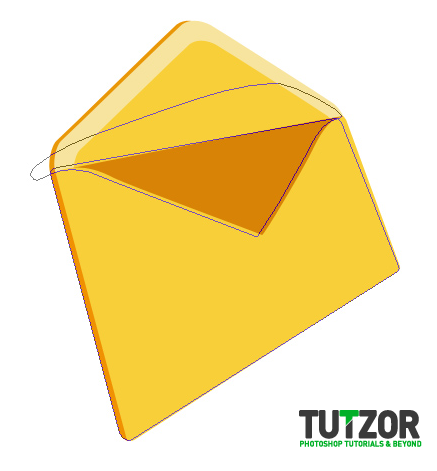
So. Let's duplicate the "Envelope Body" layer and move it under all your envelope-related layers. Set its color to #f7c579 and then using the Move Tool (V) move it a few pixels to the left. Like this we will give our envelope a 3D look.
Duplicate the "Envelope Flip" layer as well and give it the same color-change-move-it treatment ;)
Like in the pic below--->
Step
06
Member since:
Mar 2011
Cool ...but kinda flat, don't you think?
So let's fix the flatness.
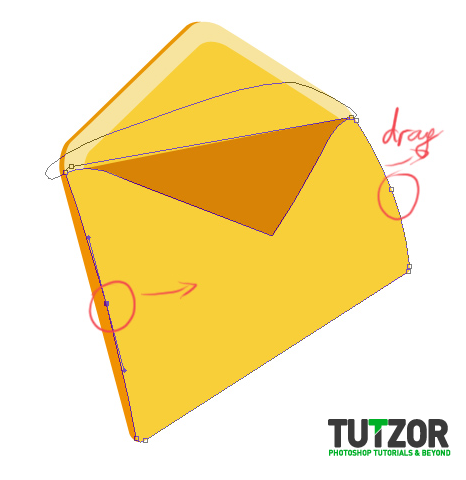
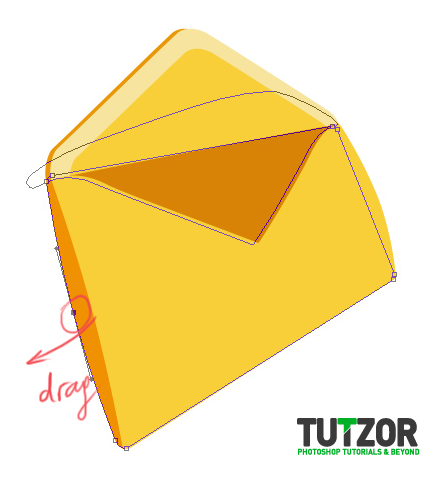
Take the Direct Selection Tool (A) and head over to the "Envelope Body" layer, and with the help of the anchor points (create a couple of anchor points if needed) "fatten" it a bit by dragging to the right.
Then head over to the copy of the "Envelope Body" and fatten it by draggint to the left. Like in pics 1&2 below--->
Step
07
Member since:
Mar 2011
Riiight.....
We still have some more shapes to create BUT! for now let's work those gradients thehehe n__n
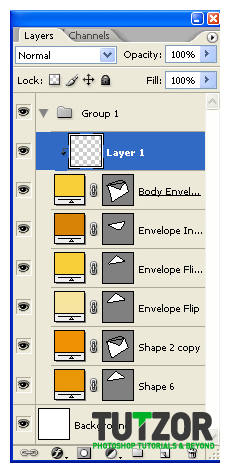
Sooo.....create a new layer above the "Envelope Body" shape layer. Then right-click on this new layer and choose "Create Clipping Mask".
So now your layers palette should look something like in image 1 below--->
Then let's take the Gradient Tool (G) and set it to Lineart Gradient, Foreground to Background. And of course we need Foreground and Background colors so let's set the Fg to #fee06a and the Bg to #f7b90c
Then on the clipping mask drag a bit like in image 2 below, so that you get a result similar to image 3 below :)


Step
08
Member since:
Mar 2011
Then as a final touch...know how good quality envelopes have a waxy kind of paper? That paper reflects a lot of light so let's do the same :)
On the same gradient clipping mask, we'll give the bottom of the envelope body some reflection :)
So.
Take the Gradient Tool, leave it to Linear Gradient but change it to Foreground to Transparent. Use the #f7e49e color to drag like in image 1 below...so that you get a result somewhat like in image 2 below--->


Step
09
Member since:
Mar 2011
Next let's move on to the "Envelope Inside" shape layer.
Create a new layer over it and transform this new layer into a clipping mask.
Then set your Foreground color to #ee9d05 and your Background one to #b76000 and take the Gradient Tool (set to Linear Gradient and Foreground to Background) and drag like in image 1 below...to get a similar result to image 2 below:


Step
10
Member since:
Mar 2011
Next we'll move on to "Envelope Flip Center" shape layer.
Again, create a layer above it and right-click on the new layer--->create clipping mask.
With the exact same gradient as before, drag like in image 1 below..to get the result in image 2--->


Step
11
Member since:
Mar 2011
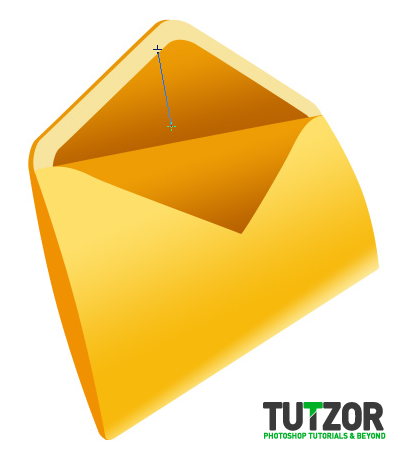
Now we'll set our Foreground color to #fcf5da and our Background one to #f4c563 and we'll attack the "Envelope Flip" shape layer ^^
Of course, create a new layer above the envelope flip one, right-click on it and make it into a clipping mask......then drag with the Gradient Tool (G) set to Linear Gradient and Foreground-To-Background as in image 1 below to get the result in image 2 below ^__~

Step
12
Member since:
Mar 2011
On to the "Envelope Body copy" then :)
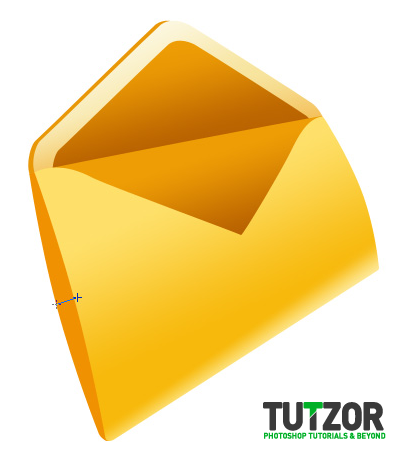
Same thing, give it a new layer clipping mask, then set your Foreground color to #bb6500 and let's show the gradient tool some love again hehehe n___n
Set it to Foreground-to-Transparent and drag like in image 1 below...try to get something like in image 2 below--->

Step
13
Member since:
Mar 2011
Next it's the "Envelope Flip copy" shape layer.
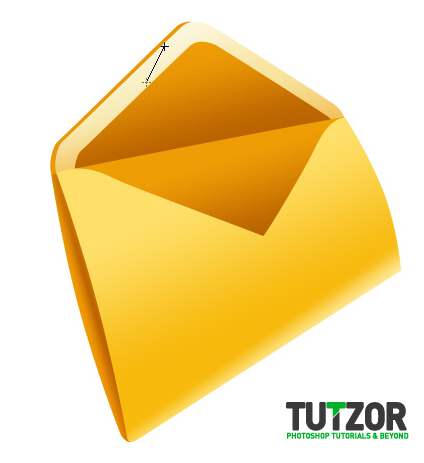
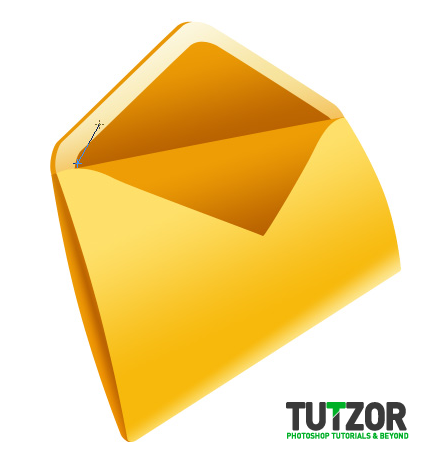
Adorn it with one beauuuutiful clipping mask..and set your Foreground color to #eeba8c and your Background one to #cf7a03
Take the Gradient Tool, leave it with its previous step's settings and drag like in image 1.
Then press "X" key to switch your Foreground color with your Background one and drag like in image 2 below...so you get something like in image 3:

Step
14
Member since:
Mar 2011
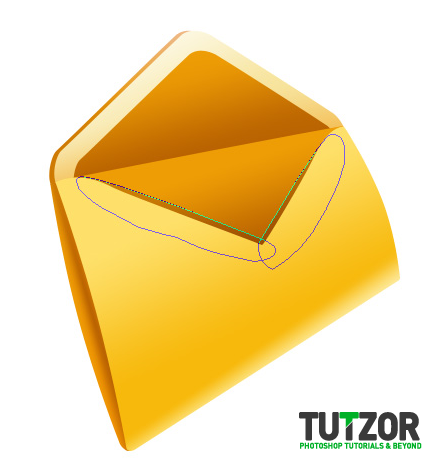
Next, let's go back to the "Envelope Inside" shape layer. It has already one clipping mask with the gradient over it, yep? Well, we will give it a second clipping mask ^^
This new clipping mask must be over the gradient one, be careful =O
Good..let's set this new clipping mask to Multiply blending mode and the let's set our Foreground color to #9e7a51
Taking the Pen Tool, let's create a sort of..shadow :3
Then set the layer to about 40% opacity.
Like in the image below-->
Step
15
Member since:
Mar 2011
Sweet :3
Make a new layer above all your others.
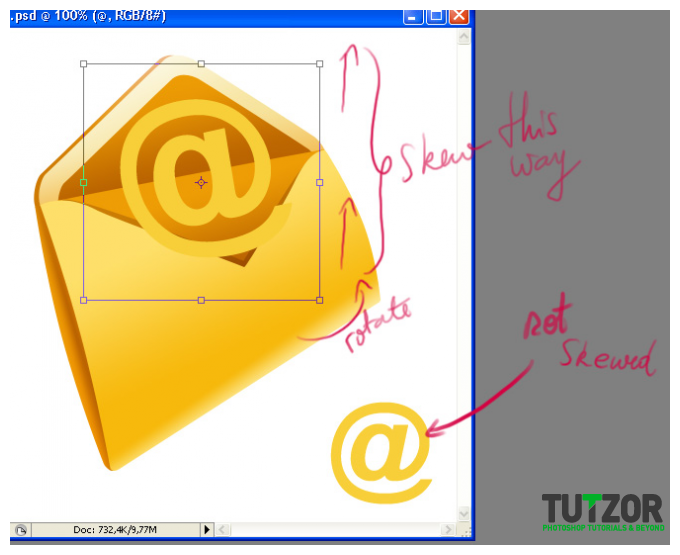
Now let's take the Text Tool (T) and choosing a font that you think looks good (meh, here I chose Arial, bold...for convenience's sake haha) write a single "@" sign. Click Ctrl(Cmd on Mac)+T to transform it by skewing it from bottom-right to top-right, like in the pic below--->
Then right-click on the text layer and choose "Rasterize Type".
Step
16
Member since:
Mar 2011
Next, we'll go into the realm of 3D ^__^
Make sure you have your rasterized type layer selected as your working layer then hold down ALT key and press the left-pointing arrow key on your keyboard.
Press this ALT+left arrow key 9 times.
You will notice 9 copies of the @ are err..."born"...but each is moved a few pixels to the left that the previous =D
That's good!
Now that we have a total of 10 @ layers (9 copies and the original), move the original on top of the copies.
Then we can name this original @ layer "@ Original".
Next, we click on the topmost of the copies and press Ctrl(Cmd)+E to merge..and..merge...and...meeerge..all the 9 copies of the @ in one layer.
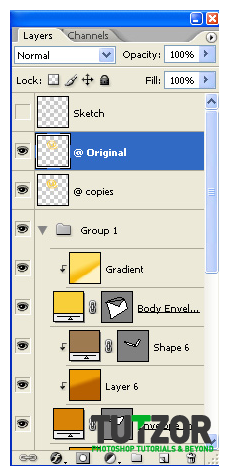
So now, regarding this @ layer business you should have 2 layers: one with the @ original and one with the @ copies, merged into one. Like in picture 1 below--->
On your canvas, you should what is shown in image 2 below:

Step
17
Member since:
Mar 2011
Oki, mooo-vin on :)
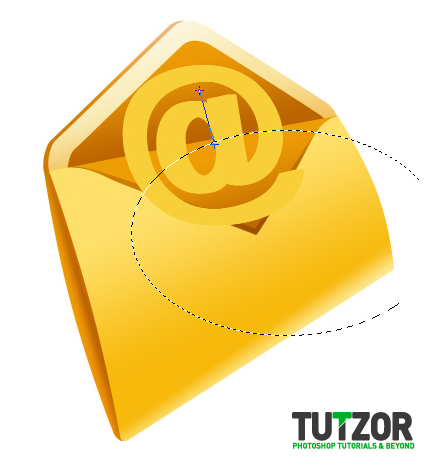
Now we'll create a Clipping Mask over ther "@ Original" layer and take the Elliptical Marquee Tool =3
Create a selection at about ..2/3 of the @ sign, like in image 1 below--->
Then go to Select-->Inverse to inverse your selection and set your Foreground color to #fbedc6
Take the Gradient Tool, set it to Foreground to Transparent and Linear Gradient and drag like in image 2 below to obtain a result like in image 3 below--->


Step
18
Member since:
Mar 2011
Deselect.
Let's make a new layer yet again, and move it inbetween the "@ original" layer and its current clipping mask. Right now the "@ Original" layer should have 2 clipping masks.
Set your Foreground color to #f9cd01 and your Background one to #eda201 and with the Gradient Tool set this time to Foreground to Background and Linear Gradient, drag like in pic 1 below to get the result of pic 2 :)


Step
19
Member since:
Mar 2011
Right. Now we'll take care of the @ copies merged layer ^^
Make a new layer and transform it into a clipping mask to the "@ copies" layer. Then set your Foreground color to #e79b38 and your background one to #7c3808 and take up your Gradient Tool.
Make sure it's set to Foreground-to-Background and Linear Gradient, then drag like in pic 1 below...to get a similar result to pic 2 below---->


Step
20
Member since:
Mar 2011
Dundundun.....it needs highlights.
New layer, transform it into a second clipping mask to the "@ copies" layer (make sure it's above the previous, gradient clipping mask layer) and setting your Foreground color to #f9ecbb take the Gradient tool and set it to Foreground to Transparent.
Drag like in pic 1 below to get the result of pic 2:


Step
21
Member since:
Mar 2011
Now we'll return to the gradient clipping mask of the "@ copies" layer and on it we'll dodge a bit :)
So
Take the Dodge tool and set it to a soft, round brush of about 40px in size, Range: highlights and Exposure: 11%.
Dodge in the areas in pic 1 to get the result in pic 2 ^___^


Step
22
Member since:
Mar 2011
Now let's make the shadow of the @ sign ^___^
Create a new layer and mov it right under the "@ copies" layer.
Then set it to Multiply and lower its opacity to about 60%.
Next...well...next.....let's set our foreground color to #866844 and then Ctrl(Cmd)+click on the THUMBNAIL of the "@ copies" layer in the Layers Palette and obtain its selection. Like in pic 1 below--->
Then take the Paint Bucket Tool (G) and fill this selection with the #866844 Foreground color on the newly created layer which we just set to Multiply.
Speaking of, let's re-name it to "@ Shadow".
Then move the @ Shadow a bit to the left, so that it looks like a shadow...like in image 2 below:


Step
23
Member since:
Mar 2011
Speaking of shadows.
We need our e-mail sign to be INSIDE the envelope, not floating mindlessly on top of it right? =/
So let's do this: let's go the Body Envelope shape layer and Ctrl(Cmd)+click on its layer thumbnail to obtain its selection, just how we did a bit before with the "@" sign.
Then let's return to the @-related layers...starting with that shadow we made in the previous step.
And..let's press a nice...sweet..Delete xD
Do the same with the "@ copies" and "@ Original" layers.
This will delete all the part of the shadow/copies/original @ with float over the envelope :)
So what we have now is something like this:

Step
24
Member since:
Mar 2011
Right, now one more tweak for our @ sign.
Go to the "@ Original" layer, and create a new clipping mask for it. Place this clipping mask on top of the other two.
Set the layer to Multiply blending mode and lower its Opacity to about 50%.
Then with the brush tool set to #866844 foreground color and a hard, round brush, drag a bit in the areas shown in pic 1 below to get the same result like in pic 2 below:
Notice the slight shadow? :)


Step
25
Member since:
Mar 2011
Right.
Now let's take care of that arrow :)
Make a new layer above all your others. Then take the Pen Tool (you can set its Foreground color to #ffc300 if you want) and following the Sketch we did in the beginning draw the first part of the arrow.
Like in pic 1 below-->
Name this shape layer "Arrow Tail".
Then set your Foreground color to #4a5251 and creating a new layer above the tail of the arrow, convert this new layer to a clipping mask to the Arrow Tail draw the err...underside..thingy...or the arrow :)
Like in pic 2 below:






Comments
Re: Create an E-Mail Icon
Now it is easy to create a icon by this step by step tutorial. Thanks for the great posting.
Re: Create an E-Mail Icon
Great tutorial and techniques well explained!
Thanks for sharing...
Bookmarked!!