Water effect photo montage
26
Aug'10
 Cpotorac
Member since:
Aug 2010
Step
01
 Cpotorac
Member since:
Aug 2010
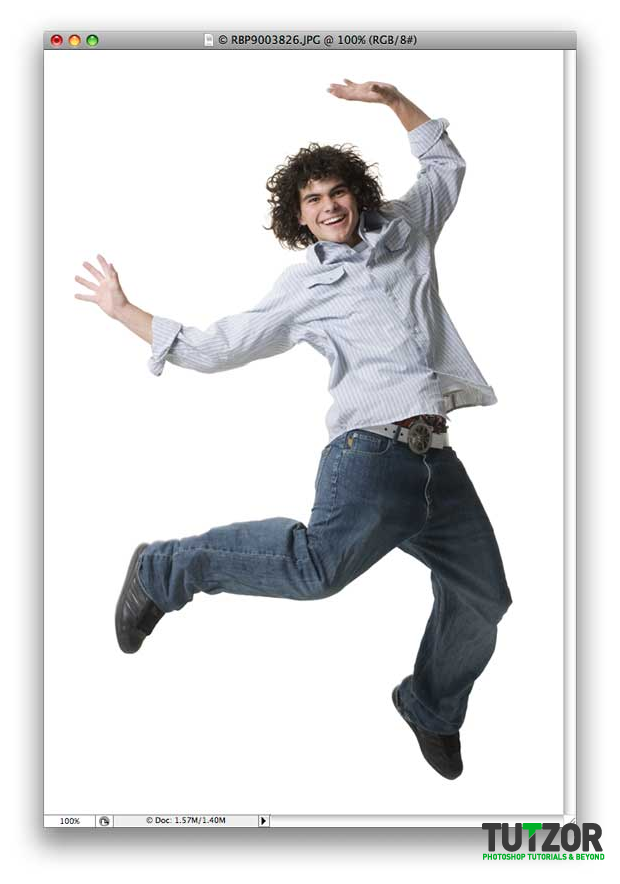
First of all you need your image. I found my image on sxc.hu. There a ton of free images there so keep on searching. Here are a few: http://www.sxc.hu/photo/956170, http://www.sxc.hu/photo/829826, http://www.sxc.hu/photo/604619 and I also bought this one from istock: http://www.istockphoto.com/file_closeup/object/3907033_water_splash.php?id=3907033.

Step
02
 Cpotorac
Member since:
Aug 2010
Next you need to take the man out of that background. Use the Pen Tool for this and draw a path around the guy. Don’t worry about the hair because we don’t need it and the same for the hands and shows.


Step
03
 Cpotorac
Member since:
Aug 2010
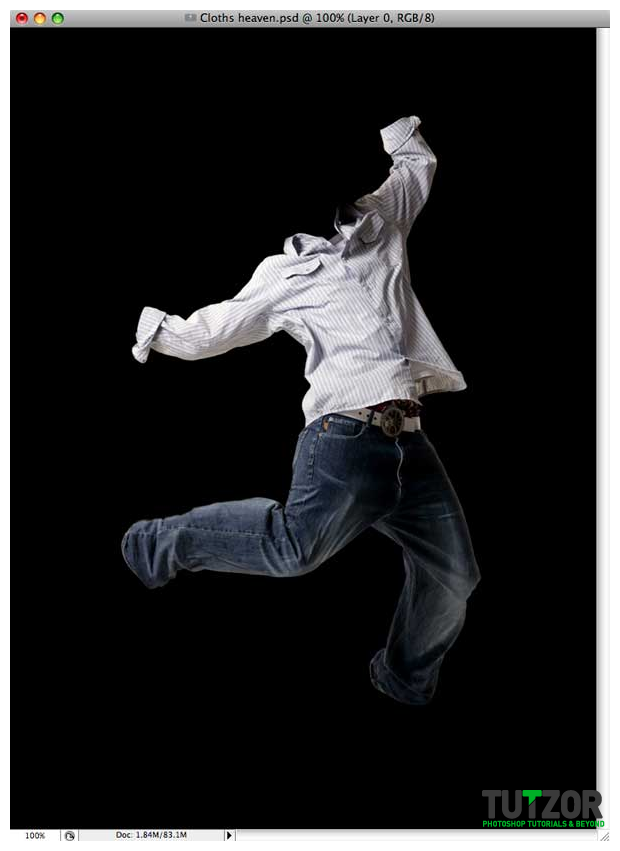
Now that we have the path around him press Ctrl + Enter (Command + Return on a Mac) and that will select the man.
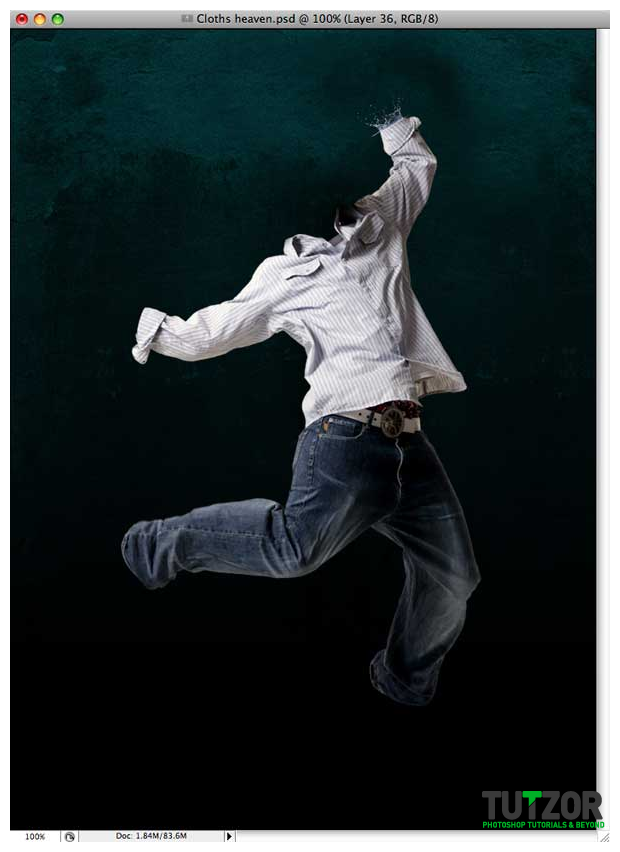
Now open up a new document. This will be the final file. Fill it with black. After you open up the new document move the selected man on that new document by dragging it on the workspace. It should look like this.

Step
04
 Cpotorac
Member since:
Aug 2010
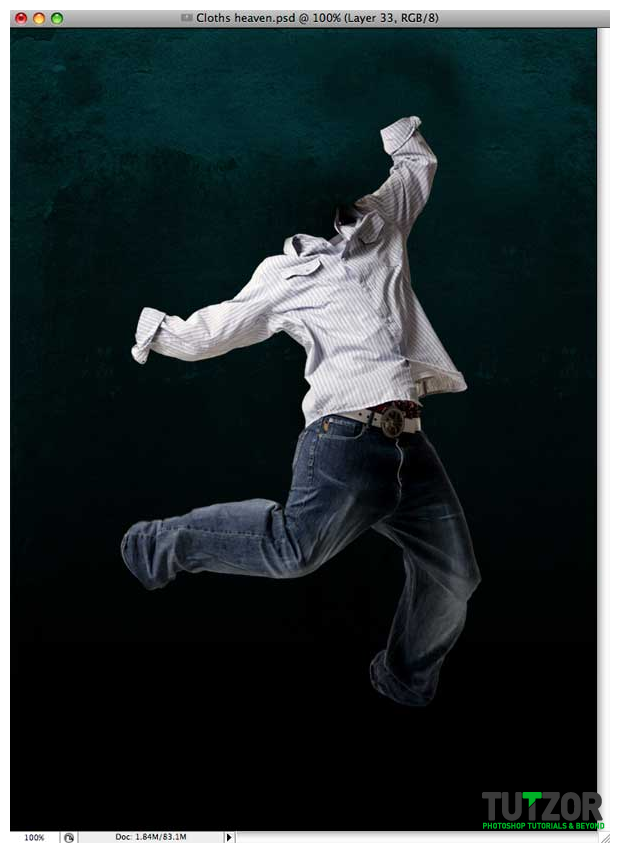
Next I want to bring a nice background for this because I want to finish with the easy stuff before we start. I have used a texture and applied a gradient over it. Also textures can be used for free from the same site I mentioned before.

Step
05
 Cpotorac
Member since:
Aug 2010
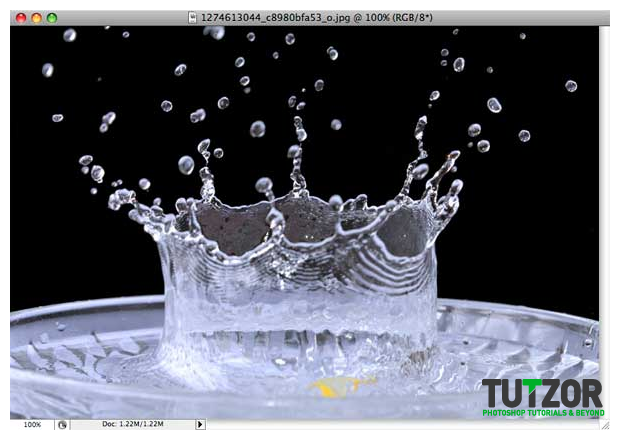
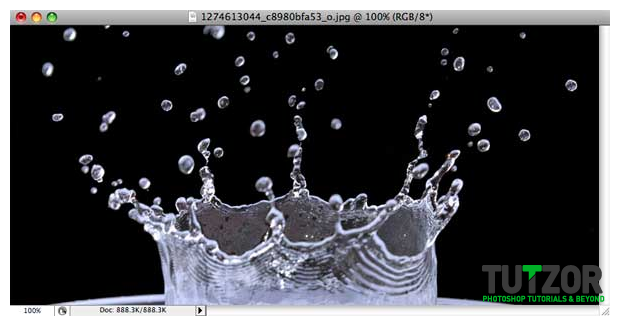
It is time to make the water effect. First you need to find your images of water splashes. There are a ton of them. I reccomend you look for those images that are very clear and have a nice water splash. Also you need to find lots of them. I found the ones I used on free stock images like sxc.hu or fotolia.com.

Step
06
 Cpotorac
Member since:
Aug 2010
Next cut the part of the image you don’t want.

Step
07
 Cpotorac
Member since:
Aug 2010
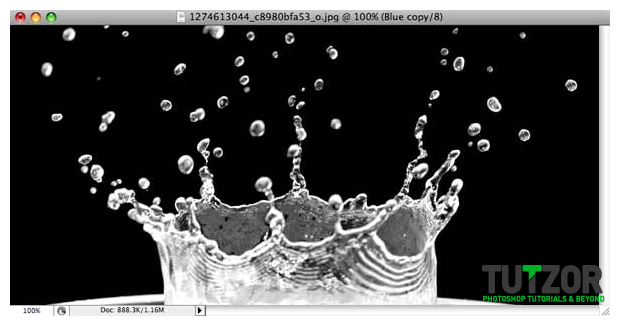
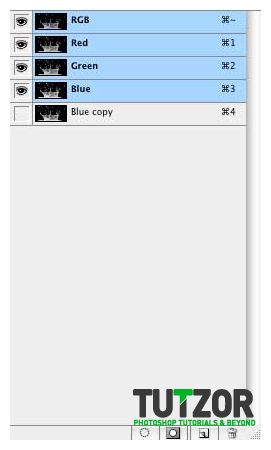
Go to the channels of the image and select the channel you consider that has the best contrast between the splash and the background.
Next duplicate this channel, make it visible and make the Blue channel (in my condition) invisible by pressing the eye icon.


Step
08
 Cpotorac
Member since:
Aug 2010
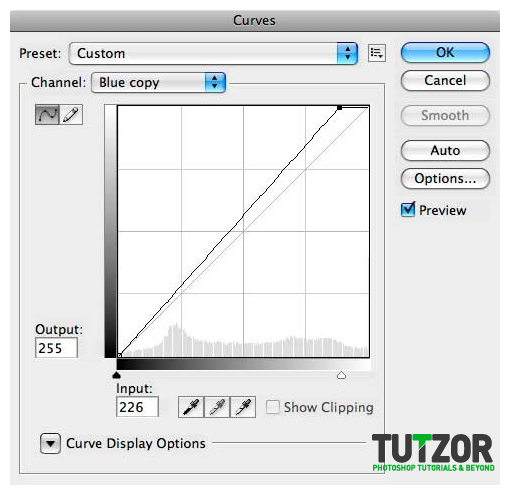
Now go to Image – Adjustments – Curves. In this case we have nothing to change for the image but there are a lot of images where the contrast between the water and background is not that visible.


Step
09
 Cpotorac
Member since:
Aug 2010
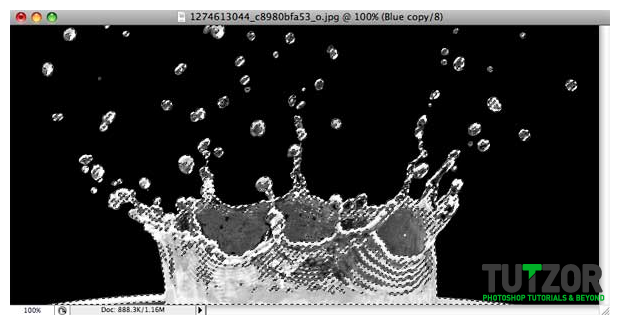
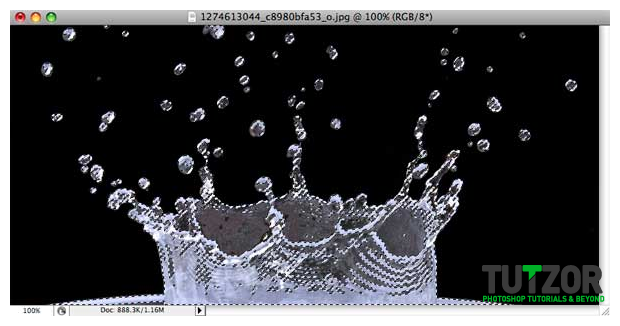
Now Ctrl + Click on the channel you just duplicated. This will make a selection around the water splash.

Step
10
 Cpotorac
Member since:
Aug 2010
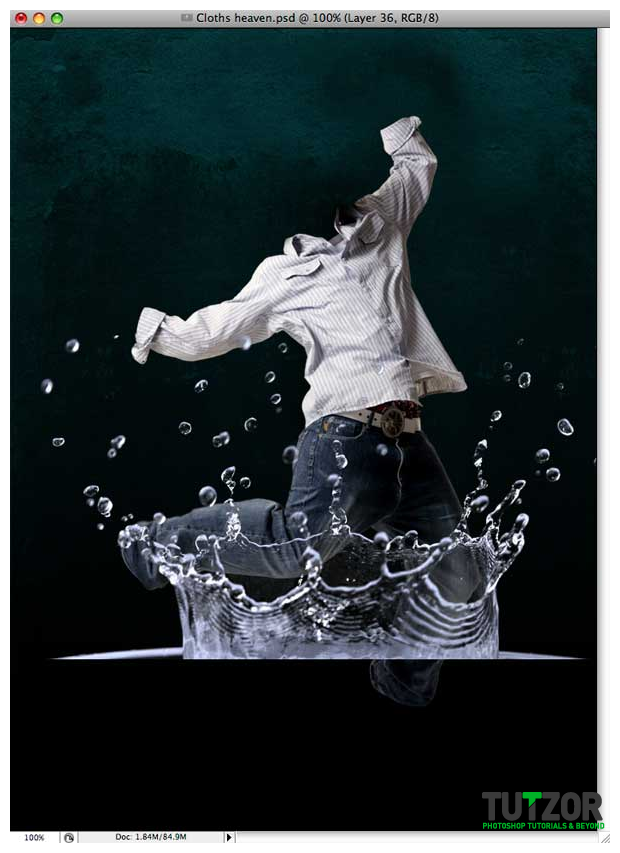
Now select the RGB channel by clicking on it’s thumbnail and go to the layers palette. And click Ctrl + J to copy the selection to a new layer. After you do this drag the copy of the splash to your workplace.


Step
11
 Cpotorac
Member since:
Aug 2010
As you can see the water is transparent. I will use this on the right hand. What you need to do now is to resize it so that will look good over the right hand.

Step
12
 Cpotorac
Member since:
Aug 2010
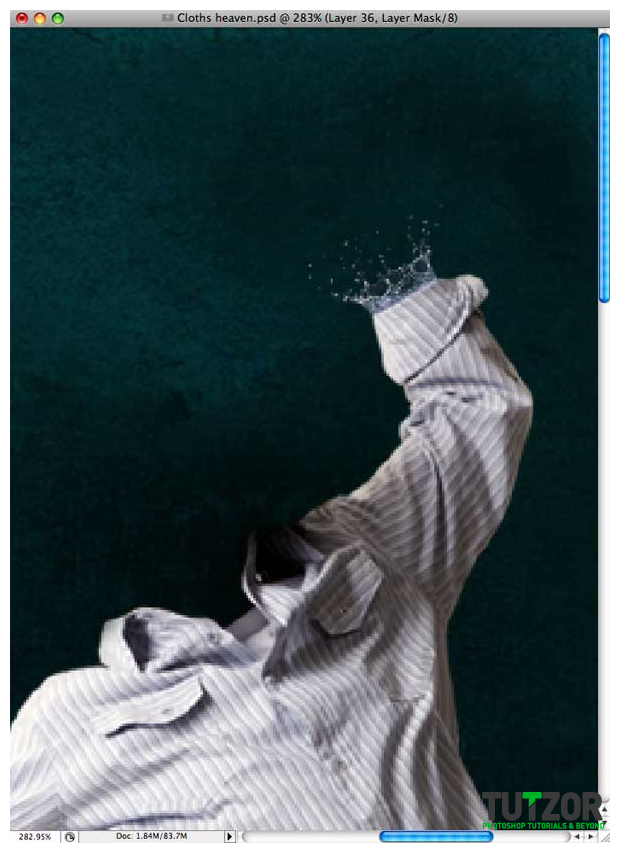
As you can see it does not look that good and it needs some retouching. First move the layer in the back of the boy and activate the layer mask for this splash and brush away the parts of the splash we don’t need.

Step
13
 Cpotorac
Member since:
Aug 2010
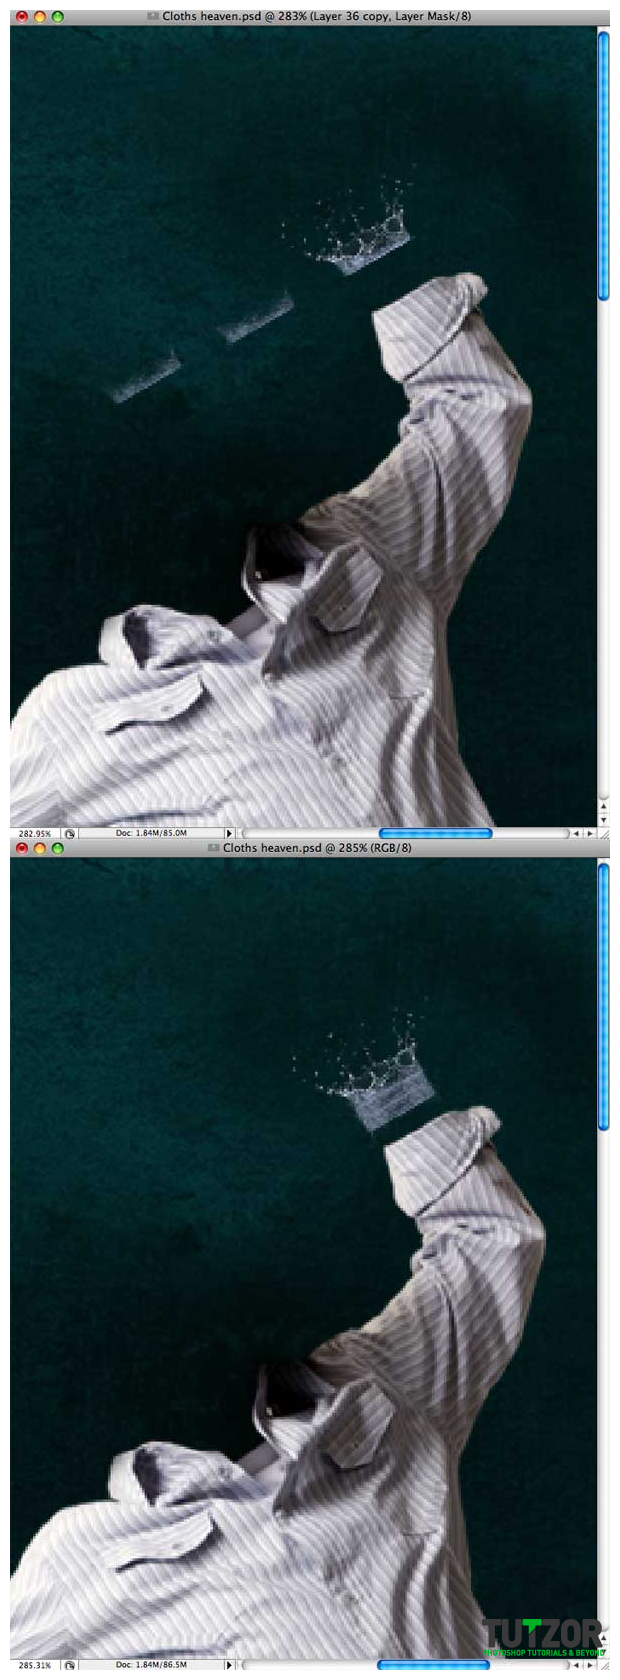
This looks real great… I know. But I would like to make it little bigger. Or long. To do this just duplicate the splash 2 time, and mask away the part that splits. Here is what I mean:

Step
14
 Cpotorac
Member since:
Aug 2010
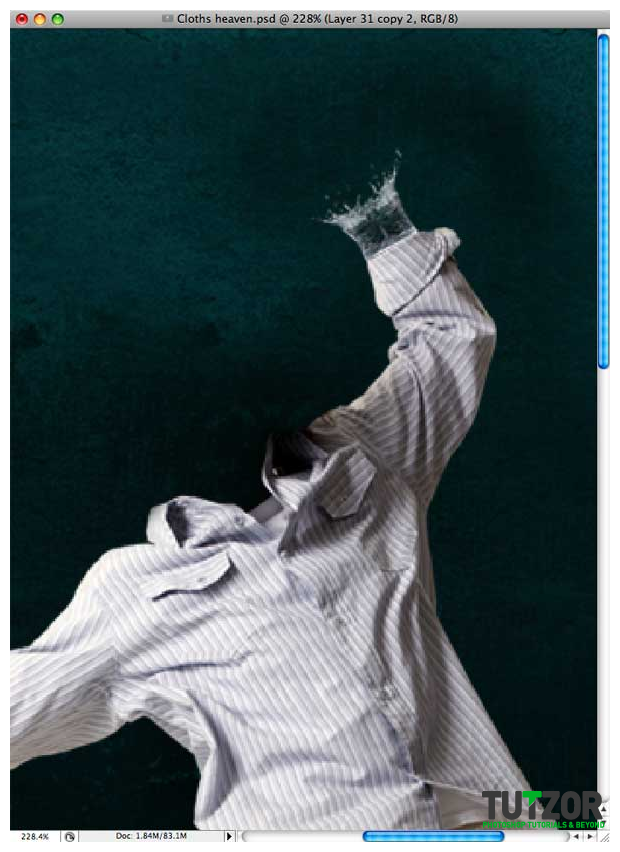
Next you can merge the layers together and try to get away that blue look of the water. To do this play with the settings of the Color Balance till you get it to look white and something like this:

Step
15
 Cpotorac
Member since:
Aug 2010
Now make the other hand. Same technique and same steps I used. You can use the same image but I thought I would use a different one and the lower part of the first one. Here is how I did this hand:


Step
16
 Cpotorac
Member since:
Aug 2010
It is time to make the bottom of the boy next. This time use a splashier water image. Also don’t use just one image. Use more. And again same technique.
You will also need to move these splashy images that you will create on top of the guy layer. They will not be over the shirt because you will carefully mask them till you get something like this:


Step
17
 Cpotorac
Member since:
Aug 2010
Next are the legs. Again use the same technique. I will show you images after each change. First is the left leg.


Step
18
 Cpotorac
Member since:
Aug 2010
Now the right leg. Use the same images as we used for the left leg.


Step
19
 Cpotorac
Member since:
Aug 2010
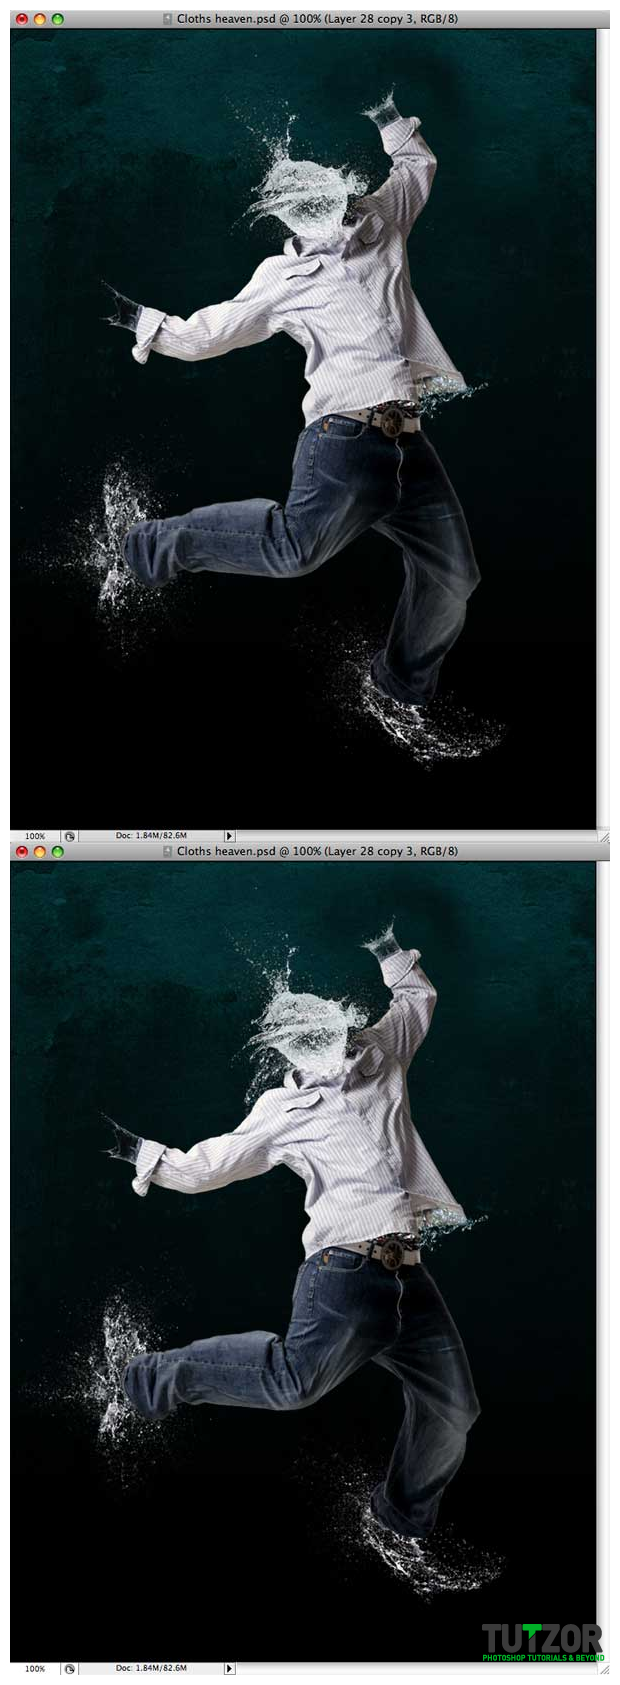
Next is the head. Remember that I only used water images. No effects or 3D stuff. Also the head is a simple image of a balloon getting blown with a dart.

Step
20
 Cpotorac
Member since:
Aug 2010
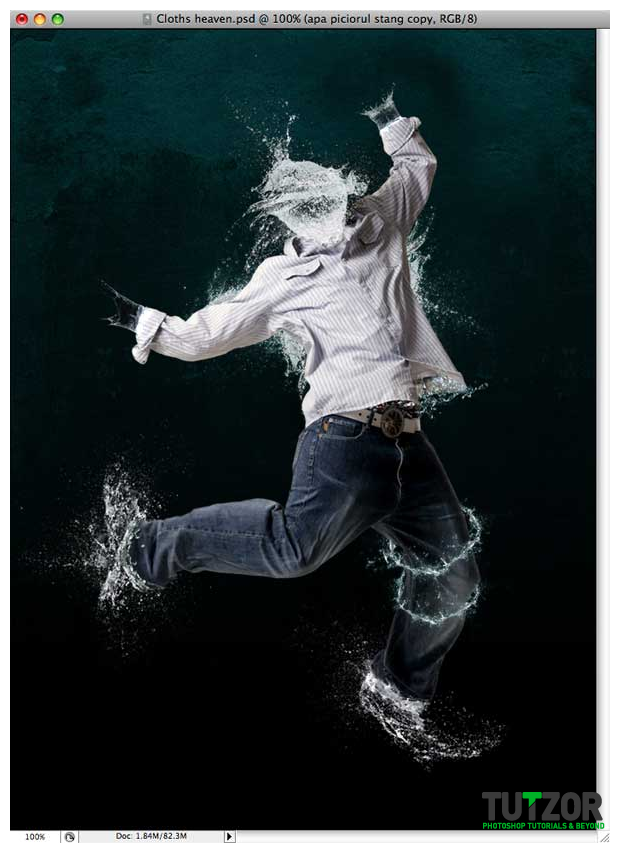
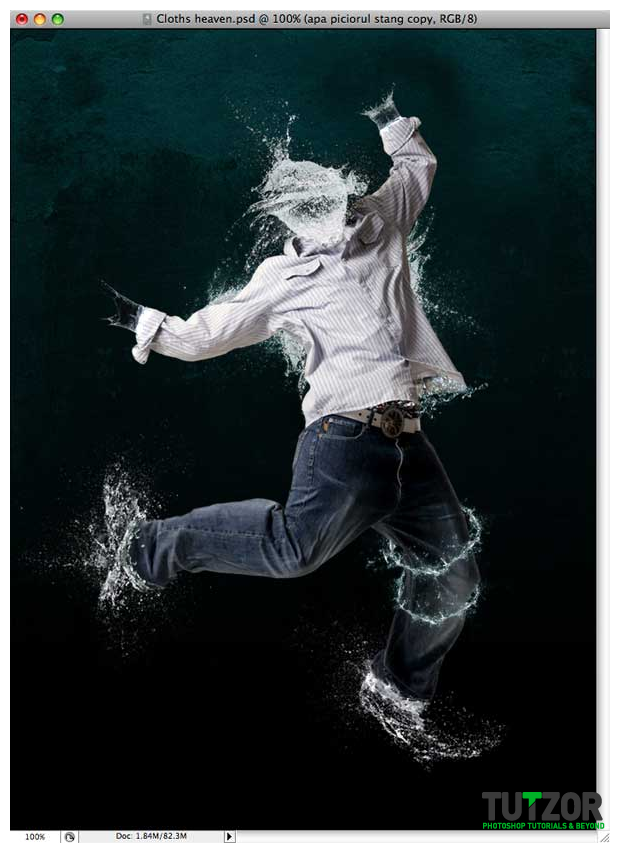
Congratulations. You managed to make this effect. Here is a bonus that will make this work look better. Just a few retouches and some more splashes behind the object you are trying to apply the effect to and we are done.







Comments
Re: Water effect photo montage
Certainly, certainly.
Re: Water effect photo montage
Thank you a lot for sharing this info with us all, it has really served me that's for sure"
[url=http://pontefreno.bugs3.com/la-desesperacion-por-encontrar-el-amor/]blogs person[/url]
Re: Water effect photo montage
Hi Cpotorac,
Could you please get in touch with me? I would like to explain a project that I'm in charge of, involving a global awareness campaign for aquatic conservation. Your image is very compelling, fun, and appropriate to one of the themes of the campaign, which is that humans are made of 98% water, and I would like to see if you might consider supporting the project by allowing this image to be used in a poster. You can email me at reidridgway@yahoo.com.
Warm Regards,
Reid
Re: Water effect photo montage
Excellent, I like your link and tutorial.
Re: Water effect photo montage
Of course! :)
Re: Water effect photo montage
Could it be alright that will put thing about this in my small personal weblog if I post a reference to this webpage?
Re: Water effect photo montage
i enjoyed to do this..... amazing
Re: Water effect photo montage
Hey there this one is aweesome, but i´ve got some problems to do that, is there maybe a video about that tutorial?? will be great!
thanks, Tronko
Re: Water effect photo montage
Wonderful work.
Re: Water effect photo montage
It is a great work and good idea. thank u so much .
Re: Water effect photo montage
i enjoy this tutorials bt it's little bit dificulty to do the same i thk you need to tell in more details how to make the background ( i see your website 1st time ) normally i am learning frm psdtuts.com bt you have also done a g8 job so pls tell in more details.
Re: Water effect photo montage
nice its awesome...
Re: Water effect photo montage
Simple et doux. Je pense commencer un autre blog ou cinq très bientôt, et je vais certainement considérer ce thème. Gardez-les venir!
Re: Water effect photo montage
My companion and I really enjoyed studying this weblog publish, I used to be simply itching to know do you trade featured posts? I am all the time looking for someone to make trades with and merely thought I would ask.
Re: Water effect photo montage
It's a good process.
Re: Water effect photo montage
That is great i got a lot of experienced about water effect. You are best on my side !
Thank for the best tutorial!
Re: Water effect photo montage
wouldnt it be easier to just take a snapshot of a dancing guy that is made of water, and all splashy? like frosty the snowman, but you prank him into going outside to play in the snow, only its like the first week of august...
sometimes you just cant reproduce those kodak moments.
Eight years in the web & digital media industries
I had fun watching this tutorial and I've learned something. This is very creatively done. Thank you so much for posting.
Is it can be more than excellent!?
Dude...Thank you for the way you explain it. Very well teach. I really learn A Lot! This kind of work is kind of work that only the Godlike can do.
Re: Water effect photo montage
Nice....tutorial..!!! Amazing______
Good evening
Fine article, especially the second paragraph :)
Subcribed to your rss
Re: Water effect photo montage
Marion, thnx for your support. Sorry, we can't send out our tutorials.
Re: Water effect photo montage
This is amazing - is it possible that you could kindly send this turorial to my email address.
Thanking you.
Re: Water effect photo montage
brilliant;) i am really very impressed by this tutorial. can u send ur great tutorial to my email?
thanx
Re: Water effect photo montage
brilliant;) i am really very impressed by this tutorial. can u send ur great tutorial to my email?
thanx
Re: Water effect photo montage
Thank you Ice! Even if it looks to be more complicated to add milk on skin like in photos of razooma web site...
Re: Water effect photo montage
To add www.razooma.net/projects/milk/ effect,
you can use this tutorial and use this brush,
http://www.tutzor.com/free-photoshop-goodies/liquid-splash-brush
Enjoy!
Re: Water effect photo montage
Very cool!! Thanks ....I would like to know how to add a milk splash effect on face or body like this: www.razooma.net/projects/milk/
Re: Water effect photo montage
thats great..this is my favourite website..keep posting like this,i like it..i have some tutorials in photoshop too...in http://okmantap.comRe: Water effect photo montage
Awesome It's very realy greats job. so interesting with this technic.Thanks agains!