Simple light effect to your everyday photo
11
May'11
 sunrise20
Member since:
Mar 2011
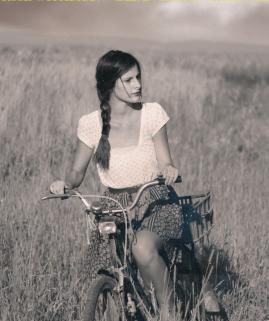
In this tutorial, I will show you how to take an ordinary image and to transform it into a beautiful, bright, elegant photo. We will work with the colors and add our own pieces to really enhance the look and feel. With that said, lets get started!
Final Image
Step
26
 sunrise20
Member since:
Mar 2011
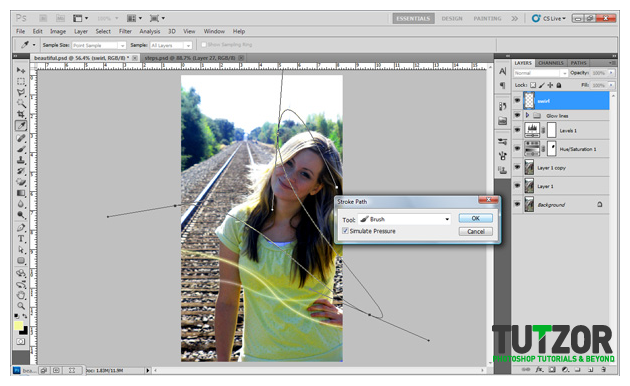
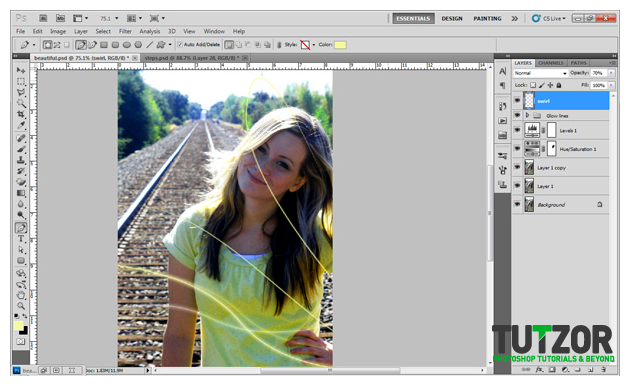
With your pen tool still selected, right click on the line and choose "Stroke path..." and choose the "Brush" as your tool and make sure your "Simulate Pressure" box is checked. Then press "Ok". Hit "ESC" twice on windows to hide your path to see your results and then drop your opacity down to.


Step
27
 sunrise20
Member since:
Mar 2011
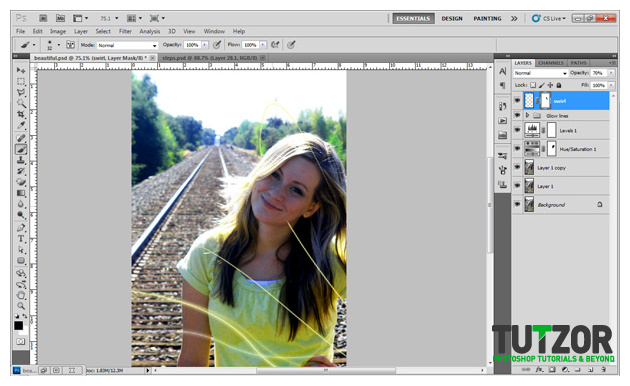
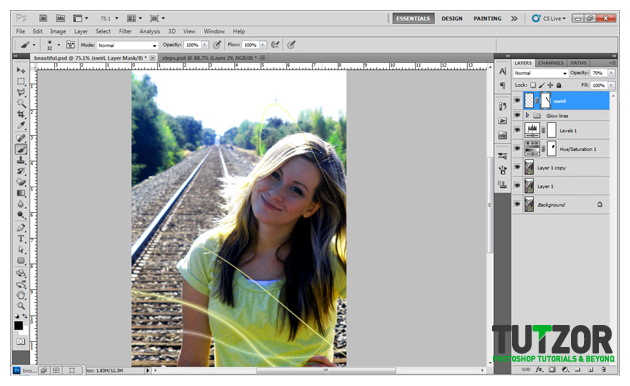
Now let’s hide the line that hides that beautiful face. To do this we are going to use the masking method again. On the "swirl" layer, add a mask layer by either going to Layer>Layer Mask> Reveal all or by pressing the circle inside the square at the bottom of the layers palette. Then choose your brush tool and set the size to about 32px and with the foreground color set to black, start to brush over her face and any area that should be behind her. Refer to my image as a guide.


Step
28
 sunrise20
Member since:
Mar 2011
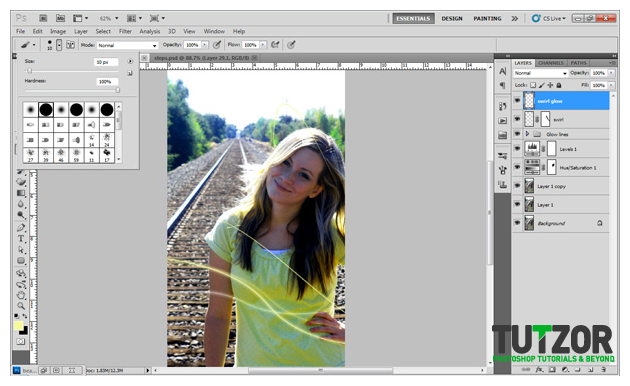
Now let’s create a new layer and call this "Swirl glow" and set your brush size to 10px with the hardness at 100%. (Make sure your brush is the brush that goes from thin to thick to thin.)

Step
29
 sunrise20
Member since:
Mar 2011
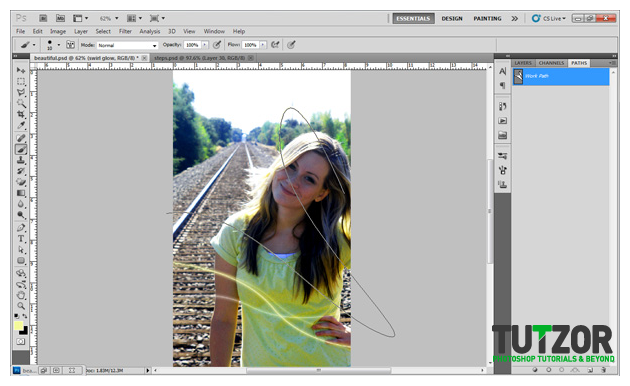
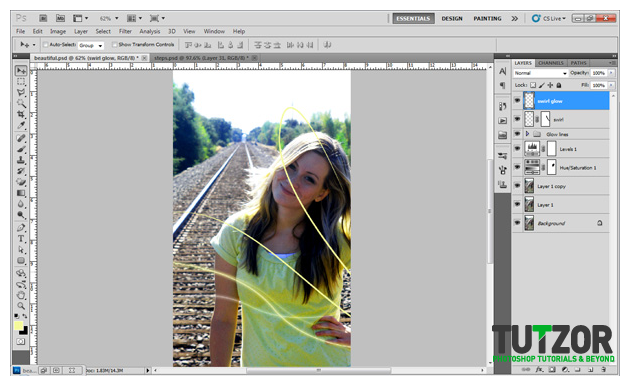
Select your path that we made previously by going to the paths palette like we did before and click on the path. Then go back to your layers palette and while on the "Swirl glow" layer, right click>Stoke Path>select the brush as your tool and make sure the pressure box is checked>Ok. Hide your path and make sure you have a path similar to mine.


Step
30
 sunrise20
Member since:
Mar 2011
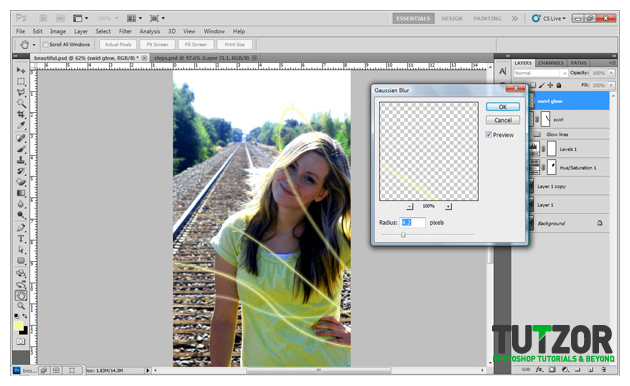
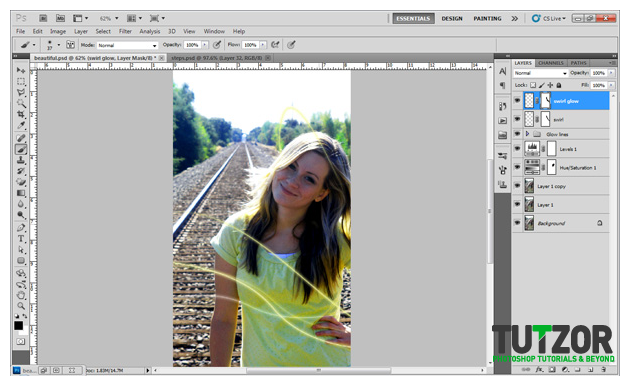
Next we are going to blur this layer by going to the top menu and going to Filter>Blur>Gaussian Blur and setting the radius to about 4.2 and press ok.

Step
31
 sunrise20
Member since:
Mar 2011
Then mask this layer and hide the unwanted glow across her face.

Step
32
 sunrise20
Member since:
Mar 2011
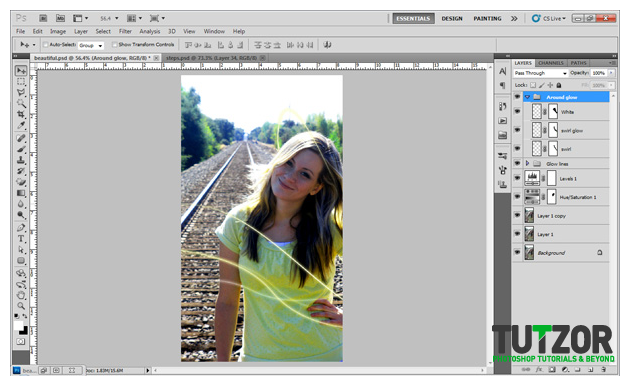
Create a new layer and name this layer "white" and select your path again and do the same process by stroking it but this time set your brush size to 2px and set your foreground to #ffffff. Then you should have something like this. This will make your line brighter. Then group these layers and name it "around glow".

Step
33
 sunrise20
Member since:
Mar 2011
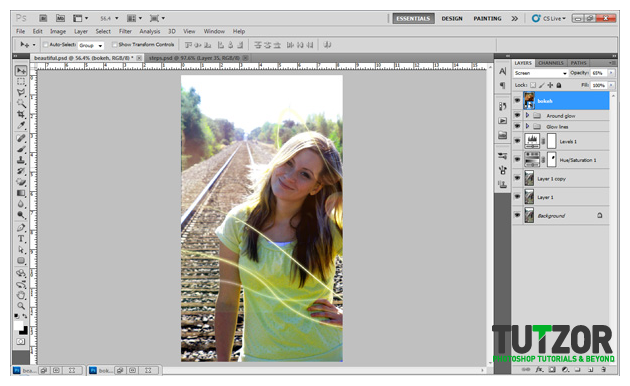
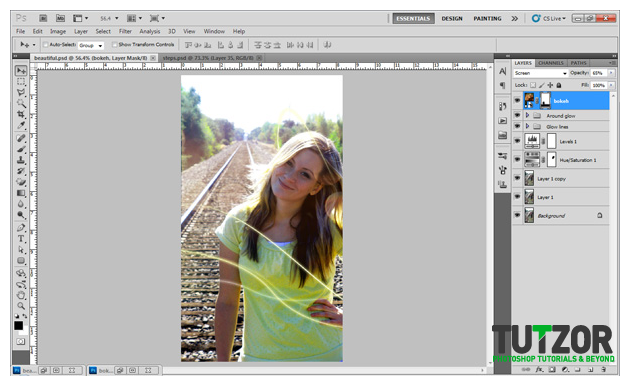
Ok now the hard part is done. We have a few more steps to go. Next let’s add a bokeh light effect. to do this, place the "bokeh.jpg" image on your canvas and place it where you think would look best. Change the blending mode to "Screen" and drop the opacity to 65% to make the effect come to life! Then use the masking method to hide any unwanted parts. Refer to my image a reference.


Step
34
 sunrise20
Member since:
Mar 2011
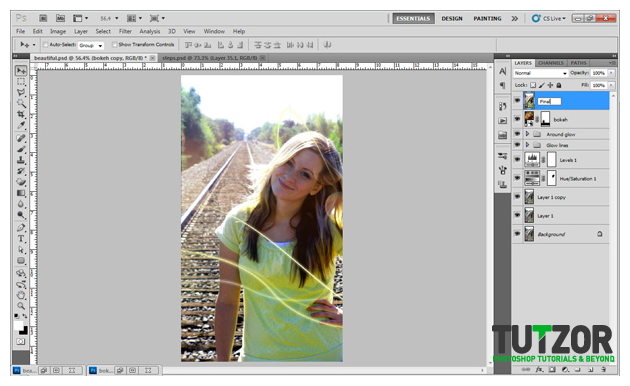
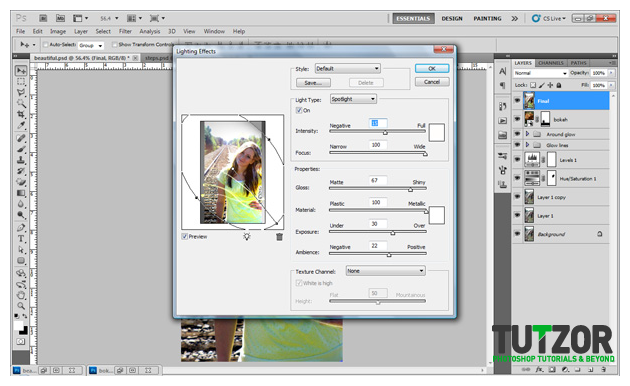
For the last step, let’s add a lighting effect to make the image flow smoothly. Select all of your layers and then duplicate them by going to the top menu and going to Layer>Duplicate Layers. Then press "Ok". After this, DO NOT deselect your duplicated layers and go to the top menu again and go to Layer>Merge Layers to make them all one layer. Then name this layer "Final".

Step
35
 sunrise20
Member since:
Mar 2011
Then go to the top menu and go to Filter>Render>Lighting Effects and put the numbers Similar to mine to get the same effect. You can play around with it a bit to make it your own cool effect.

Step
36
 sunrise20
Member since:
Mar 2011
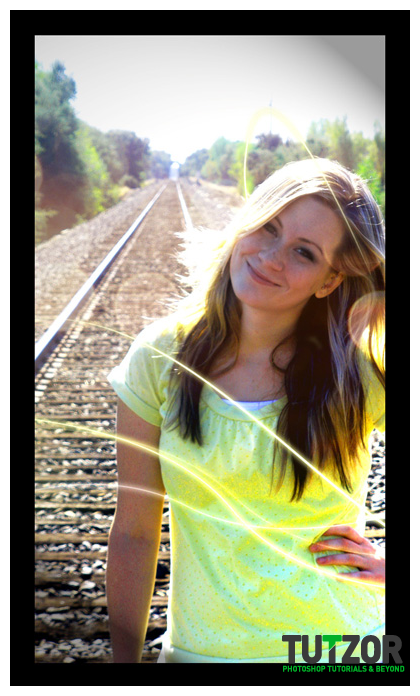
And there you have it, a beautiful girl with glow effects and bokeh lights that really bring her to life! Thanks for viewing my tutorial.






Comments
Re: Simple light effect to your everyday photo
Nice tip! You can add effects to your photos at http://www.addeffects.net without installed software