Grunge Text
05
Apr'11
 sunrise20
Member since:
Mar 2011
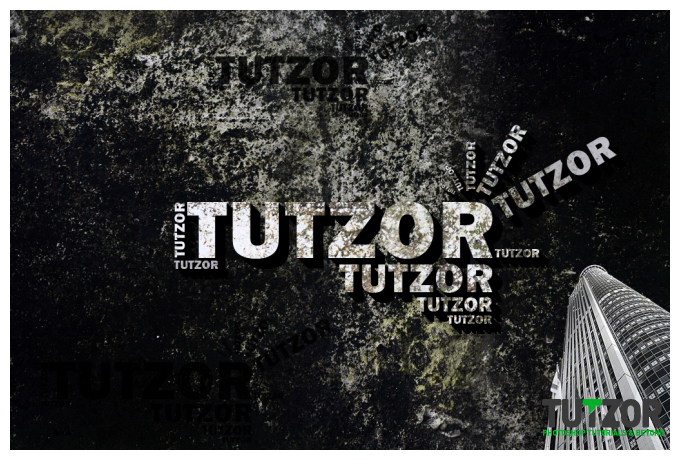
This tutorial will show you how to take simple text to the next level. We will be using one text layer and duplicating this layer to make more text layers and using a grungy wall for all of our grunge texture. Enhance your text effects with these simple steps and ideas.
Go to the following URL link to download the image we will use towards the end of the tutorial or you may use your own:
Building: http://www.redbubble.com/people/miketv/art/5036806-2-chrysler-building-o...
Final Image
Step
01
 sunrise20
Member since:
Mar 2011
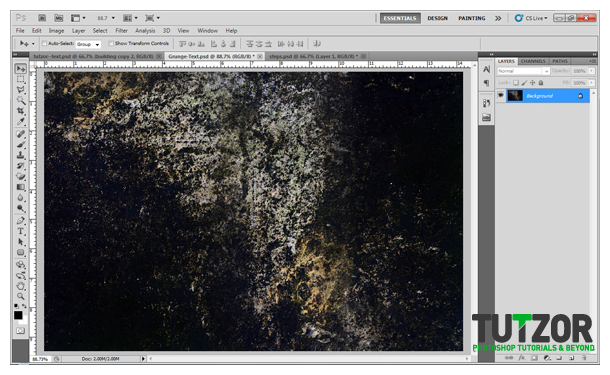
Open up our Dirty Wall image in Photoshop.

Step
02
 sunrise20
Member since:
Mar 2011
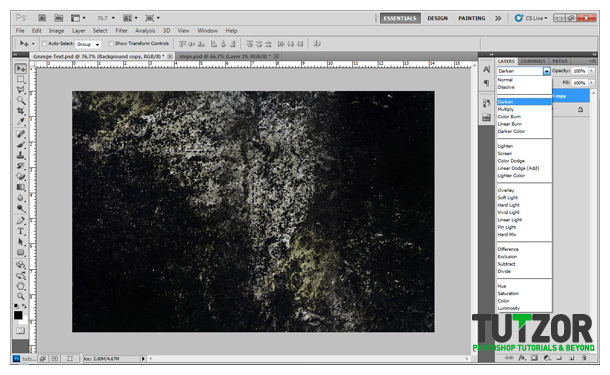
Duplicate the background image by going to layer>Duplicate Layer and change the blend mode to “Darken”.

Step
03
 sunrise20
Member since:
Mar 2011
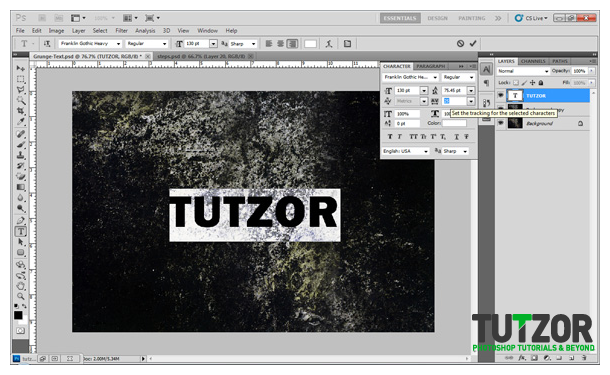
Next, let’s begin adding our text. With our foreground color set to white, I am going to use the font type "Franklin Gothic Heavy" at 130pt to make the name "TUTZOR" which is the name of this awesome site. I am also going to set the tracking for my letters to +25. You can do this by opening the "Character's" window in Window>Character.

Step
04
 sunrise20
Member since:
Mar 2011
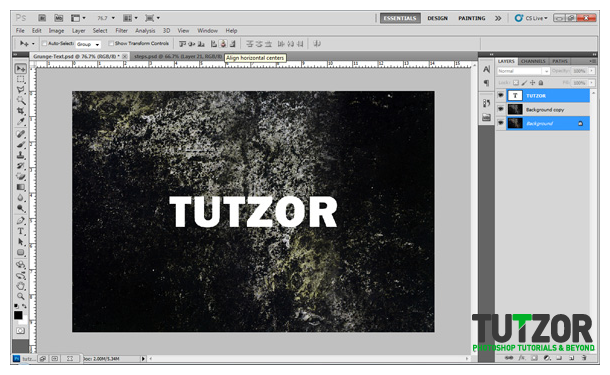
To center our text, select the background and our text layer making sure the move tool is active and pressing the "align vertical centers" and "align horizontal centers" which is located at the top, below the menu.

Step
05
 sunrise20
Member since:
Mar 2011
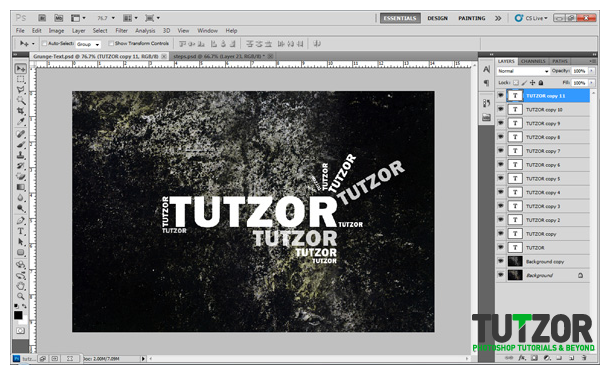
In this next step you will be duplicating your text layer and placing, rotating and sizing it to your liking. Duplicate your text layer by having your text layer selected and go to Layer>New>Layer via Copy or by pressing CTRL+J on Windows. Refer to my image to see what I did.


Step
06
 sunrise20
Member since:
Mar 2011
Then I am going to bring down the opacity of a few layers by selecting each layer I want and you can either enter in a percentage or use the slider. The opacity option is located at the top of the layers palette just above the "Fill" section.

Step
07
 sunrise20
Member since:
Mar 2011
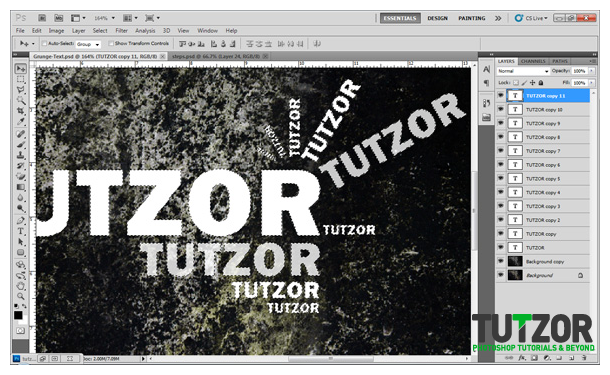
In this step I want to make a selection of each text. To do this on Windows, press and hold ctrl+shift and click on the "T" in the layers palette for each text layer.

Step
08
 sunrise20
Member since:
Mar 2011
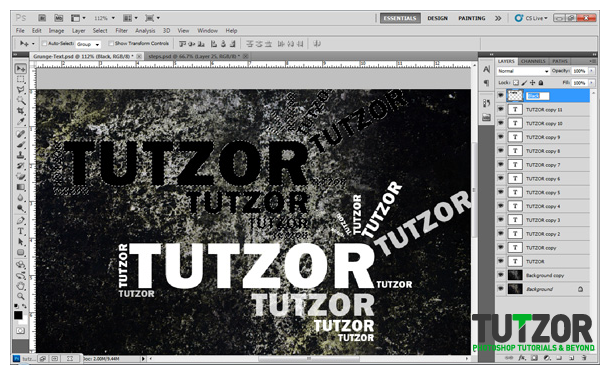
Once you have your selection make a new layer above your text layers, name this layer "Black" and fill this with black. Use the move tool and move your layer from its current location so that you can see your changes in the next step.

Step
09
 sunrise20
Member since:
Mar 2011
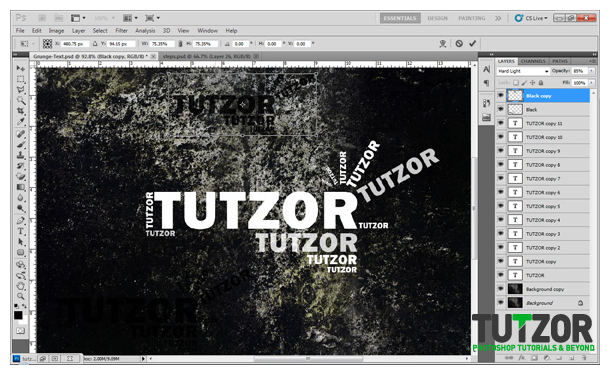
Deselect your selection by pressing ctrl+D or by going to the menu and going to Select>Deselect. Change the blend mode to "Soft Light", drop the opacity to 85% and place it where you would like it and shrink it. Duplicate this layer and put this where you would like it and shrink this layer even smaller.

Step
10
 sunrise20
Member since:
Mar 2011
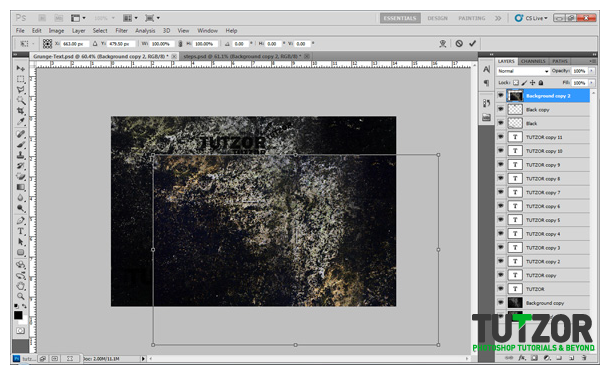
Next we are going to duplicate the background layer and place it above all of the layers. Then move your background image kind of similar to I did.

Step
11
 sunrise20
Member since:
Mar 2011
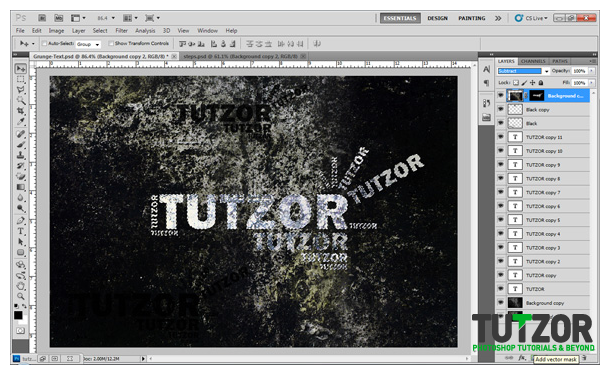
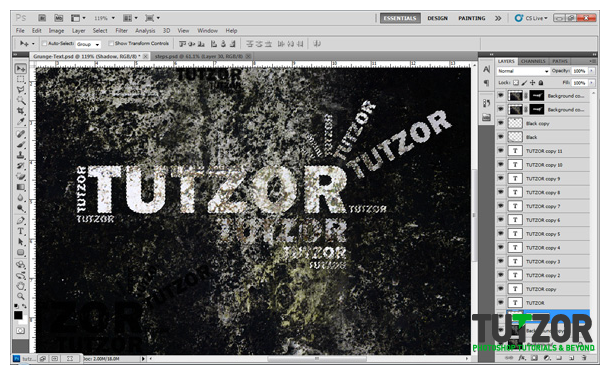
Change the layer mode of our new dirty wall image to "Subtract" and make a selection of all of your white text again. When you have all of your white text selected, with your dirty wall image active, press the "Mask" icon at the bottom of the layers palette or go to Layer>Layer Mask>Reveal Selection to have our dirty wall image only cover our white text. You should end up with what I have below.

Step
12
 sunrise20
Member since:
Mar 2011
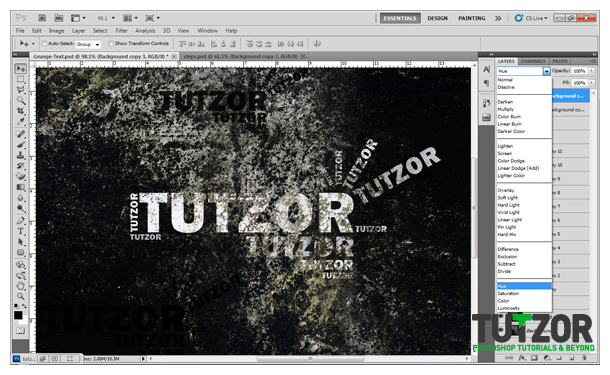
Then duplicate our top mask layer and change the blend mode to “Hue”.

Step
13
 sunrise20
Member since:
Mar 2011
Lets add a 3D effect. To do this we are going to make a selection of our white text by holding the ctrl key on Windows and selecting the "Mask" selection on the “background copy 2” layer. Once you have your selection, create a new layer above your background layer, name this layer “Shadow” and fill in your selection with black. You will not be able to see your black selection because it is behind all the layers. Deselect your selection.

Step
14
 sunrise20
Member since:
Mar 2011
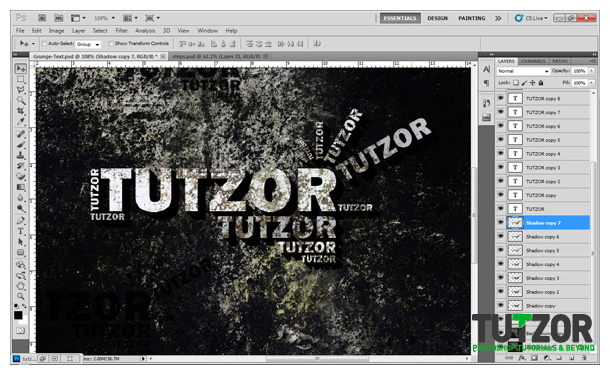
On your 3D layer, press the arrow key down 2 times and to the right 2 times. Duplicate this layer and repeat the same process until you have a good looking 3D effect. Refer to my image to see my results.

Step
15
 sunrise20
Member since:
Mar 2011
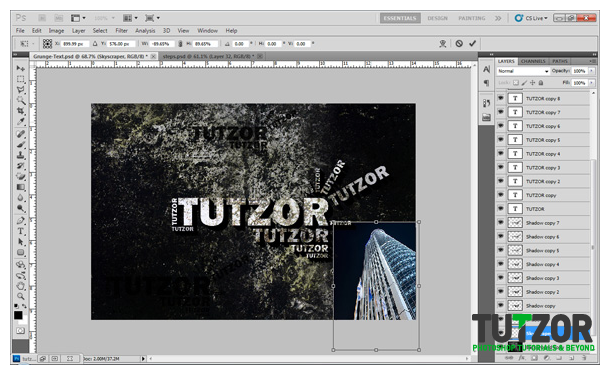
For the last step, let’s add a building to our image. Go to http://www.dreamstime.com/skyscraper-image10259245 to get the building. You will have to purchase this image if you would like to use it or you may use your own. Place the building image on our canvas by going to File>Place and rotate it horizontally.

Step
16
 sunrise20
Member since:
Mar 2011
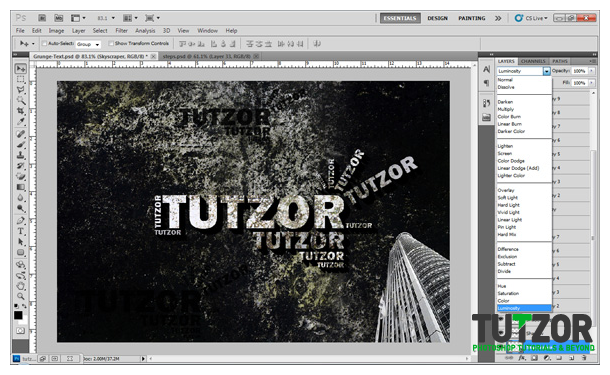
Change the blending mode to “Luminosity” and place this image on the bottom right corner of the canvas. You will then have to delete the sky out of our image by selecting the magic wand tool, selecting the sky and deleting it. And Wa La! A nice grungy text effect.



Comments
Re: Grunge Text
ye , thx, good job.
Re: Grunge Text
Awesome work . really love it its great tutorial ..... thanks for help