Creating a moonlit night scene - PART 1
19
Sep'10
Member since:
Sep 2010
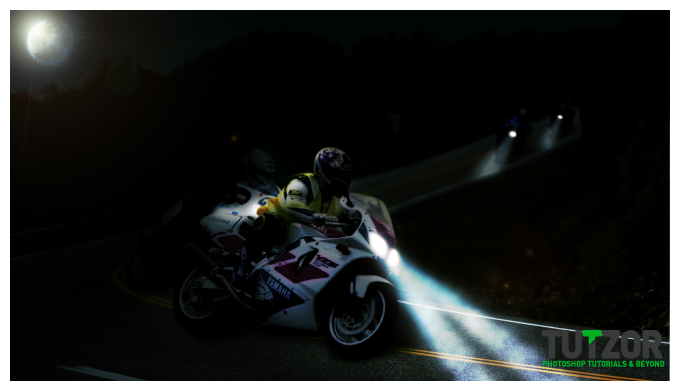
Hi there, today I'm going to show you guys how to create a moonlit night effect.
Here are the following images I used:
- Road - http://www.sxc.hu/browse.phtml?f=download&id=1257037
- Sky - http://www.flickr.com/photos/krossbow/4589329062/sizes/o/in/photostream/
- 1st biker - http://www.flickr.com/photos/mdpettitt/2667856867/sizes/o/in/photostream/
- 2nd biker - http://www.flickr.com/photos/34094515@N00/4492751894/sizes/o/in/photostream/
- 3rd & 4th biker - http://www.flickr.com/photos/f650biker/4950298973/
I was inspired by this tutorial:
http://psd.tutsplus.com/tutorials/photo-effects-tutorials/create-a-moonlit-night-scene-in-photoshop/
Final Image
Step
01
Member since:
Sep 2010
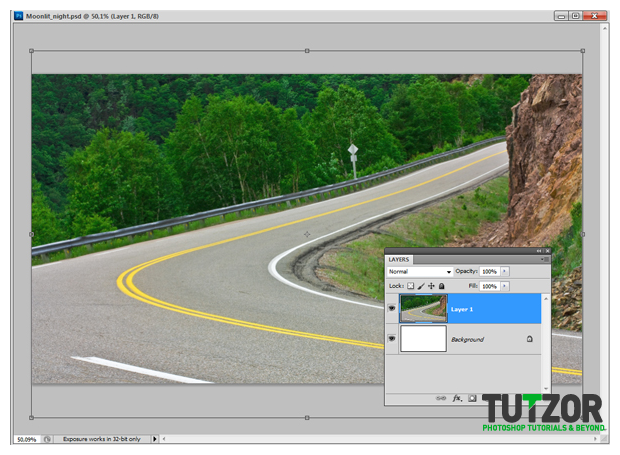
Let’s start by creating a new document 1920X1080 (standard resolution for full HD ). Paste our road image in the document and resize it to fit the canvas (CTRL+T) then rename the layer Road

Step
02
Member since:
Sep 2010
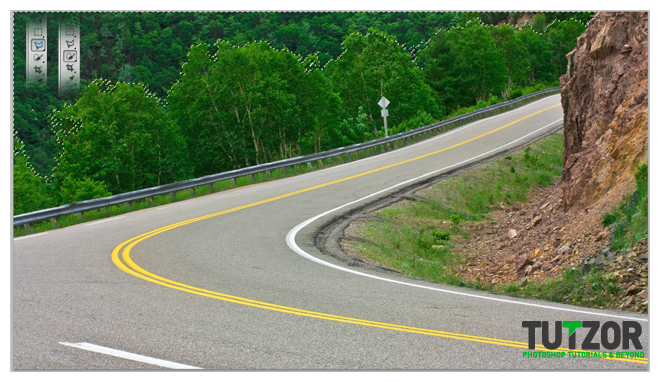
Because we need to have a sky in this image, start by selecting some of the forest behind the closest trees. You can use what method you want for that, I used magic wand and quick selection tool. Hit Delete after your selection is done.

Step
03
Member since:
Sep 2010
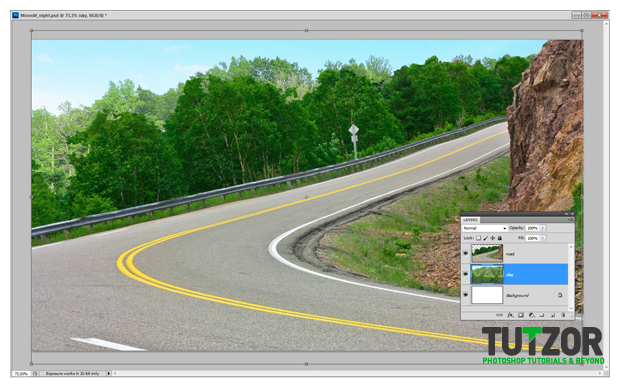
Open the image with the sky and forest and paste it in our document. Rename the layer “sky” and put it under the road layer. Now hit CTRL+T to transform it. Flip the sky image horizontal so the part with less trees will be on the left. Scale the image as I did and put it in so manner that the trees from the road image will become part of the ones in the sky image.

Step
04
Member since:
Sep 2010
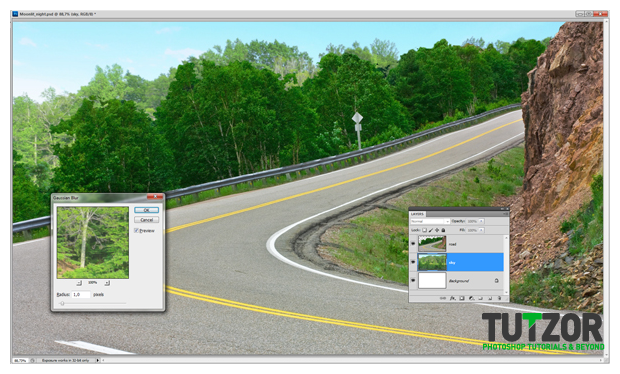
With the new layer selected go to Filter > Blur > Gaussian Blur and set the radius to 1 px, then duplicate the layer and set the blending mode to Multiply, now merge the layers (select the 2 layers, hit right click and select merge layers from the dropdown menu)

Step
05
Member since:
Sep 2010
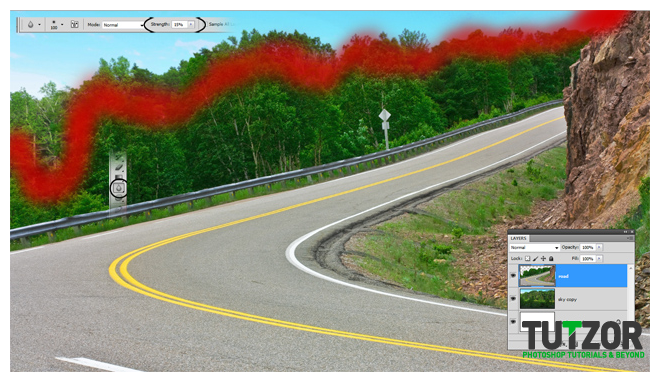
By duplicating the sky layer and multiply it we obtain the same color with the trees from the road image. Now we need to blur a bit the trees from the road layer. Select your blur tool, with a soft rounded brush with 100 px size. Set your strength to 15% and blur the edges of the trees in the area I marked for you. You can create a group now and name it background, then move the sky and the road layers there.

Step
06
Member since:
Sep 2010
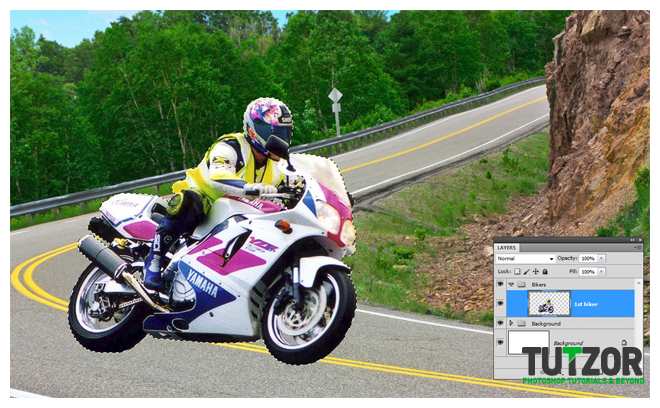
Let’s open the images with our bikers now. Create a group named bikers in our document. Select our first biker using polygonal lasso tool (for a perfect cut) or the pen tool. (I’m a fan of the polygonal lasso tool so that’s what I’m using). After you’ve done the selection, cut it and paste it in our document and rename the layer “1st biker”

Step
07
Member since:
Sep 2010
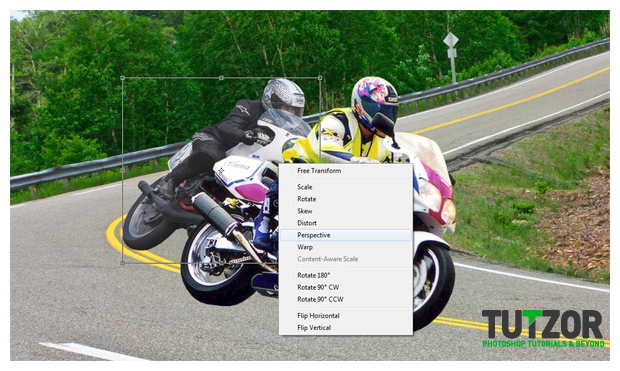
First we’ll bring all the bikers in the scene then we are going to resize them and fix the perspective. Now open the image with the 2nd biker and repeat the same steps from above, rename the layer “2nd biker” and make sure this layer is under the 1st biker. Then you can resize the bikers and fix the perspective just a bit (CTRL+T > right click and from the drop menu select perspective or scale, make sure the proportions are right) you should get something like I did.

Step
08
Member since:
Sep 2010
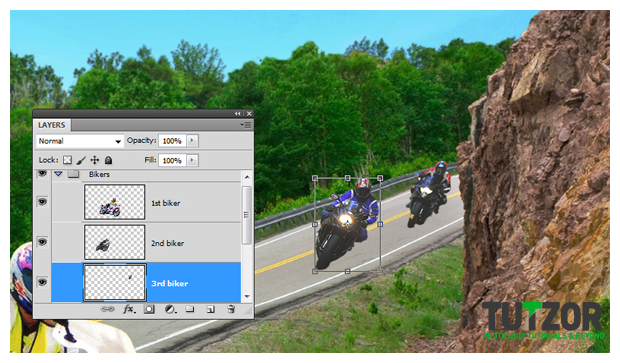
I think we need to make this race real, so add some other small bikers on the back of the road, down the hill. Open the 3rd image with the bikers and cut them out from there in separated layers and paste them into our document. Rename the layers “3rd biker” and “4th biker” and resize them as I did, also you can play just a bit with the perspective.

Step
09
Member since:
Sep 2010
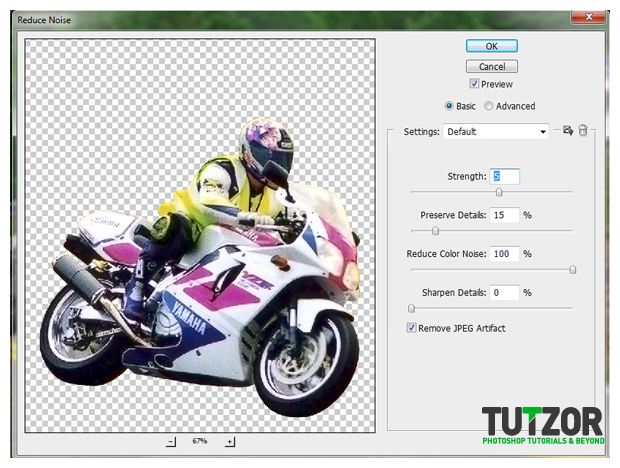
Let’s start retouching the bikers. We’ll start with the 1st one. This image has to much noise and we need to remove some. Let’s try this, go to Filter > noise > reduce noise and set this values: Strength 5 Preserve details 15%, reduce color noise 100%, Sharpen details 0% and check the remove JPEG artifact box.

Step
10
Member since:
Sep 2010
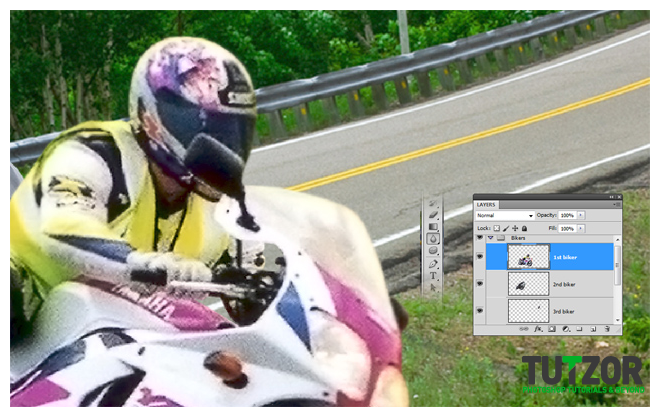
This first biker is the most important so we need to make him look very real. We need to blur the edges a bit but the Gaussian blur will do no good, so select your blur tool. Set the strength to 15% and using a soft rounded brush, blur the edges of the biker.

Step
11
Member since:
Sep 2010
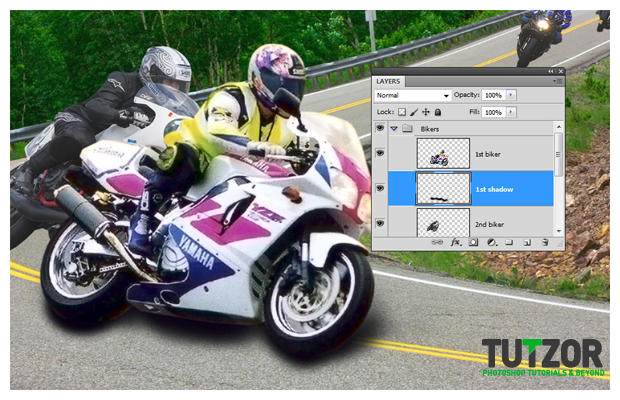
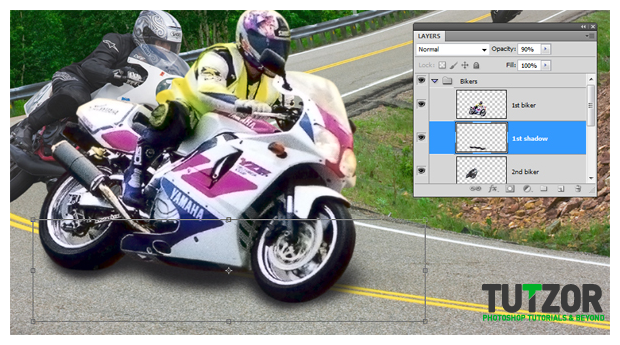
Now for the shadow, add a new layer under the 1st biker layer and name it 1st shadow. Paint using a soft rounded brush as I did.

Step
12
Member since:
Sep 2010
Go to Filter > Blur > Gaussian blur and set the radius 7 for the shadow. Scale it like I did (CTRL + T) and then set the opacity to 90%

Step
13
Member since:
Sep 2010
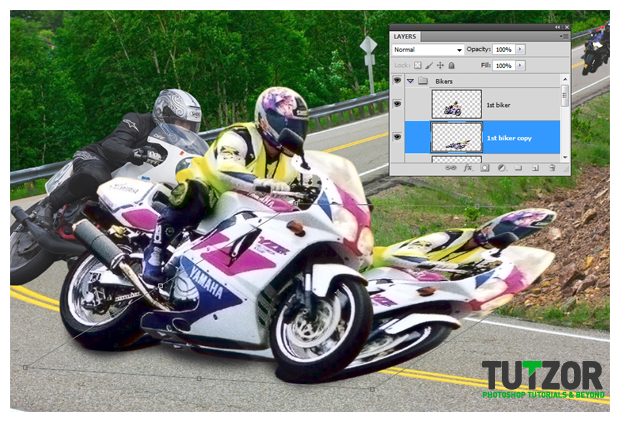
Duplicate the 1st biker layer and move it under the original. Then hit CTRL + T and using perspective and scale try to transform the layer like I did. After this hit CTRL + U or go to Hue/and saturation and set the lightness to 0.

Step
14
Member since:
Sep 2010
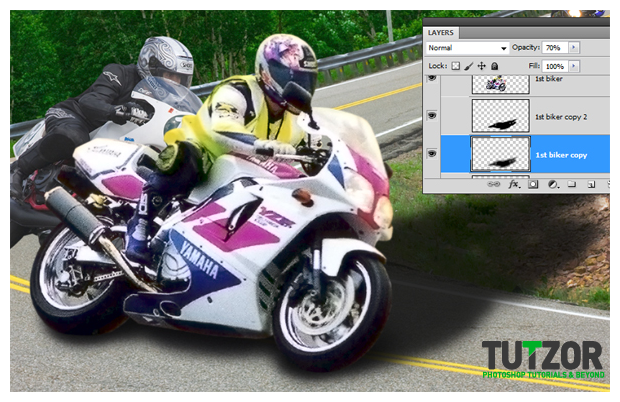
Duplicate the new layer. We’re going to add Gaussian blur for each one but with different values. For the first go to filter > blur > Gaussian blur and set the radius to 9 and for the second one set the radius to 20. Set both layers to 70% opacity.

Step
15
Member since:
Sep 2010
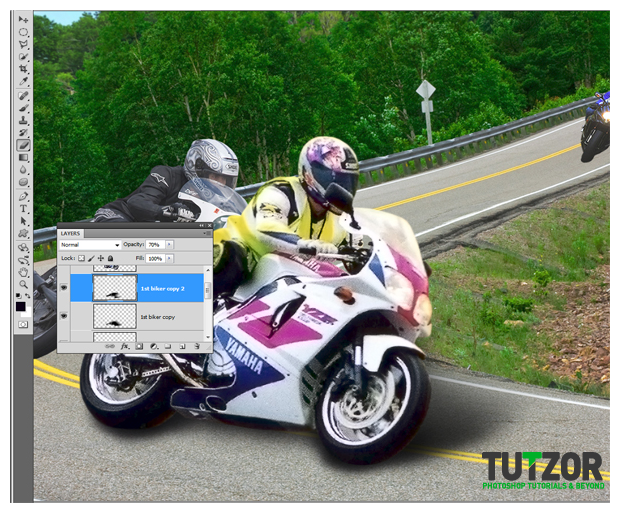
Now pick your eraser and for the both layers erase like I did. (use a soft rounded brush with different opacity and sizes).

Step
16
Member since:
Sep 2010
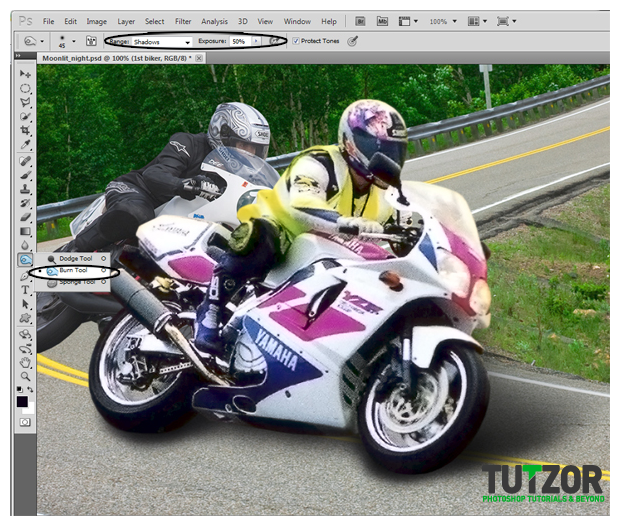
If you see, we have some glowing edges on the biker in the dark zones. We need to remove those by selecting the burn tool. Set the range to shadows and the exposure to 50% then paint over the glowing edges like I did.

Step
17
Member since:
Sep 2010
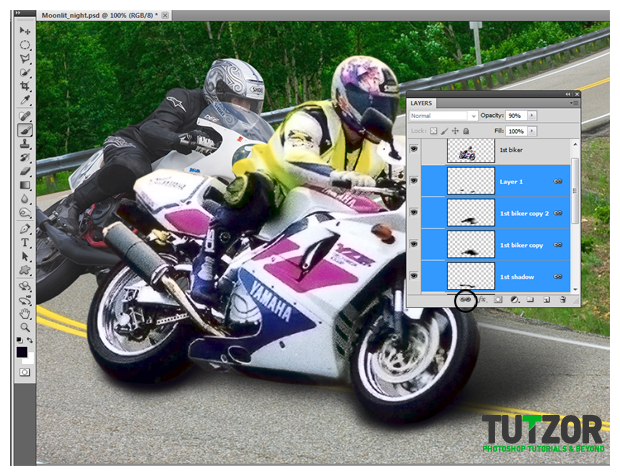
Only one step and we’re going to have a very real shadow. Make a new layer under the 1st biker layer and paint a bit under the wheels and go to Filter > blur > Gaussian blur and set the radius to 2px then the opacity to 90%. Now you can select all the shadow layers and link them.

Step
18
Member since:
Sep 2010
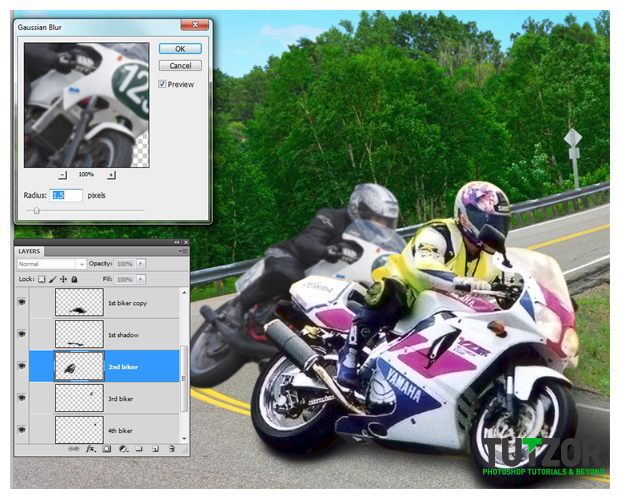
Let’s go to the second biker. We’ll start by blurring him a bit. Go to Gaussian blur and set the radius to 1,5 px.

Step
19
Member since:
Sep 2010
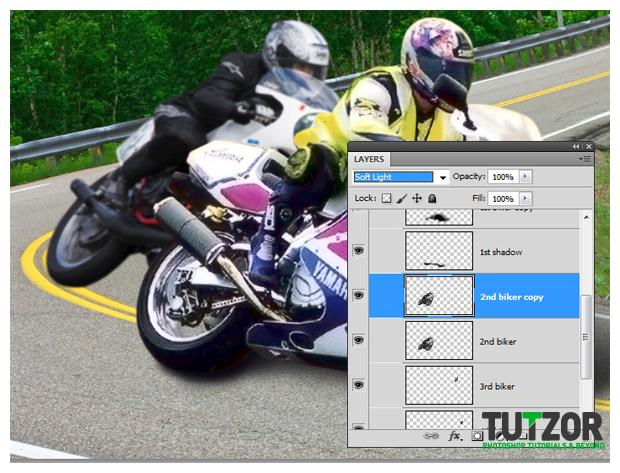
Duplicate the 2nd biker layer and set the blending mode to soft light so the colors will match with the first biker. You can merge the 2 layers now.

Step
20
Member since:
Sep 2010
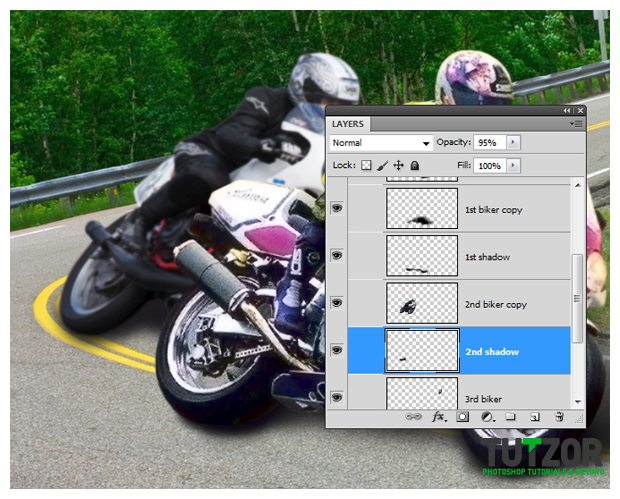
Make a new layer “2nd shadow” under the 2nd biker and paint like I did, then go to Gaussian blur and set the radius to 7 and the opacity to 95%

Step
21
Member since:
Sep 2010
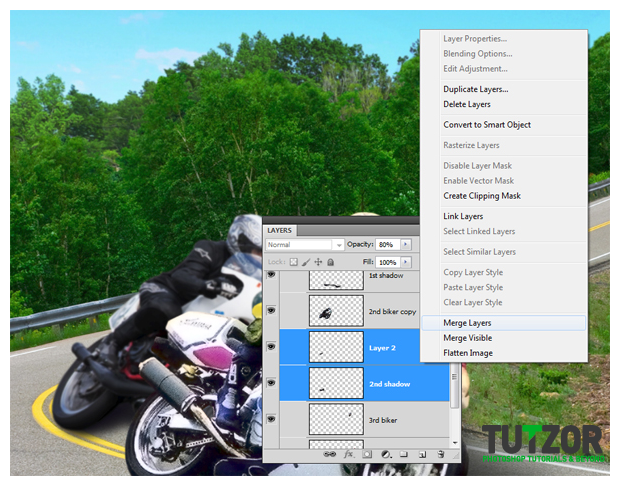
Create another new layer and paint just a bit under the wheel then set the opacity to 80% (this one doesn’t need Gaussian blur if you used a soft brush). Merge the 2 shadow layers.

Step
22
Member since:
Sep 2010
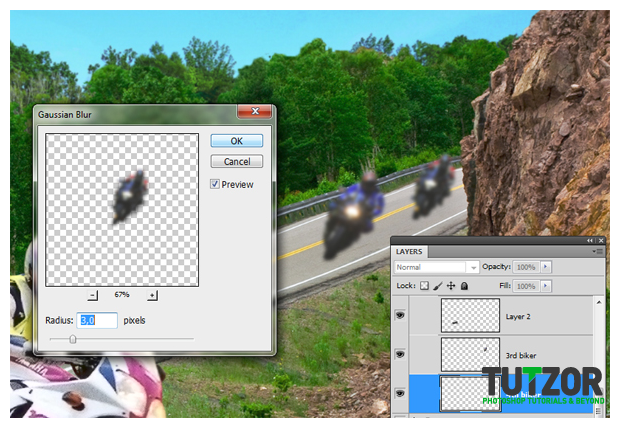
You will do the same steps now for the other 2 bikers. This 2 are small so the details are not important. Start by adding Gaussian blur to each one, a radius of 3 is enough ( don’t worry the background will be blurred as well). Duplicate the 2 layers and set them to soft light and merge them (the same step from the 2nd biker)

Step
23
Member since:
Sep 2010
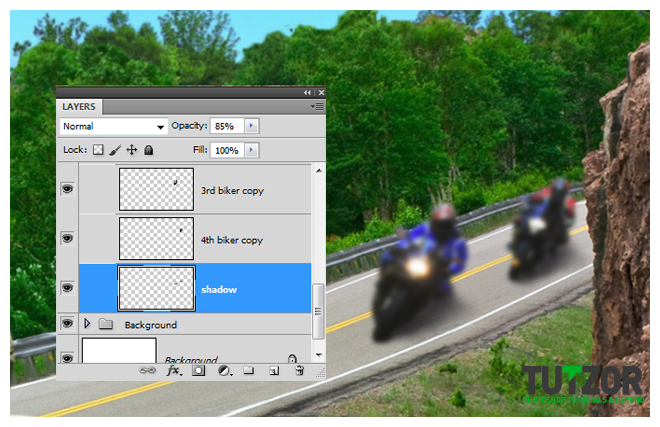
Make a new layer under the 2 layers, name it Shadow and paint like me, then Gaussian blur and the opacity to 85% (same steps like before). You should get my result.

Step
24
Member since:
Sep 2010
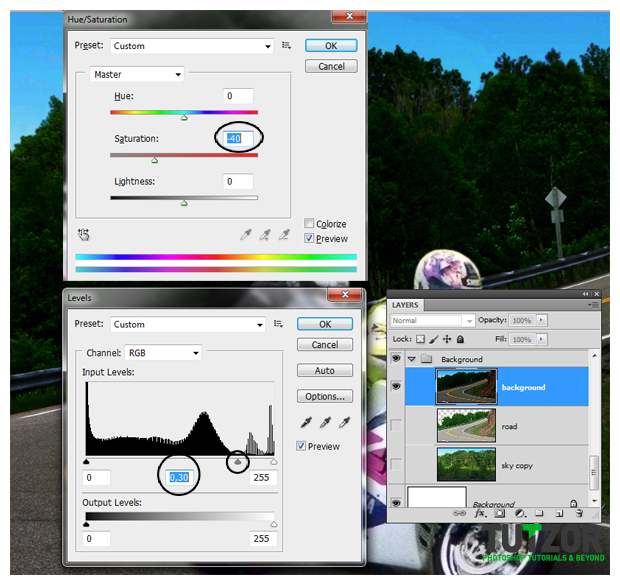
Go back to the background group and merge the 2 layers together (you can duplicate them to have a copy if something goes wrong), rename the layer Background and go to image > adjustments > levels or just press CTRL+L and set my values: set the middle arrow to 0,30. Now go tu Hue/Saturation (press CTRL+U) and set the saturation to -40

Step
25
Member since:
Sep 2010
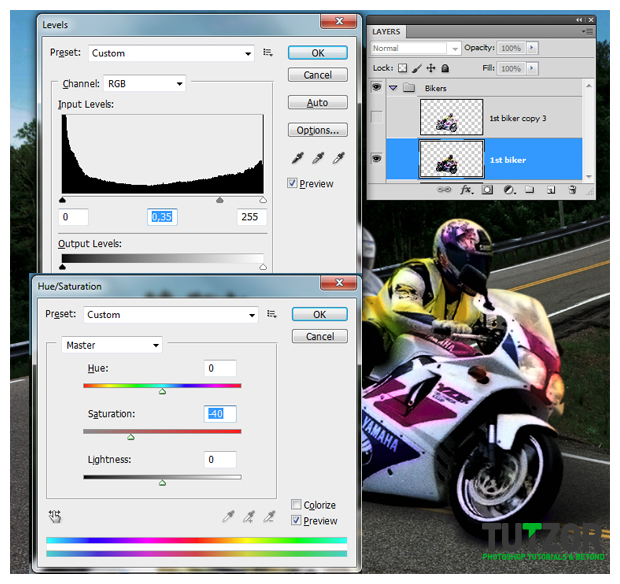
Now we’re going to make the bikers darker to. Start by selecting the 1st biker (duplicate in case something goes wrong), open the levels panel CTRL+L and move the middle arrow to 0,35 and then the saturation to -40 (CTRL+U)




Comments
Re: Creating a moonlit night scene - PART 1
This will come in hand next July when my husbands MC does their "Bark At The Moon" run. Thanks!
Debra Asencio
http://youbetterasksomebodygd.carbonmade.com
Cool tutorial
Thanks for the detailed tutorial, i could use the light trick on my next project.