Light Beam text effect !
02
Oct'10
Member since:
Sep 2010
Step
01
Member since:
Sep 2010
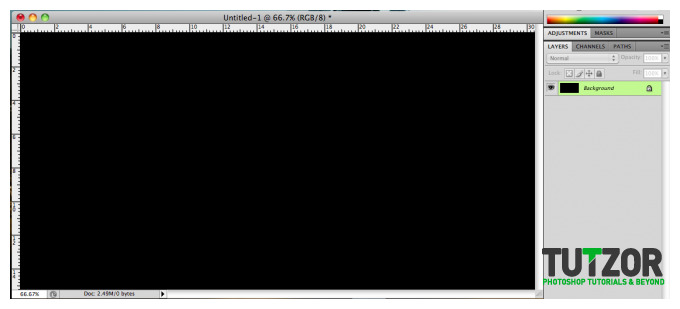
In this tutorial I used wide background. Click File then New to create a new RGB document that’s 12x6 inches. (size is up to you) at 100 ppi, then click OK. Press D then press Option + Delete (Mac) or in PC, ( Alt + Backspace).

Step
02
Member since:
Sep 2010
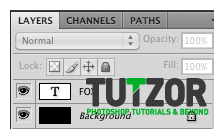
Now click the Type tool (T) and use Arial Black at around 190-200px and press the X key to set the text color to White. Type any word you want, I used FOX in this tut and place it top right (like the image).



Step
03
Member since:
Sep 2010
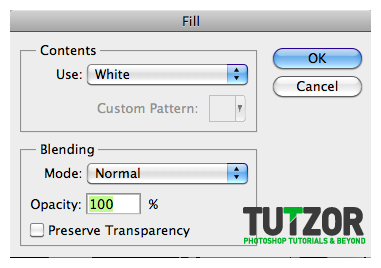
Press Command and click on the text layer’s thumbnail icon (the T thumbnail) in layers panel to load the shape of the letters as a selection. While the selection is on, Create New Layer (Layer 1),then Select then Modify then Border. In the Border selection dialog, choose White from the Use menu > Click OK to fill the selection with white color. In the Layers panel, click and drag the layer 1 down to reposition it below the text layer. Now change the Blending option from Normal to Dissolve to give a speckled effect.




Step
04
Member since:
Sep 2010
Then press Command + D to deselect the selection. Then select the text layer then press Command + Delete (PC : Ctrl + Backspace) to change it’s color to black.


Step
05
Member since:
Sep 2010
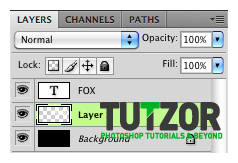
Create a new layer now (layer 2) and place it under the Layer 1. So the top is Text then Layer 1 then Layer 2 then Background as the bottom one. Select the Layer 1 and press Command + E (PC : Ctrl+E) to merge down(layer 2). This will retain the dissolve effect and put the layer back in Normal Blend Mode. (the image is the layer 1 and layer 2 have been merged).

Step
06
Member since:
Sep 2010
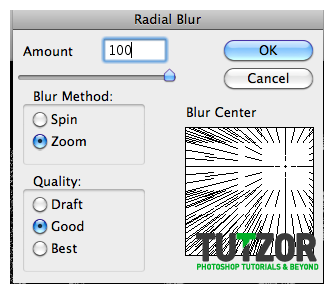
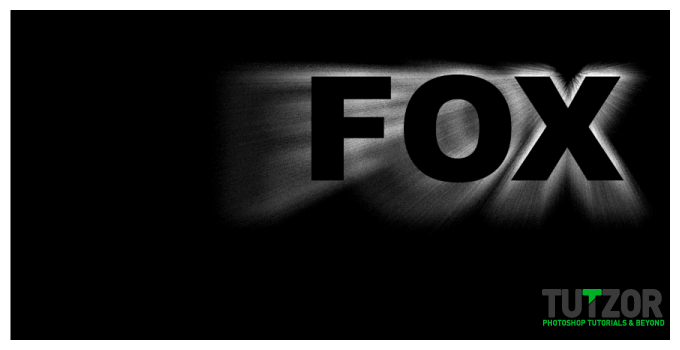
Select the Layer 2, then choose Filter then Blur then Radial Blur. Amount is 100 and blur method to zoom. This is the tricky part in this tutorial, in the blur center dialog, click the target and place it just near the top of the X. Use your feeling, It took me two tries to successfully place in the right place.


Step
07
Member since:
Sep 2010
(optional) you can resize the light by pressing Command + T (PC : Ctrl+T) to enter free transform and move the light as you like. Then press the tick symbol to apply the transformation.
Step
08
Member since:
Sep 2010
Create new layer (layer 3) and place it on top (layer stack) so, on top is layer 3, followed by TEXT layer, layer 2 and Background layer. Select the Gradient tool(G) in the Gradient Editor, select the Foreground to transparent, and click OK.


Step
09
Member since:
Sep 2010
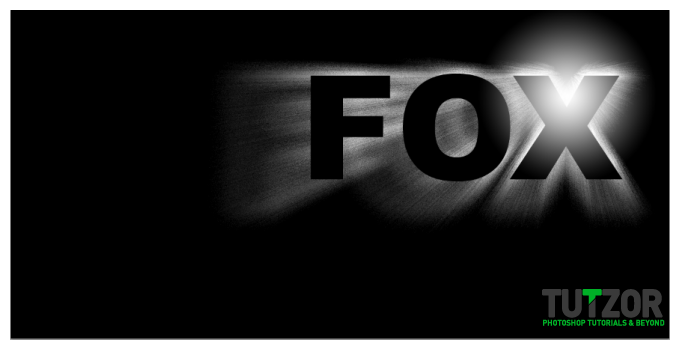
Change your Foreground color to White, and with the Gradient tool (same settings from step 8), Click and drag out a small radial gradient line from the source of the blur effect (the same point at step 6) just near the top of the word X. This will add glow effect.

Step
10
Member since:
Sep 2010
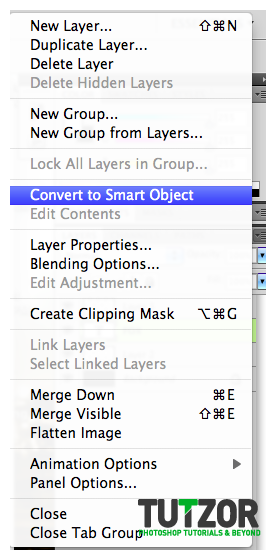
Select the text layer. Click the flyout menu icon on the top right of layers panel and choose Convert to Smart Object.

Step
11
Member since:
Sep 2010
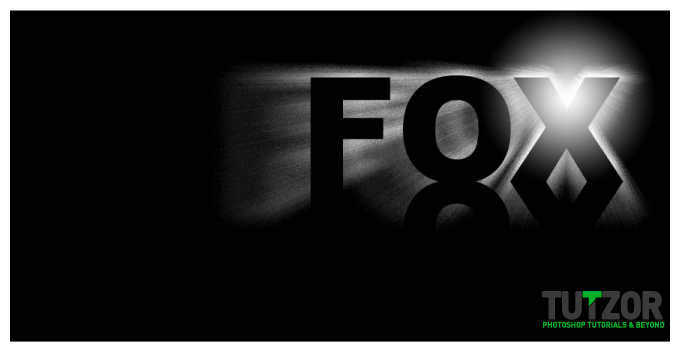
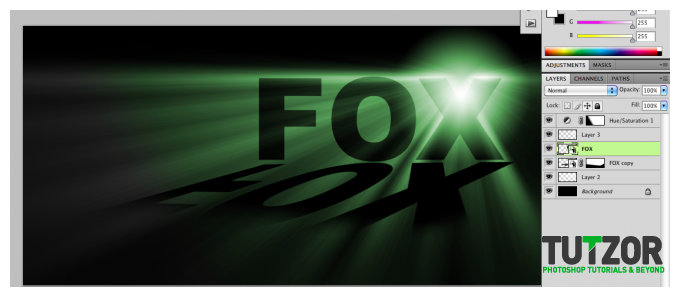
Once the smart object is created, press Command + J (PC : Ctrl+J) to duplicate the TEXT layer, called, FOX copy. Select the FOX copy layer and click-drag the layer below the FOX layer (original text layer). And choose Edit then Transform then Flip Vertical. Use the move tool (V) and position it just below the FOX word, so it will looked like a reflection. (see image)

Step
12
Member since:
Sep 2010
At this point if you think the light beam is not enough strong, just apply more of the Radial Blur, you can apply the same settings by choosing Filter, then on the top of the Filter menu, you’ll see Radial Blur. Click that as many as you like, but we don’t want to fill the whole image with that, spare some of the space at the edges. (see step 13’s image).
Step
13
Member since:
Sep 2010
Select the FOX copy layer. Then choose Edit > Transform > Distort. And distort the reflection just like a shadow caused by the light.(see image)


Step
14
Member since:
Sep 2010
Now add layer mask on the FOX copy layer. Set foreground color to black and select Gradient tool. I used the same transparent gradient but this time set the gradient type to Linear Gradient.


Step
15
Member since:
Sep 2010
With the same settings in from step 14, Shift+drag out a gradient line on the layer mask from the bottom of the document to about quarter of the way into the original text to fade the harsh edges. You don’t have to follow this step, you can do anything you can to fade the bottom edges of the reflection text. (see image on step 16)


Step
16
Member since:
Sep 2010
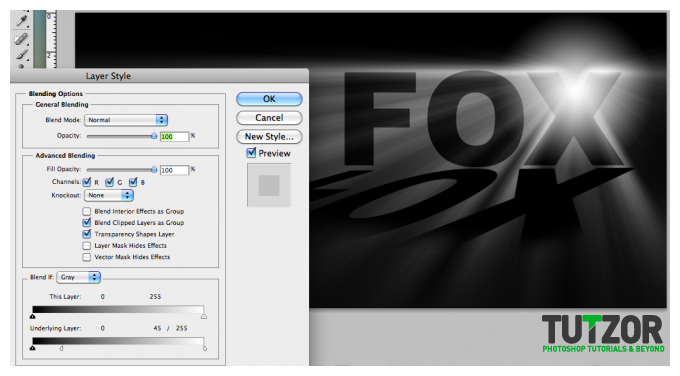
Select the main text layer again, and click the add layer style icon (fX symbol) at the bottom of the layers panel, and choose the blending option. At the ‘Blend If’ section at the bottom of the dialog allows you to blend layers based on luminosity. We want to bring some light flare cutting in front of the text, so go to Underlying Layer section and Option+Click (PC : ALT+Click) and click at about in the middle, it’s up to you how much light flare you want them to cut through. (See image)

Step
17
Member since:
Sep 2010
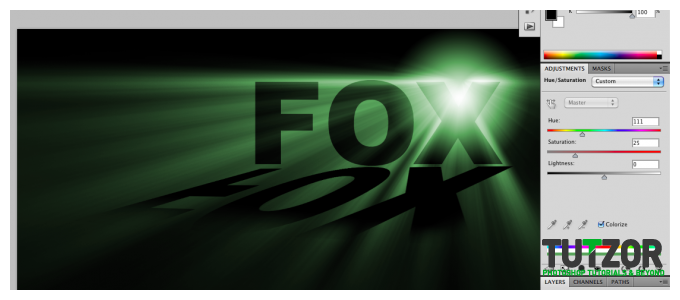
In this step we are going to give this text some colors. (Fun Part ! ☺) Click the Layer 3 to select it. Then click the create new adjustment layer icon at the bottom of the layers panel and choose the hue and the saturation into any numbers you want. In this tut I used green because Tutzor is green too ☺.

Step
18
Member since:
Sep 2010
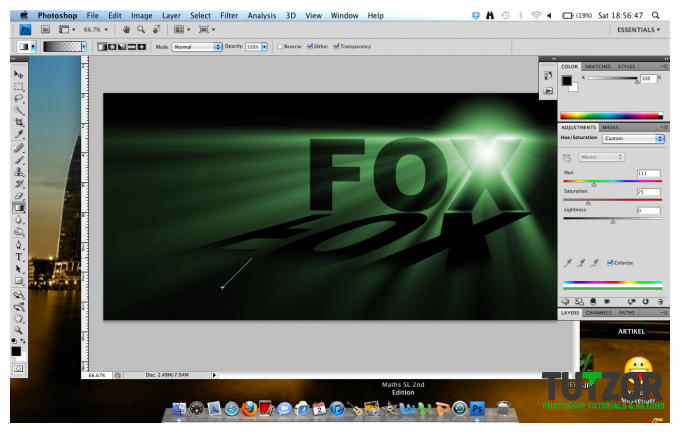
*Optional* If you want to have the light flare on the edges to be grey, select the gradient tool and make a little line at the edges (see image)
which will make some parts to be Grey, see the second image. (whoops now you know I still use YM! ☺)


Step
19
Member since:
Sep 2010
Thanks for viewing, if you think this tutorial is useful please Vote up !





Comments
Re: Light Beam text effect !
simple & amazing
Re: Light Beam text effect !
great tutorial sir,its really useful for me. i really appreciate it.thanks alot
Re: Light Beam text effect !
i just want to say..u deserve a million thx.
Re: Light Beam text effect !
Thanq
ILovePsd
Re: Light Beam text effect !
Thank you!
Re: Light Beam text effect !
Thanks man, I got it
Re: Light Beam text effect !
How did you get the transformation to distort, this will not allow me to do so.
Re: Light Beam text effect !
Hello, when I get to step 13, the program will not let me "distort" it is not an option for me. I have all options but distort and perspective. Can you help me?
Re: Light Beam text effect !
Pretty slick effect. I followed through it yesterday and made this: http://www.flickr.com/photos/50097216@N08/5060539978/
I was confused as to why you made the text a smart object though. I guess it stays cleaner than if you rasterize it? I know text can only have certain transforms applied to it, is that why you converted?
Re: Light Beam text effect !
i like it
Re: First!
thanks!~
First!
First!
cool effect!