“Fringe” ( tv show ) wallpaper tutorial, using Photoshop CS5 extended - PART 2
18
Sep'10
Member since:
Sep 2010
Hi everybody,
I'm gonna show you how to create "Fringe" tv show wallpaper, using the new photoshop cs5.
Here are the list of files I used.
- Frog 1 http://www.sxc.hu/photo/202964
- Frog 2 http://www.sxc.hu/photo/518961
- Frog 3 http://www.sxc.hu/photo/554538
- Butterfly http://www.sxc.hu/photo/1054217
I'm inspired from this following tutorial to achieve the 3d text effect:
Photoshop materials for 3D
- http://photoshoptutorials.ws/photoshop-tutorials/text-effects/fringe-promotional-wallpaper-tutorial.html
Hope you guys would enjoy it.
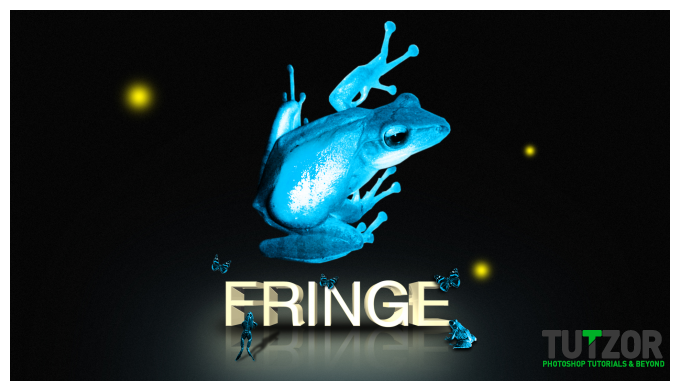
Final Image
Step
26
Member since:
Sep 2010
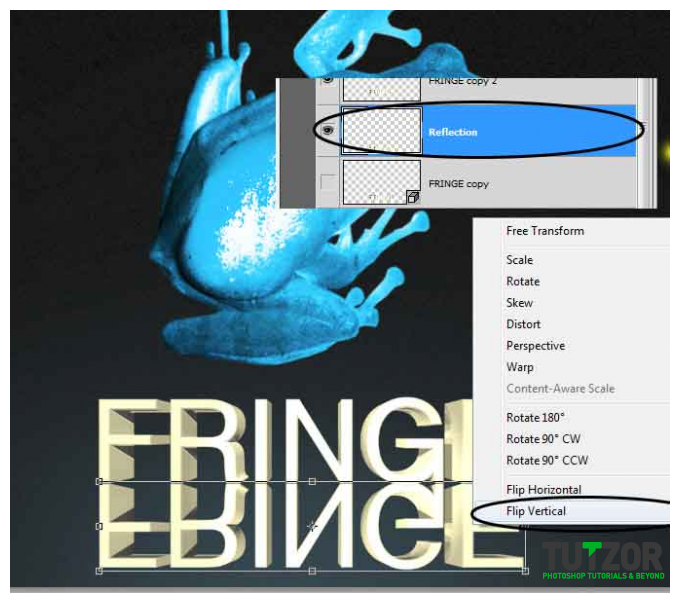
For adding the reflection we will duplicate the text layer (not the one with glowing edges wich is set to screen), and rename it “reflection” then using transform (CTRL+T) you will flip it vertical (right click > Flip Vertical) and drag the text to the bottom of the original layer (make sure the reflection layer is under the text layer)

Step
27
Member since:
Sep 2010
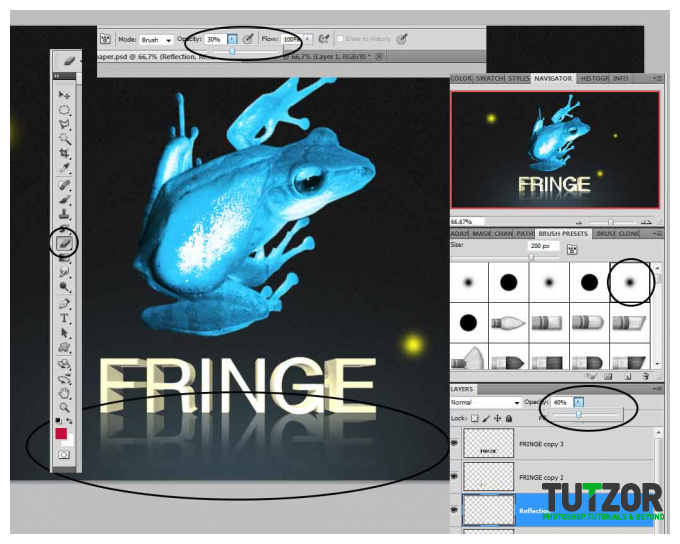
Set the opacity for the reflection layer to 40%, then using the eraser (with a soft round brush and the opacity 30%) You can use different sizes of the brush and try to optain my result (You are free to explorer but don’t forget to duplicate the layer in case something goes wrong)

Step
28
Member since:
Sep 2010
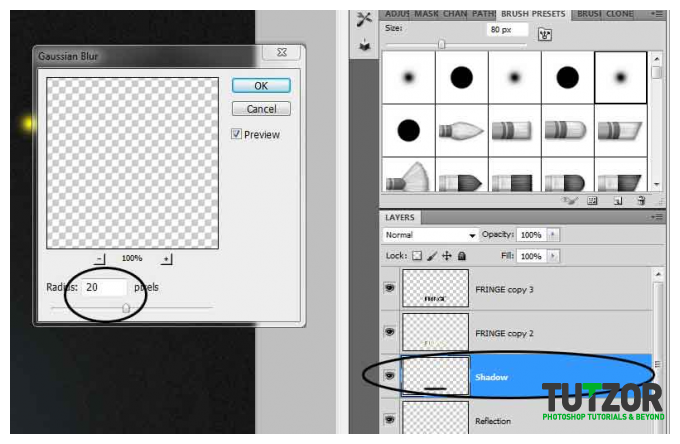
Let’s make this as real as we can by adding now some shadows. Start by creating a new Layer and call it “Shadow”. Make sure this layer is between the text layer and the reflection layer. Using black, and a soft round brush paint like I did under the text. Then go to Filter > Blur > Gaussian Blur and set the radius to 20, then set the opacity of the layer to 70%.

Step
29
Member since:
Sep 2010
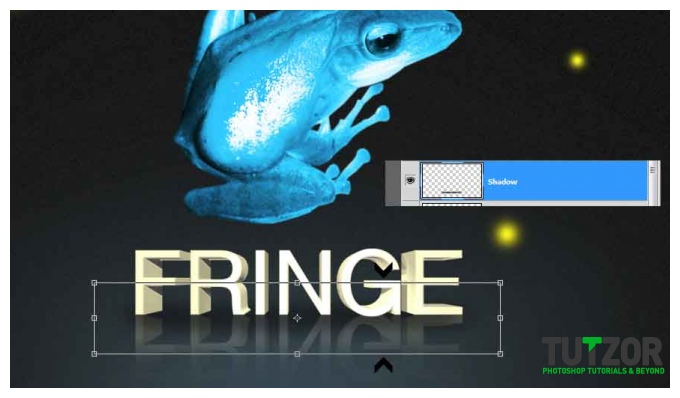
Scale the Shadow using Transform ( CTRL+T) and drag the top and the bottom line until you get my result.
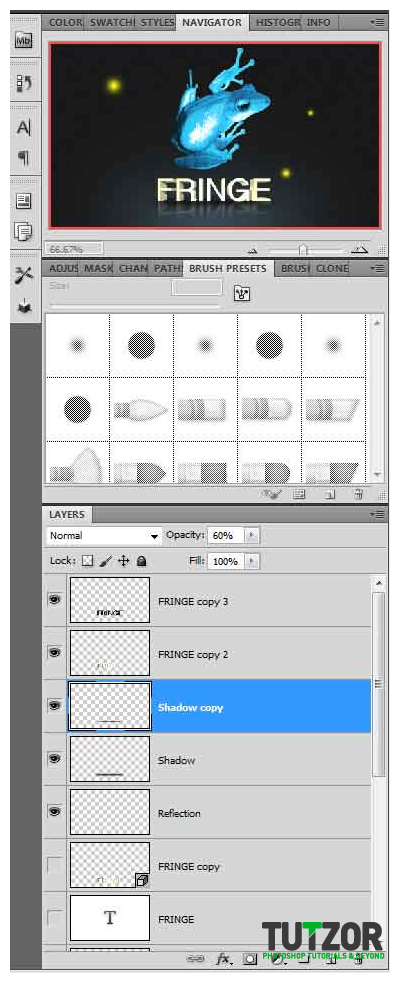
Duplicate the shadow layer (keep it on top of the original) set the opacity to 60% and scale it like I did (CTRL + T)


Step
30
Member since:
Sep 2010
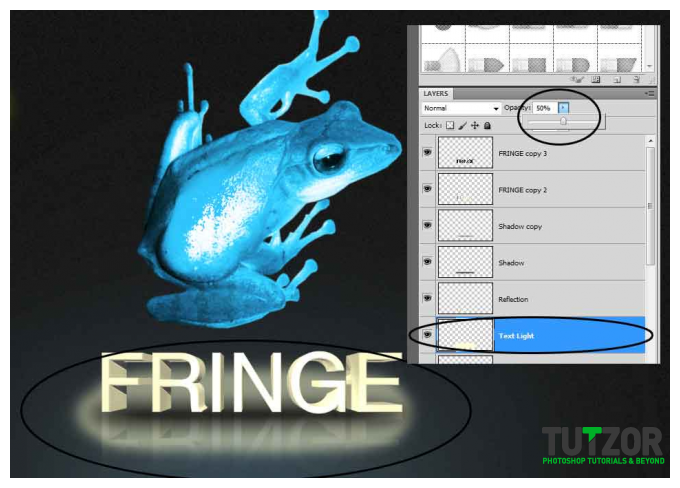
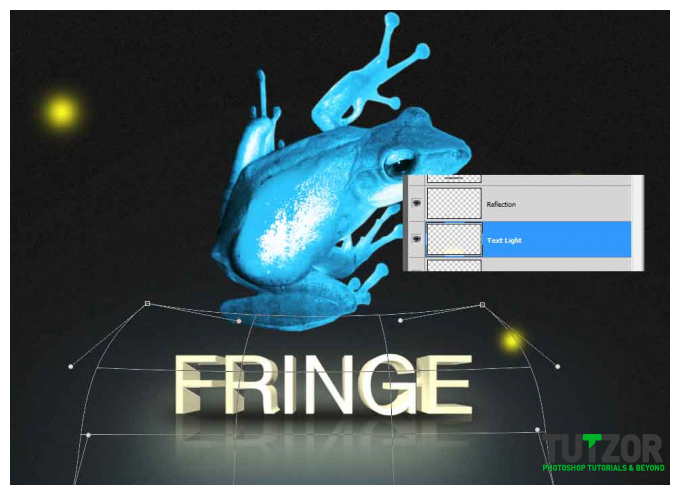
Make a new layer under the reflection one and call it “Text light”. Pick the brush using this color #FFFFCE and with a soft rounded one, paint like me and then set the layer opacity to 50%.
Go to Filter > Blur > Gaussian blur and set the radius to 70, then you can explorer by transforming like I did (CTRL + T)


Step
31
Member since:
Sep 2010
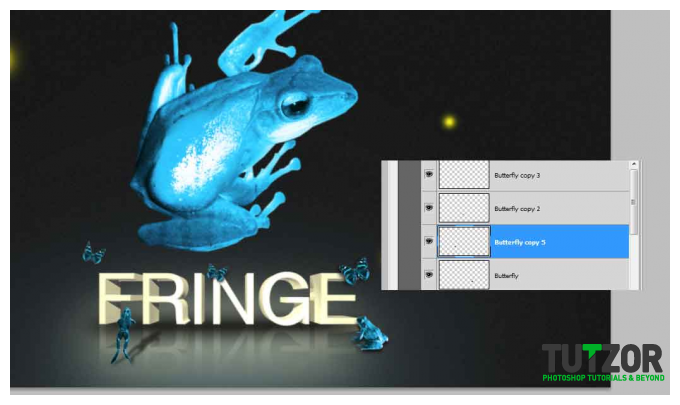
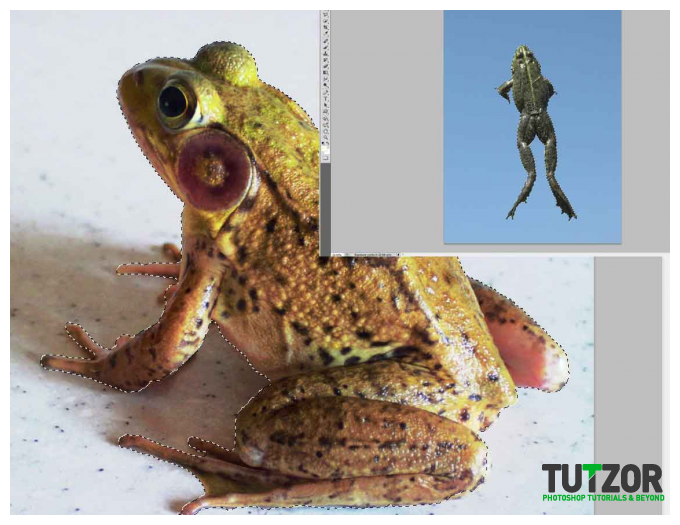
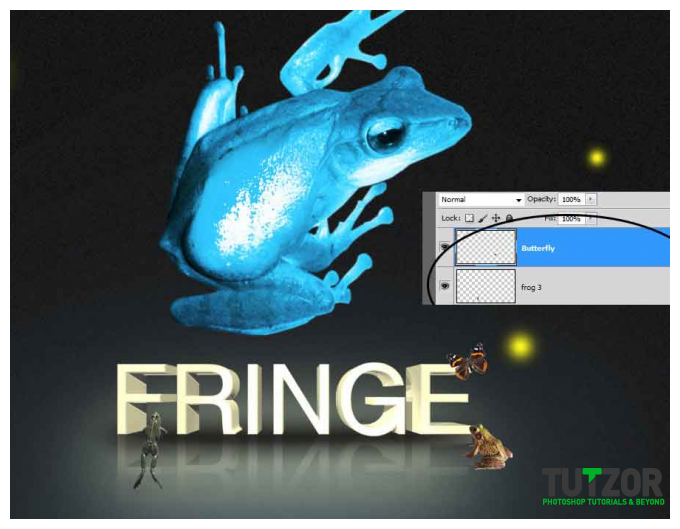
Let’s add some other small frogs, and butterflies in the text area. Open the images that you downloaded and paste the frogs into our project. (Select the frog like we did at the beginning with the main image, using lasso tool)
Rename the 2 new layers “frog 2” and “frog 3” and scale them like I did ( CTRL +T) and keep the layers on top o f the text layers. Repeat this steps for the butterfly and paste it in our project and name the layer “butterfly”. You can scale, rotate, flip this small animals/insects as you wish and you can put them where you want.


Step
32
Member since:
Sep 2010
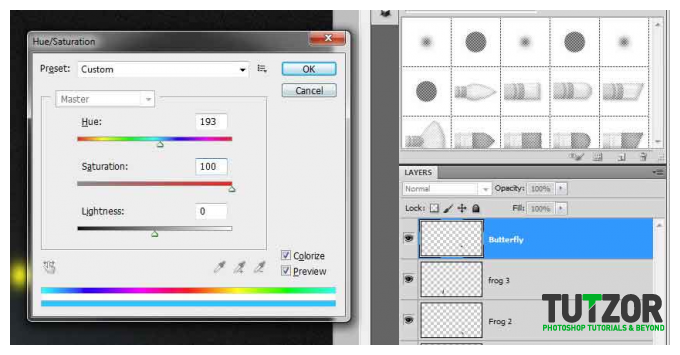
This step you will repeat it for each one of the small things. We will apply the effect from the main frog. So pick the layer you want to make first (I picked frog 2), go to Image > Adjustments > Brightness and Contrast and set this values Brightness: 10 contrast: 100. Now open the Hue and saturation panel (CTRL+U) check the colorize button and set the Hue: 193 and the saturation 100. Repeat this step for each one. We’re not going to use the dodge tool or other blending options for this layers because they are small and doing that will be a waste of time.

Step
33
Member since:
Sep 2010
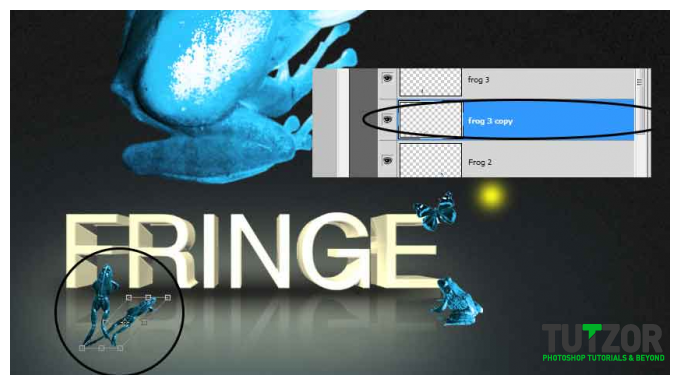
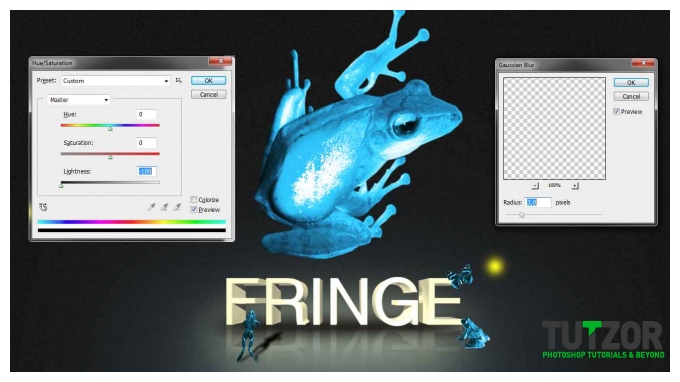
We need to add shadows to this animals/insect. You will repeat this step also for each one. Duplicate the layer frog 3 for example, put it under the original one and transform it like I did using perspective and scale (CTRL+T, right click > perspective/scale)
Let’s make this modification to look more like a shadow, press CTRL+ U and set the lightness to -100. Now go to Filter > Blur > Gaussian Blur and set the radius to 3. Set the opacity of the layer to 70% now repeat the step to the other layers. (Maybe for the other layers you will not use the perspective and not the same radius for Gaussian blur).


Step
34
Member since:
Sep 2010
You can duplicate the animals/insect, transform, rotate, flip, what ever you want to make the wallpaper nicer. You can explore more in this tutorial.
