Create a Star Wars Themed Media Player

14
Mar'11
Seiorai
Member since:
Mar 2011

Okay boys&girls, today we'll go back to those awesome days when Star Wars movies first hit the big screens and everyone instantly went into a hype about this new, weird, awesome kind of movies! Remember those days? Oh..you don't....well let's shake hands then, I don't remember them either ^_~

But I've read enough and seen enough old footage on TV to be able to imagine it :)
So yeah. Today we'll take a ride in the Star Wars universe!

We'll do this by creating our own media player interface design -just the design folks, I'm no good at coding this kind of stuff hahaha- greatly inspired by the awesome C-3PO :)

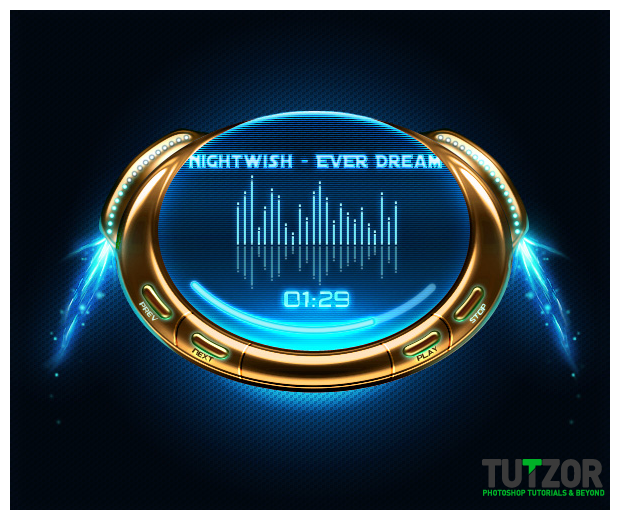
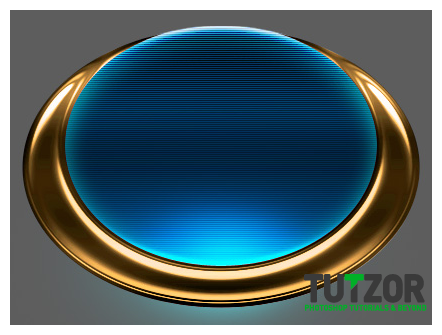
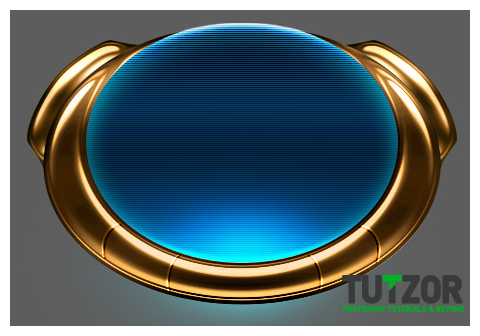
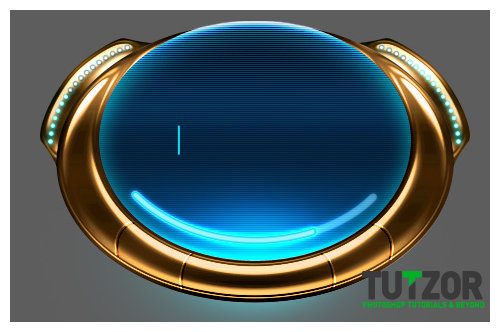
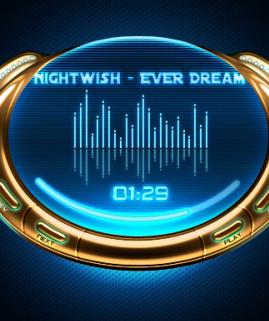
Long story short, this is the final result:

Rating

Your rating: None Average: 4.4 (38 votes)

Required Files

Final Image

Step
01
Seiorai
Member since:
Mar 2011

Okay, first let us fire up Photoshop and create a new document, say about 600px wide and 500px tall. Take the Paint Bucket Tool (G) and fill it with a neutral gray...say #5d5d5d.

Now name this neutral gray layer..."Background". Yeah I know, veeeery original...

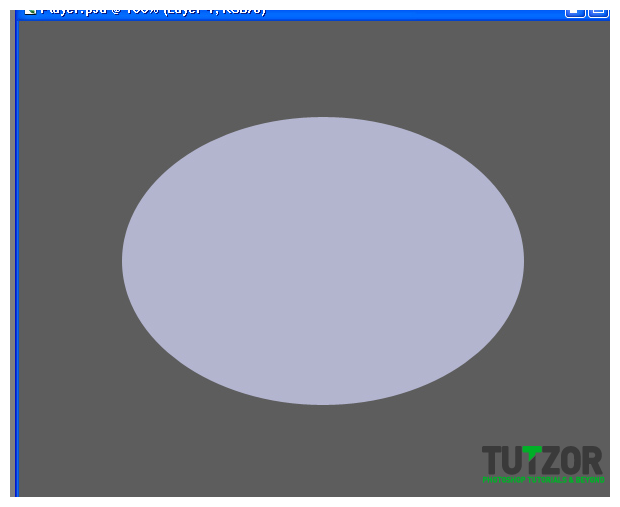
Anyway. Name it "Background" and then create a new layer above it. Set your Foreground color to #b3b5cf and taking the Ellipse Tool, set it to Fill Pixels mode and on the new layer we just created draw an ellipse like so:
Step
02
Seiorai
Member since:
Mar 2011

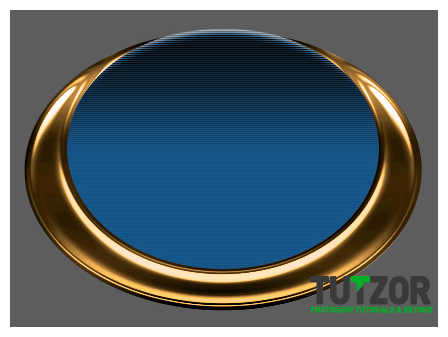
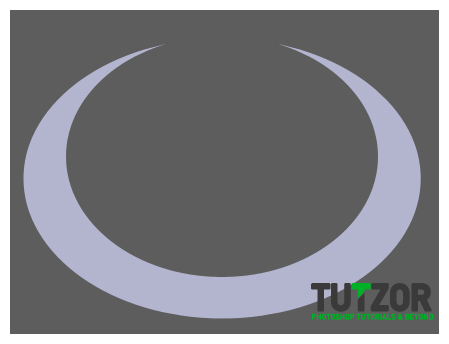
Now take the Elliptical Marquee Tool (M) and drag to create an elliptical selection. Make sure the selection is centered, so that the right side is symmetrical to the left side....then press Delete. You should be getting a result similar to this:
Step
03
Seiorai
Member since:
Mar 2011

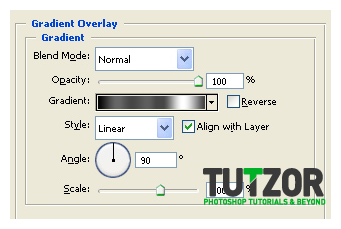
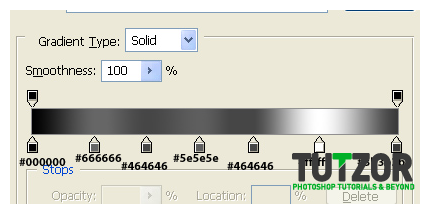
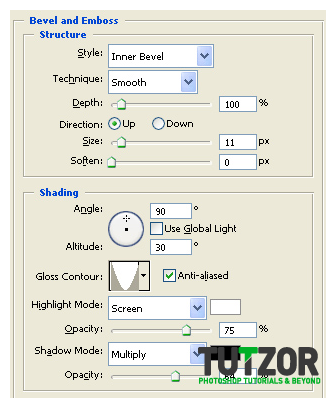
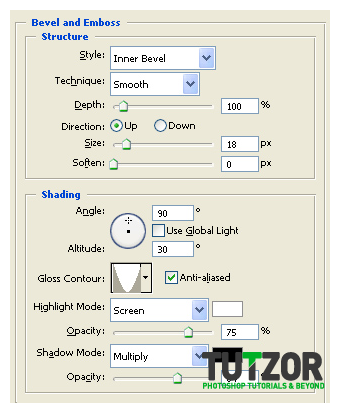
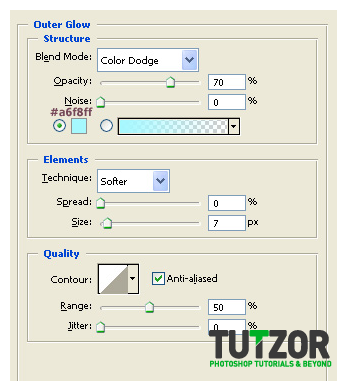
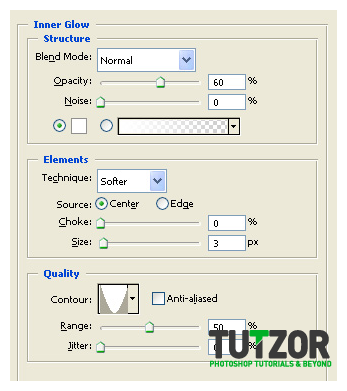
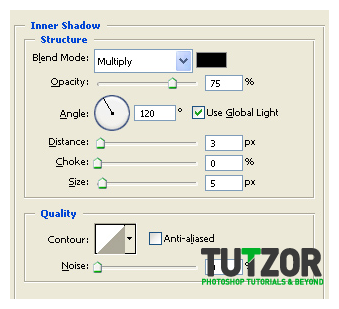
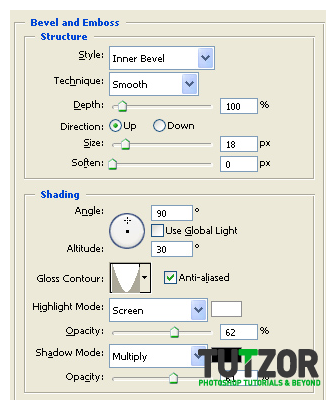
Deselect.< br/> Nice...well not really :P < br/> Let's give our plain, boooring semiluna some layer styles, shall we? < br/> So, get into the layer's Blending Options and give it these styles:
Step
04
Seiorai
Member since:
Mar 2011

Now, fasten your seatbelts: we are going to give our metal-ly semiluna A LOT of adjustment layers (to be exact, 9). So....have that seatbelt tightened up well? Let's proceed.......

  • First, let's name our semiluna layer to..err..."Body Player". Yea, that sounds good doesn't it....
  • Next, Ctrl+click on the "Body Player"'s layer thumbnail in the layers palette to obtain its selection. Then go to the bottom of your layers palette and seek the "Create New Fill or Adjustment Layer" ...click on it and choose "Photo Filter". Choose Color: #005dff ....Density: 80% and Preserve Luminosity: Checked. Click OK to confirm then lower the layer's Opacity to 50%.
  • Good!
    Afterwards obtain the "Body Player" selection again and go to the "Create New Fill or Adjustment Layer" icon...this time choose Hue/Saturation.
    Make sure this Hue/Saturation layer is the topmost layer in your layers palette at present...and give it these settings: Hue: -5, Saturation: +25, Lightness: -3.
    Good...now lower this layer's Opacity to about 70%.
  • Time for the third adjustment layer :)
    Obtain the selection again....then go to "Create New Fill or Adjustment Layer" and choose Brightness/Contrast. Give it these numbers: Brightness: +24, Contrast: +25. Click OK then lower the layer's Opacity to around 60%.
  • Fourth!
    Obtain the selection as before...this should be routine by now....and give it a Hue/Saturation of: Hue: -5, Saturation: +19, Lightness: -3. Lower the layer's Opacity to 60%. Make sure that each new adjustment layer we make is in its turn the topmost in the layers palette at that moment....otherwise you'll start getting funky colors and we don't want that :P
  • Fifth: Obtain the selection again, and give it a Hue/Saturation....like so: Hue: +175, Saturation: +17 , Lightness: 0
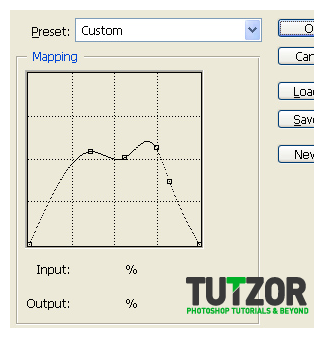
  • Sixth: Selection first...then a Curves adjustment with two anchors: Anchor one: Input-175/Output-150 and Anchor 2: Input-210/Output-190. Lower the Opacity of this layer to 70%.
  • Seventh: Obtain the selection again and give it a Hue/Saturation: Hue: 0, Saturation: +18, Lightness: -8.
  • Eighth: Obtain selection...and give it a Brightness/Contrast: Brightness: +12 and Contrast: +12 ...yea, they're the same huh? :P
  • Aaaand...ninth! Obtain the selection one more time and give it a Levels: 11....1,16....221...on the RGB channel. Lower this layer's Opacity to about 60%.

Now if you want you can use Photoshop's awesome Groups feature to group all these Body Player related layers into one laaarge Group.....which we'll name "Body Player Group"...for the sake of convenience haha :)

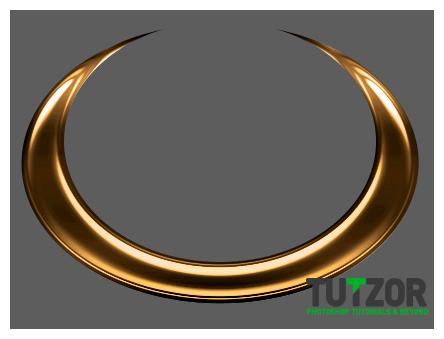
Right now your thingy should look somewhat like this:
Step
05
Seiorai
Member since:
Mar 2011
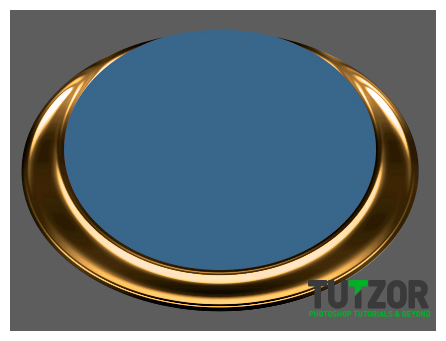
Now let's take care of the screen. You can minimalize the Body Player Group for now (so that it takes up less space in your layers palette) and then create a new layer under all your Body Player-related ones...so that this new layer is the first one above the Background layer. Got it? Great :) Set your Foreground color to #38668b and taking the Ellipse Tool (U) set to Fill Pixels mode, draw an ellipse on the new layer we just created....like so:
Step
06
Seiorai
Member since:
Mar 2011
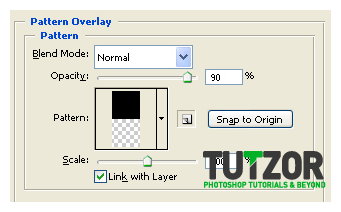
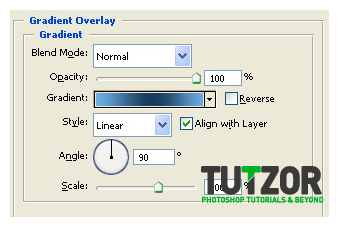
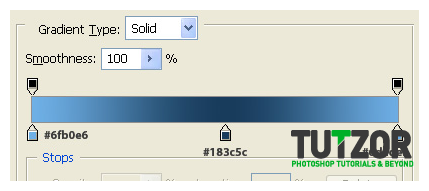
Let's name this layer.."Screen Base". Okay, next, go here and download this scanlines pattern file: http://fav.me/dd2rag Then go into the give it these layer styles (the pattern is the "scanlines 1" ) :
Step
07
Seiorai
Member since:
Mar 2011
Niceeee.... Duplicate the layer, make sure the copy is above the original in the layers palette and re-name the copy to "Screen Base 2". Lower its Opacity to about 70%. Right-click on it and choose Clear Layer Styles...... Next, go to Layer-->Layer Mask--->Reveal All. Take the Gradient Tool (G), set it to Foreground-To-Transparent, Linear Gradient. Set your Foreground color to black #000000 and drag a bit from up towards down to get a result similar to this:
Step
08
Seiorai
Member since:
Mar 2011
Then get into its Blending Optins and give it new styles, aaall of its own :) Like so:
Step
09
Seiorai
Member since:
Mar 2011
Now we'll give our player screen some Adjustment layers...so....let's obtain a selection of the "Screen Base 2" layer, and let's give it a Hue/Saturation like so: Hue: -17, Saturation: +74, Lightness: 0. Adjustment number 2: Obtain the "Screen Base 2" layer selection again and choose Hue/Saturation again, but this time give it a setting of Hue: +6 , Saturation: +87 , Lightness: 0 Adjustment layer number 3: Obtain the selection of "Screen Base 2" again and choose Hue/Saturation..again...and give it these settings: Hue: +3 , Saturation: +36 , Lightness: 0 Adjustment layer number 4: This time, we need to get the selection of the "Screen Base" layer, so be careful :) Once you have the selection go to Hue/Saturation..again...and give it these settings: Hue: +9 , Satuation: + 93 , Lightness: 0 ...and lower the layer's Opacity to 60%. Adjustment layer number 5: Once again, grab the selection of the "Screen Base" and give it a....Brightness/Contrast! Yay, we've changed the menu hehehe :) Right, what was I saying..oh yea about the Brightness/Contrast: Brightness: +25 , Contrast: +15 Adjustment layer number 6 (and last one, cheers haha) : "Screen Base" selection again, and a new Brightness/Contrast : Brightness: +19 , Contrast: +25 and then lower this layer's opacity to 70%. Now your image should be looking somewhat like this:
Step
10
Seiorai
Member since:
Mar 2011
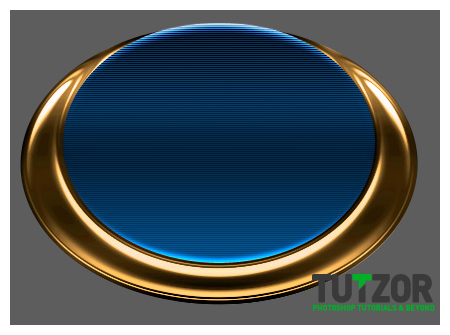
Good...now let's give our screen some glowy-glow :D Group all the Screen-related layers in one large Group...which we'll name..well..err..."Screen"! :D Right now you should be having the Background layer, then the Screen group and then the Body Player Group. Now minimalize the group to take up less space in the layers palette and create a new layer on top of it...name this new layer "Blue Glow 1". Set your Foreground color to #7fe8f1 and take the Brush Tool (B), set it to a soft, round brush of about 100px in size, and click to create a fuzzy circle like so:
Step
11
Seiorai
Member since:
Mar 2011
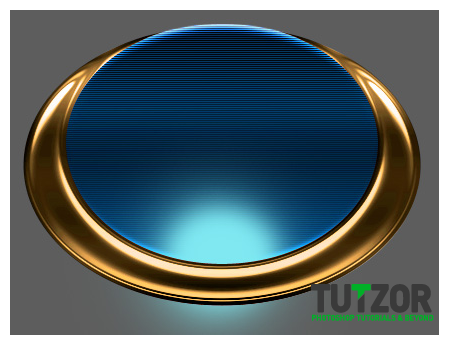
Set the layer to Overlay blending mode, then click Ctrl (Cmd on Mac) + T to transform it.....and drag horizontally to make it into an ellipse. Good...now duplicate this layer and re-name to copy to "Blue Glow 2". Resize the copy to only about half the size of the original. In the end you should get something like this:
Step
12
Seiorai
Member since:
Mar 2011
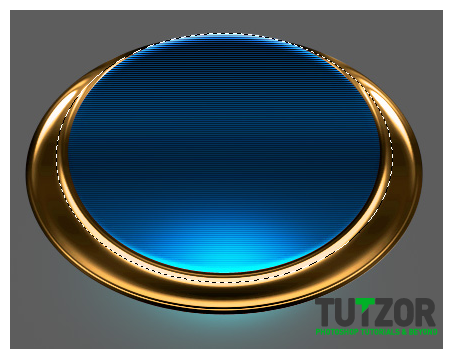
Okay, now we need a liiiittle more glow. So! Obtain a selection of the Screen Base layer...yes you read right the Screen Base layer and then create a new layer above the "Blue Glow 2" one....name this new layer..err..."Blue Glow 3" :P Okay, so this is the kind of selection you should have now:
Step
13
Seiorai
Member since:
Mar 2011
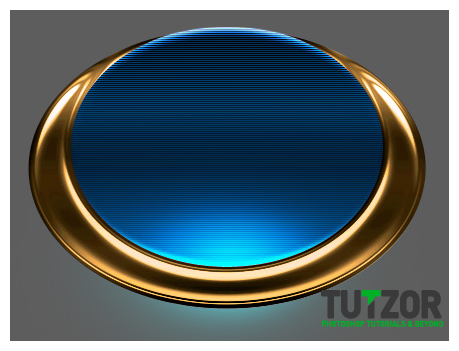
With your #7fe8f1 Foreground color, go to Edit-->Stroke--->14px and Center. KEEP THE SELECTION! Go to Filter-->Blur--->Gaussian Blur of 12. Then press Ctrl (Cmd)+I to invert the selection, and press Delete key =D I have to add something before moving on: depending on the size of the ellipse you made, the above values might vary, so try to find the numbers which fit your design best :) Anyway....after you're done that set the layer to "Color Dodge" mode...and this is what you should be having now..or close:
Step
14
Seiorai
Member since:
Mar 2011
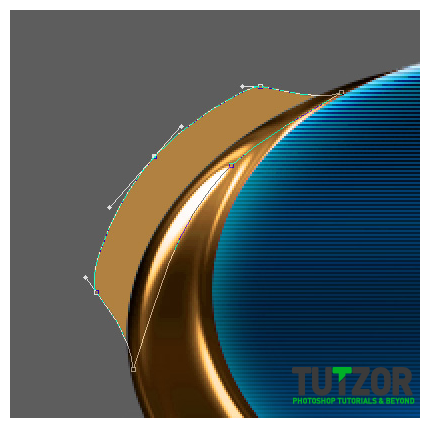
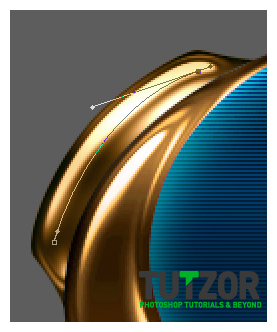
Okay, now set your Foreground color to #b18140 and create a new layer.....which you must move so that it is right under the "Body Player" group. Next, take up the Pen Tool (P) and set it to Shape layers. Now let's draw a shape like so (shown here at 200% zoom so you can see better) :
Step
15
Seiorai
Member since:
Mar 2011
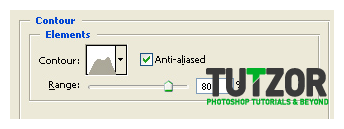
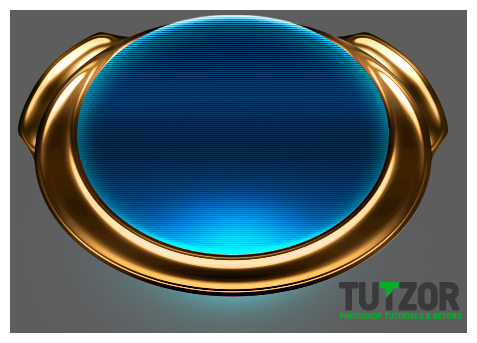
Next, go to your "Body Player" layer and right-click on it, choose "Copy Layer Style". Return to the shape layer we just created a bit ago and right-click on it......why of course, "Paste Layer Style" hahaha. We need to operate one small change though, enter its Blending options and go to "Contour" ...and change its Range to 100 instead of 80. Okay, good! Now duplicate this shape layer and move the duplicate symmetrically to the left of the player. Ctrl(Cmd)+Shift+Click on the two layers' thumbnails in the layers palette so that you obtain both their selection and then give them an Adjustment Layer of Color Balance, with these values: Midtones: +54......0.....-38 Highlights: +53....0....-43 Shadows: +6....+19....-25 And make sure Preserve Luminosity is Checked. Sweet, now you should have a result like this :)
Step
16
Seiorai
Member since:
Mar 2011
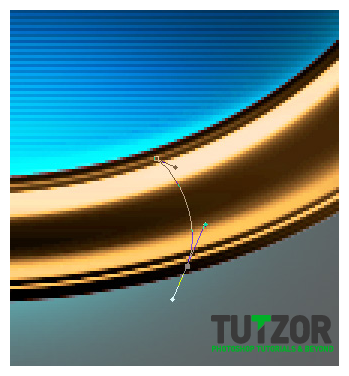
Oki, mooo-vin' on :) Let's make the insets now.... Take up the Brush Tool and set it to a hard, round, 2px sized brush. Press D to reset your colors. Now, you will find this a lot easier if you have a graphics tablet...but in case you don't, you have to use the Pen Tool set to Paths mode. Since the tablet users will know what to do, I will explain the process for mouse users here: First, take the Pen Tool (P), set it to Paths mode and create a curve path like so:
Step
17
Seiorai
Member since:
Mar 2011
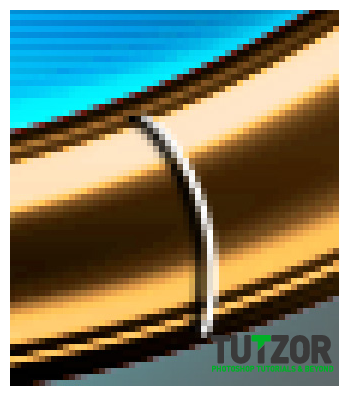
Then, right-click-->Stroke Path--->Tool: Brush and Simulate Pressure unckecked. Stroke first using black. Then Create a new layer and stroke again, this time using white. Right-click-->Delete Path. Use the Move Tool (V) to move the white stroke a little to the right, so that both the black stroke and the white Stroke are visible. Like so:
Step
18
Seiorai
Member since:
Mar 2011
Cool! :D Now you can safely press Ctrl(Cmd)+E to merge the two strokes into one layer, and then set this layer to Overlay blending mode. Also, go to Filter-->Sharpen--->Sharpen two times, to..well..sharpen the inset. Name this layer "Inset 1". Now repeat the process to create a duplicate Inset (but be careful, mind the curvature of the player's body okay? ). After you've created the duplicate, you can merge the two insets into one layer (set on Overlay blending mode).... ....after which you can duplicate the resulting layer and Edit-->Transform--->Flip Horizontally the duplicate and move it symmetrically to the left side of the player :) And..YES, you CAN merge the two Overlay-mode Inset layers into a single one now, no use to clutter the Layers Palette with unnecessary layers huh? ^__~ Nice one :) Now this is what your thingy should be fashioned to look like:
Step
19
Seiorai
Member since:
Mar 2011
Name this Overlay strokes layer to "Insets". Now let's move on to the actual text and sliders and..err..eyecandy! :D Let's take it...from the top ^^ I mean, of course, from the ears...sliders..well the thingys protruding out of the top part of the player, hahaha. Those will be the places for our Volume and Bass controls :) So! Create a new layer on top of all your others, and take the Pen Tool again :) Of course, set to Paths mode.... Create a curve path, like so:
Step
20
Seiorai
Member since:
Mar 2011
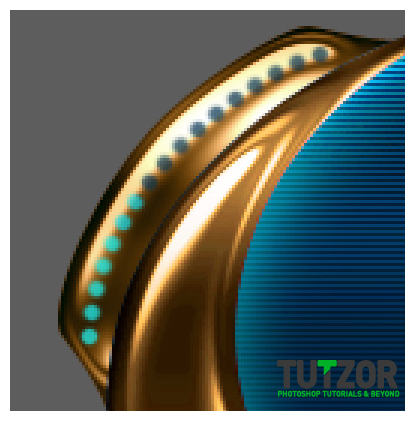
Setting your Foreground color to #0fdef1 and the brush to a hard, round, 5px sized one, go to the Brushes palette in the top-right corner of your screen and set the spacing of the brush to 160%. Then take the Pen Tool again and right-click and choose Stroke Path. Name this layer "Volume". But you know, it wouldn't be nice of us if we left the volume to the max huh? :( Too bad...ehh...anyway, look in your Layers Palette and find the Lock Transparent Pixels button, click it so we lock the transparent pixels for the Volume layer. Set your Foreground color to #022d4c and take a normal, hard, round brush with 1% spacing, color the top few circles, like so:
Step
21
Seiorai
Member since:
Mar 2011
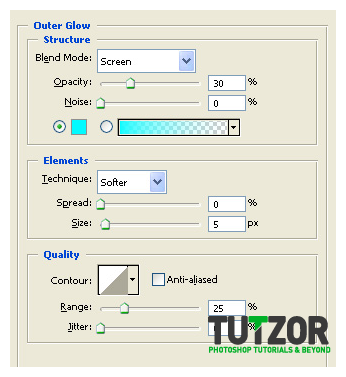
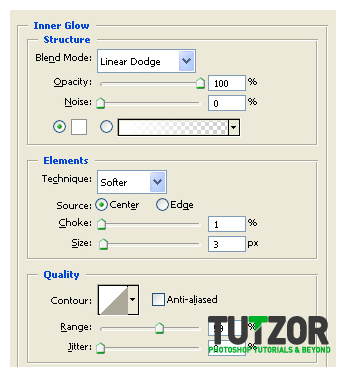
Also, lower the layer's Opacity to about 70%. Okay, now give your Volume layer these layer styles:
Step
22
Seiorai
Member since:
Mar 2011
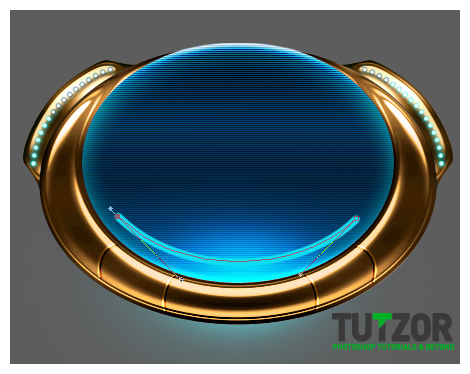
Now what we'll do is duplicate the Volume layer and name the copy "Bass", then go to Edit--->Transform--->Flip Horizontally. Move it symmetrically over the right-hand side..err..ear thingy xD Now set your Foreground color to #1a445b and taking the same hard, round, 1% spacing as before, use it to "turn up" the Bass volume xD Sweeet! :) We're done with the Volume&Bass sliders, now don't ask how exactly we get them to work..mmm..maybe by clicking on the tiny circles? xD; Dunno, use your imagination O___O .............................. Now let's draw the "song progress bar" :) Set your Foreground color to #0fdef1 and take a hard, round brush of about 7px in size. Take up the Pen Tool (P) and setting it to Paths mode draw a path that follows the curvature of the shell...err..I mean..of the body...but if I say of the body it sounds weird :P Aaanyway! Stroke this nice path with that 7px brush, like so:
Step
23
Seiorai
Member since:
Mar 2011
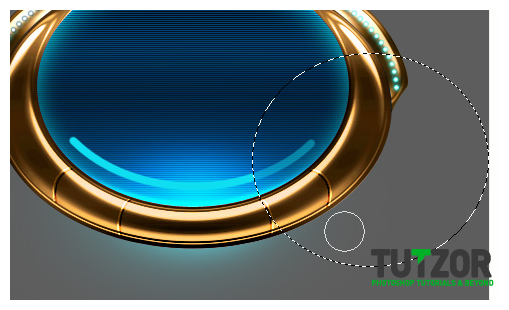
Kay..now right-click--->delete path. We won't be needing it anymore xD Kay now take the Elliptical Marquee Tool (M) and choose how far into the song you are. I'm choosing a bit past the half of the song...so let's create a selection around the yet-to-be-played part of the song progress slider ...yeaaa...now let's take the Eraser Tool (E) set to a hard, round, about 30% Opacity brush and sliiightly delete the part of the stroke that is within the selection...so we end up with something like this (here I'm also showing my selection, for you to see
Step
24
Seiorai
Member since:
Mar 2011
Now we can deselect of course :) Next, we'll need to FINALLY name our slider to..well..say "Song Progress Slider" sounds good? xD Aaand we'll give it these layer styles:
Step
25
Seiorai
Member since:
Mar 2011
Okay..we're at Step 25...you know what that means...^^ ...or you don't...but you're goinna find out soon ;) It means...*drumroll*...... ................Equalizer timeeee! Glee! :D Kay, make a new layer on top of the "Song Progress Slider" one and make sure your foreground color is set to #0fdef1 Then take the Line Tool, set it to Fill Pixels mode and Weight of 2px, and draw a line, like so:

Comments

Comments

17
Aug'11
Anonymous

Re: Create a Star Wars Themed Media Player

Can you please make the Tutzor logo 50% transparency or make a note of the options it's blocking please?

16
Aug'11
Anonymous

Re: Create a Star Wars Themed Media Player

It can be used. There are Photoshop website templates with login modules, etc. that have to be spliced. Then, they are imported into Dreamweaver, where you can use HTML and CSS to code them. But, depending on your coding experience, that may be over the top.

03
Jun'11
gal3tey

Re: Create a Star Wars Themed Media Player

hello
nice logo but i cant make :(
do you have video for this logo
thankyou

09
May'11
Anonymous

Good tutoiral

Good tutorial Good tutorial Good

18
Mar'11
Ashley

Re: Create a Star Wars Themed Media Player

You know sei, it would be super cool if the stuff you made could actually be used. Like this. It would be awesome if it would be an actual player. I'd use it all the dang time @___@